I am in the process of polishing my style 5 wheels after a long wait. I already finished the first wheel and I have to say that the process is a bit easier than I though it would be. here's how I started:
TOOLS LIST (assuming tires are not mounted on rims)
*10MM socket
*ratchet
*8 to 10 inch extension
*hammer
*long punch
*Electric Drill
SUPPLIES *Aircraft paint remover
*Sponge/scrub pad combo
*Sandpaper 120, 320, 400, 600, 800, 1000, 1500, 2000
*Terry cloths
*Rubbing compound
*Mother's polishing ball
*Metal polishing compund (too many out there to list but if it helps I used mother's Mag and aluminum polish.
1. Remover all the nuts from the back of the wheel. Use a 12 point 10MM socket.
2. After removing all the nuts use a long punch (center punch is preferred) and a hammer and carefully knock the bolts out the barrels. You may leave the nuts in place but loosened if you think you may damage the thread on the bolts.
3. Place a towel on the floor under the wheel and stand in the center of the and jump on it. I weigh 190 and it came off the first try.
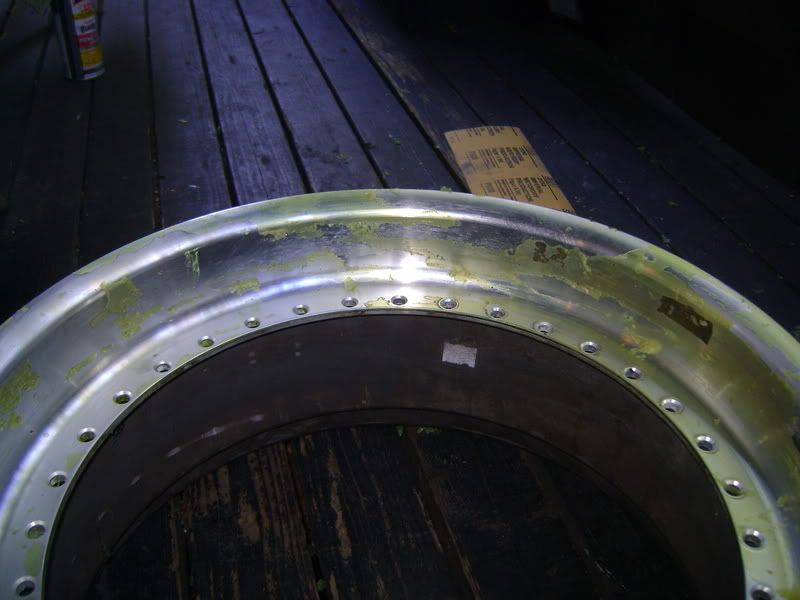
4. Using any form of Aircraft paint remover generously coat the clear coat. Allow it to sit for 10 to 15 minutes until you notice the clear coat blistering.
5. For the next step I used a damp sponge with a green scrub pad. Scrub the clear coat off. Keep in mind that you may have to repeat step 4 if you have any clear coat on the wheel left over. This will save you time sanding down the road.
6. Here's where the fun (and hand cramps) begin. If you have noticeable curbing you will have to use 120 grit sandpaper. Do not sand the whole wheel with 120 cause you will have to spend A LOT more time sanding. sand the curbed
AREA until its smooth and even with the surrounding surface.
7. sand the whole wheel using 320. apply enough pressure to dull out the metal. Its important you sand always in the same direction so you don't have swirls going in different directions. this is important when using the more coarse sandpaper. Swirls wont be as noticeable when using 1000+ grit.
8. Move up to 400 grit and repeat the same process. 400, 600, 800, 1000, Do the same all the way up to 1500 or 2000 grit depending on how much shine you are trying to get.
9. Apply rubbing compound the the entire surface. using a damp cloth, buff the wheel using good pressure. this will clean off the residue created form all that sanding. It will also work as an additional step to smoothen the surface in preparation for polishing compound.
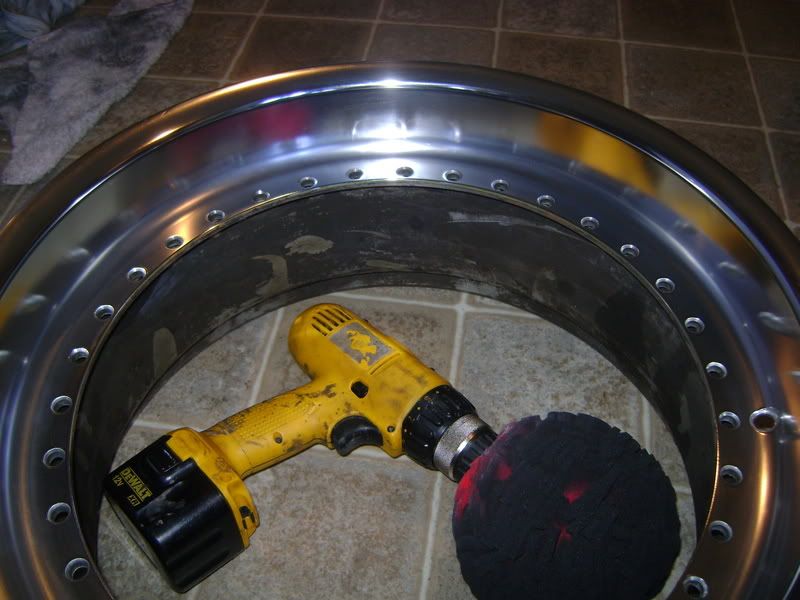
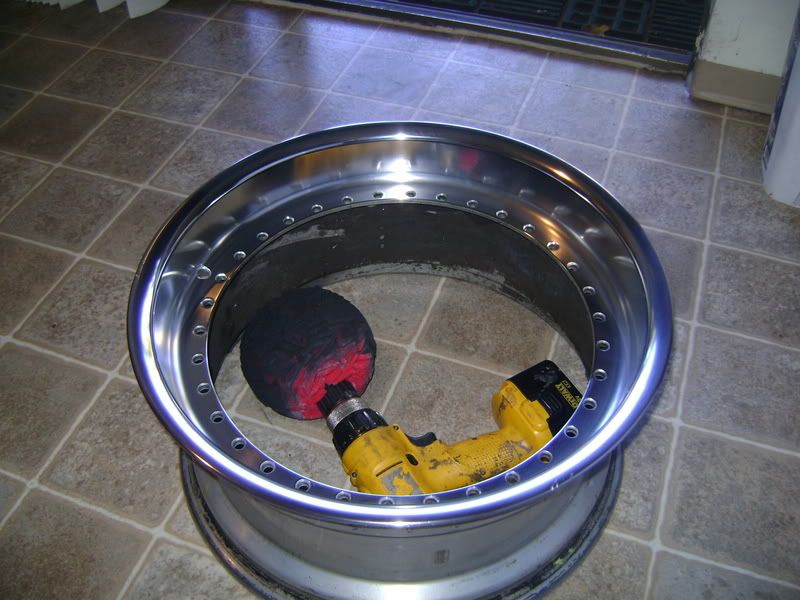
9. After buffing the wheel with rubbing compound use a metal polish compound to start polishing. I used Mother's mag and aluminum polish and mothers polishing ball. Using a clean cloth apply the polishing compound to entire surface. grab your drill and start buffing the wheel applying good pressure to bog the drill slightly until the compound turns black. . I recommend
not using a cordless drill because you will have to swap batteries every 3-5 minutes.
10. Use a clean terry towel to buff applying minimal pressure. repeat step 9 is needed for a better shine.
11. sit back and admire your work........then start the next wheel.
I used a drill to polish the bolts but I have to say that it may be too much of a commitment. After doing just 5 of them I decided not to even bother with them since they are in good condition anyway. I am also planning getting the centers painted gold. That's all there is to it. Not really all that hard but very time consuming I will update the pictures and tools list as I progress. Here's a few pics for now so you can see what it will look like. Hope this helps some of you.
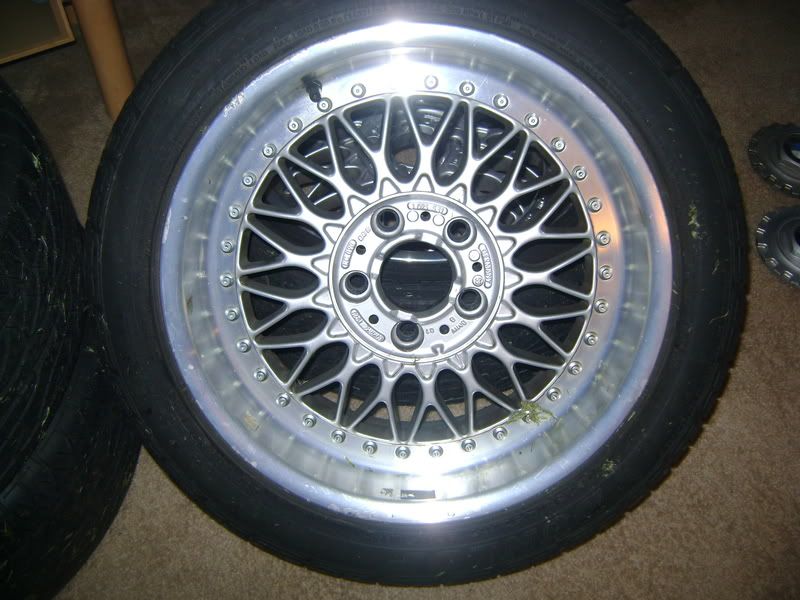
Before.... notice all the curbage.
stripping the clear coat
finished product
 UPDATE 1
 2 down....2 to go.
