 » Site Navigation » Site Navigation | | | | » Recent Threads | | | 1999 M3 Swap 09-07-2023 10:10 PM 05-02-2024 08:18 PM 6 Replies, 405,294 Views | |  |  |  | |  03-06-2014, 12:09 PM 03-06-2014, 12:09 PM | #466 | | Senior Member Join Date: Mar 2012 Location: West Bend, Wisconsin Posts: 1,055 |
I got my other hub sat down, as well as my Motorsport Hardware studs and Adams Rotors (with ECS's stainless hold down bolts) Hubs on  Studs in 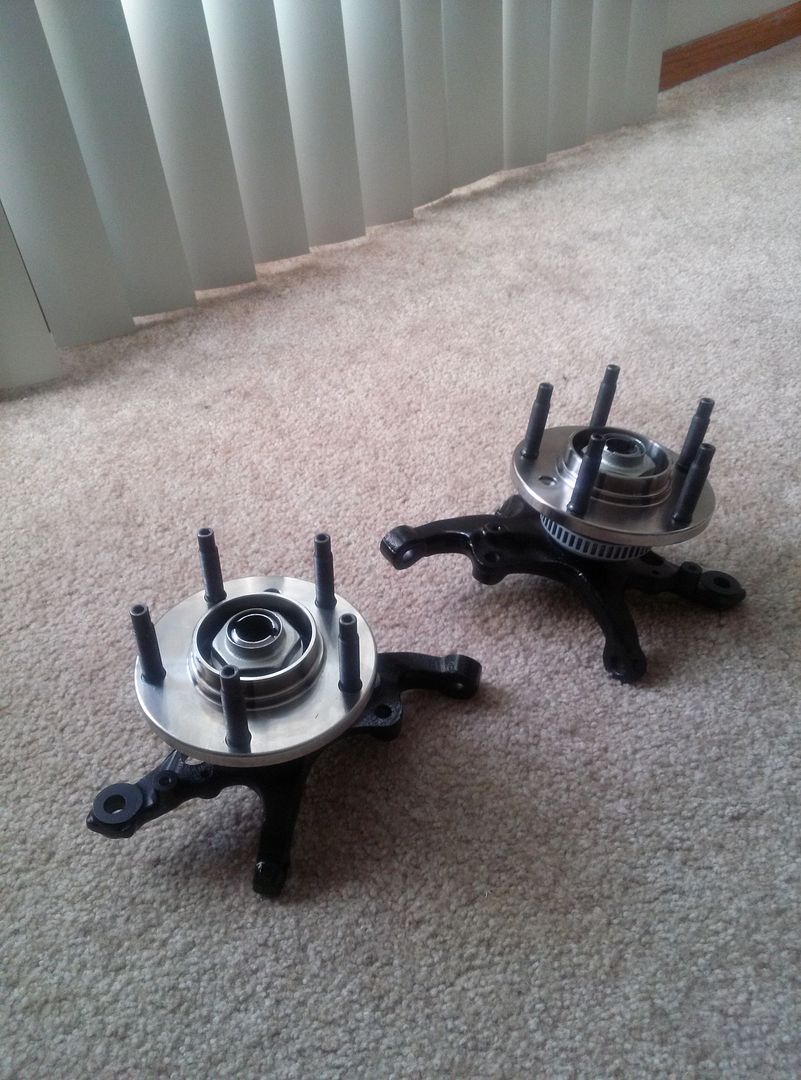 Rotors on  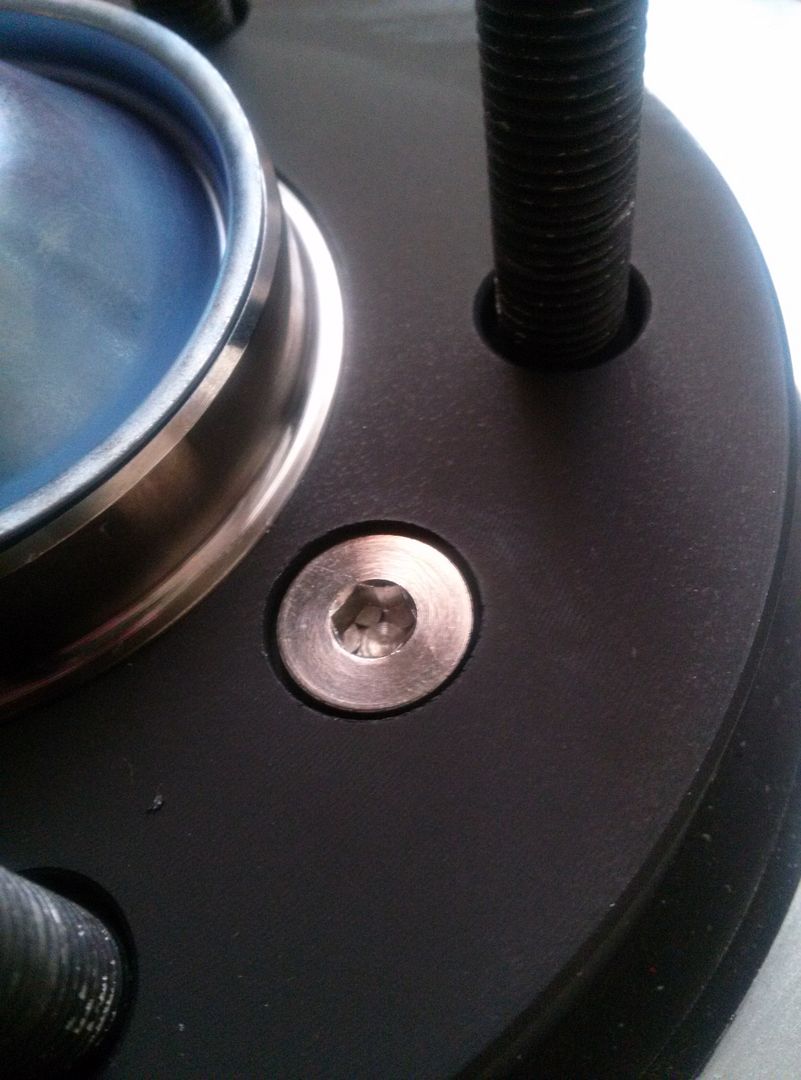 The dust cap is just sitting on there to get an idea on how they will look. I do have an issue though. When I hand tighten the hub nuts as far as I can with the socket, they spin very very tight. I looked into it and it seems SKF didn't relief the back side of the bearing to accodomate the OEM inner dust cap. It seems the SKF unit I have is sealed itself, so I might just need to dremel out my new inner dust covers or somehow bend them enough to not make contact. This guy had the same issue last year: http://forums.bimmerforums.com/forum...umber-matching Good thing the front wheels aren't in a rush to go back on=) __________________ 95 318ti & 96 318ti Quote: Originally Posted by eurohb  Im Jelly.. enough said. |  Follow me on instagram: earlmeyeriii |  |  | | 03-10-2014, 11:07 AM | #467 | | Senior Member Join Date: Mar 2012 Location: West Bend, Wisconsin Posts: 1,055 | 
I started off yesterday by installing my new tensioner with the new plug and washer. Old vs New  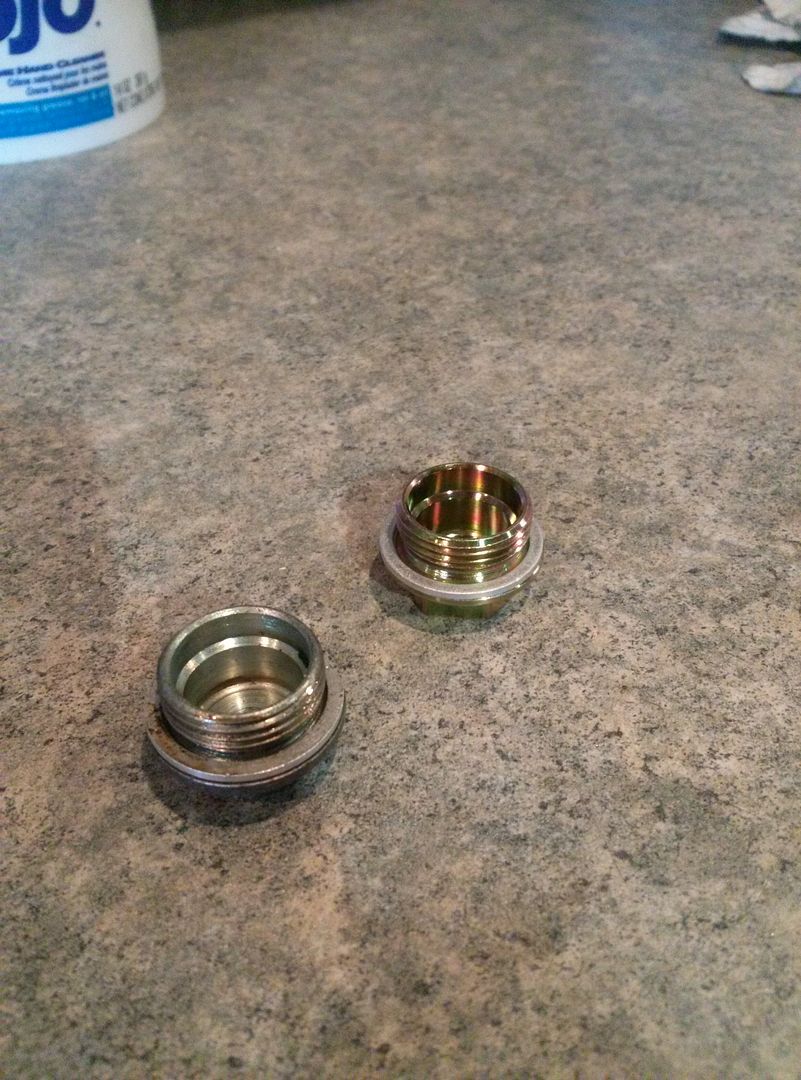 Tensioner  Installed and torqued 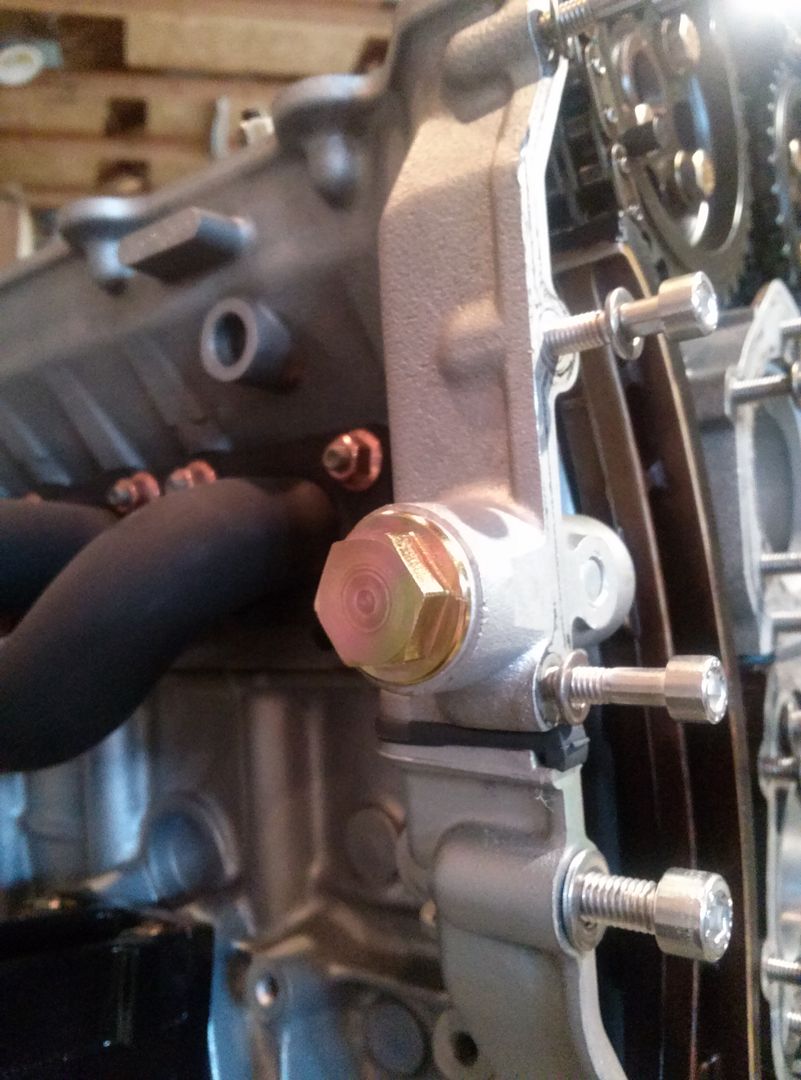 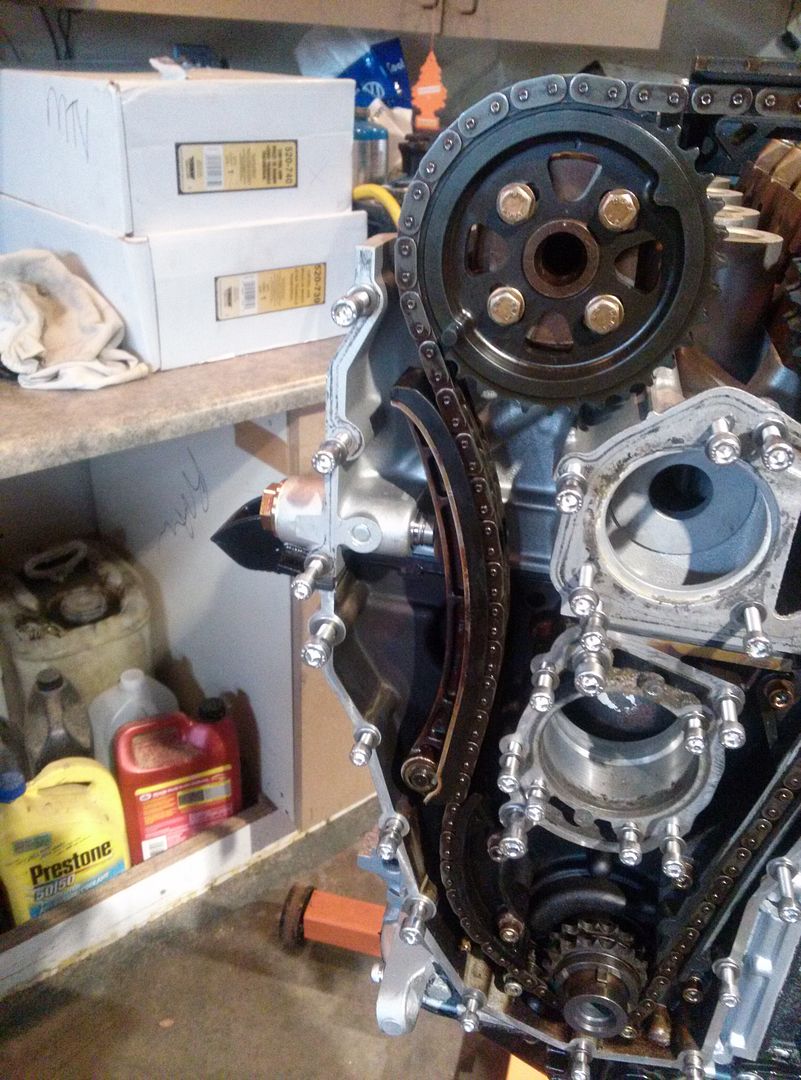 When I put it in it was short. The manual said to press the chain guide into it and release it. It only listed that for the m42 tensioner and not the m44 tensioner. I think I managed to get the m42 tensioner since I can see the snap ring when the tensioner is realeased. It isn't a big deal, but I swear I ordered the m44 tensioner. After I released the tensioner, I torqued the cam sprockets down and also torqued the upper chain guide. After that I cleaned the gasket surfaces and installed the lower timing cover hand tight. Bolts out and surface cleaned  Gasket on  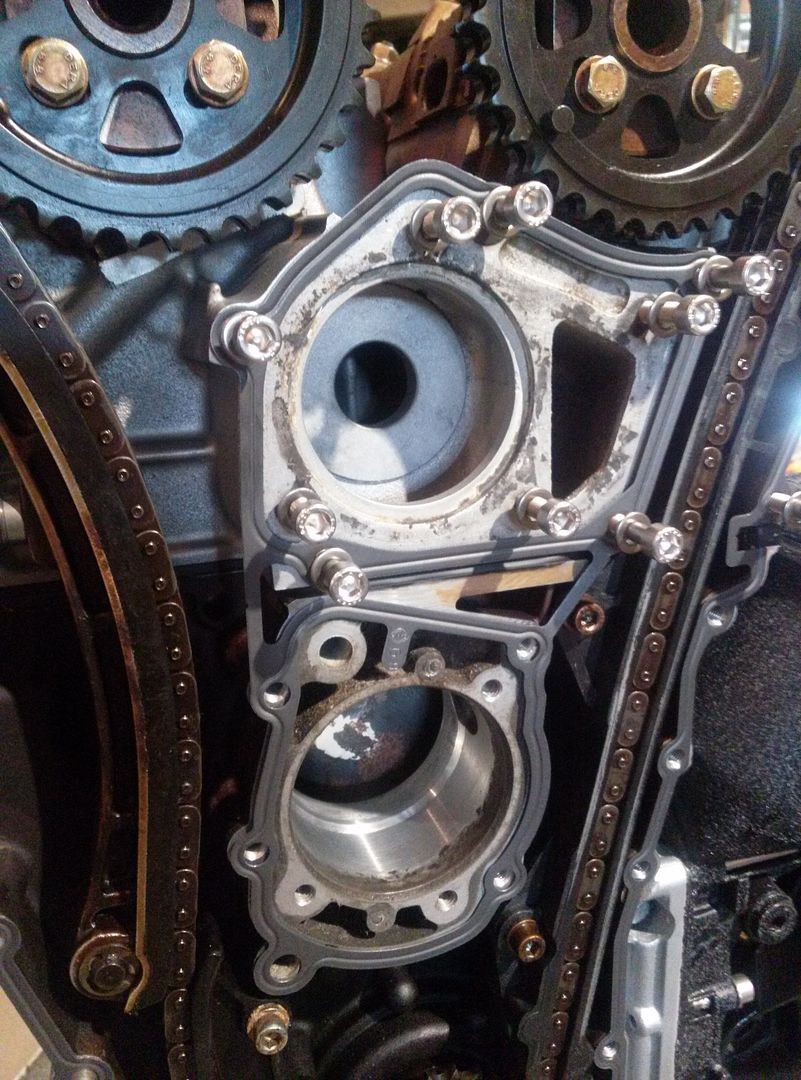 Cover on hand tight  At this point I was going to torque it all down hardware but thought I should check the timing first. The cam and cam sprocket marks line up perfect but I was still unsure of if I had the engine at TDC when I put the chain on. I put the cam bolt in and turned it with a ratchet and it seemed to stop after a quarter turn. I couldn't tell if the bolt was just tightening, the springs got super stiff at that point, or if the piston was hitting a valve. Instead of cranking on it I just backed off and am having a buddy come check it out next weekend just to check it over for me=) I figured while I was working on that, I could get the crank pulley flange all cleaned up and ready to go on. When the crank bolt initially came out I had my friend get it out with an impact, but he KO'd the dowel pin for the crank pulley. I ordered a new one for a few cents and pounded it in yesterday. Old vs New  Installed 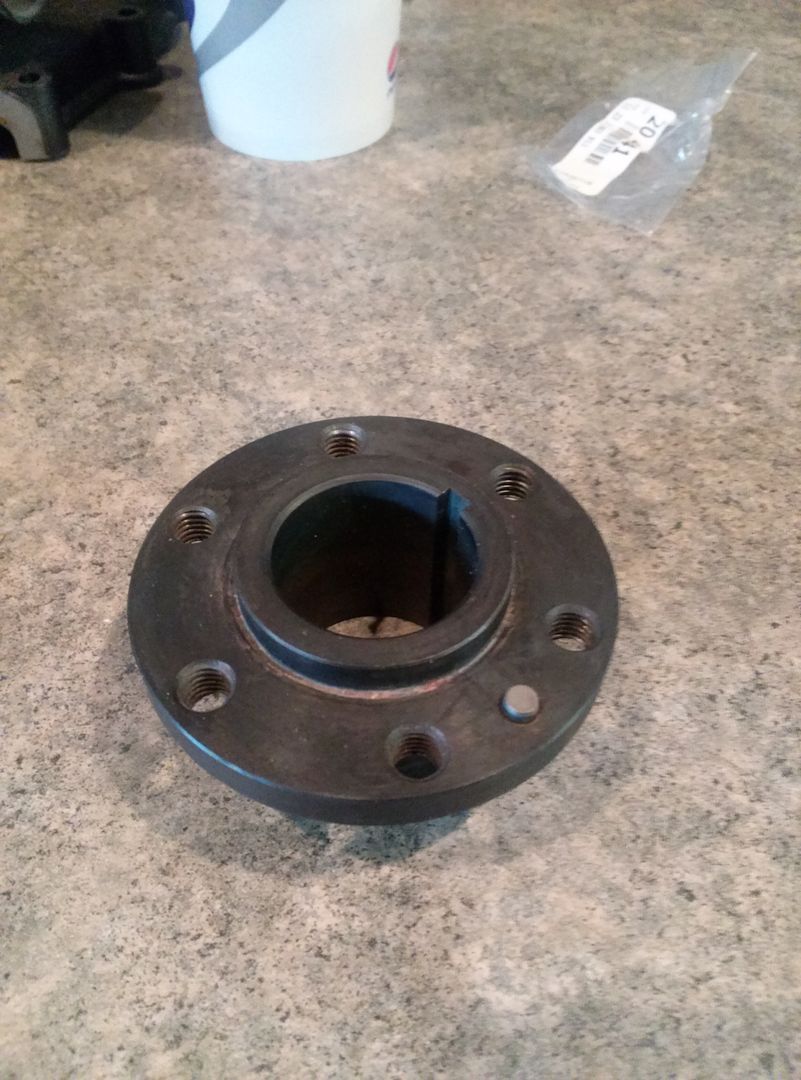 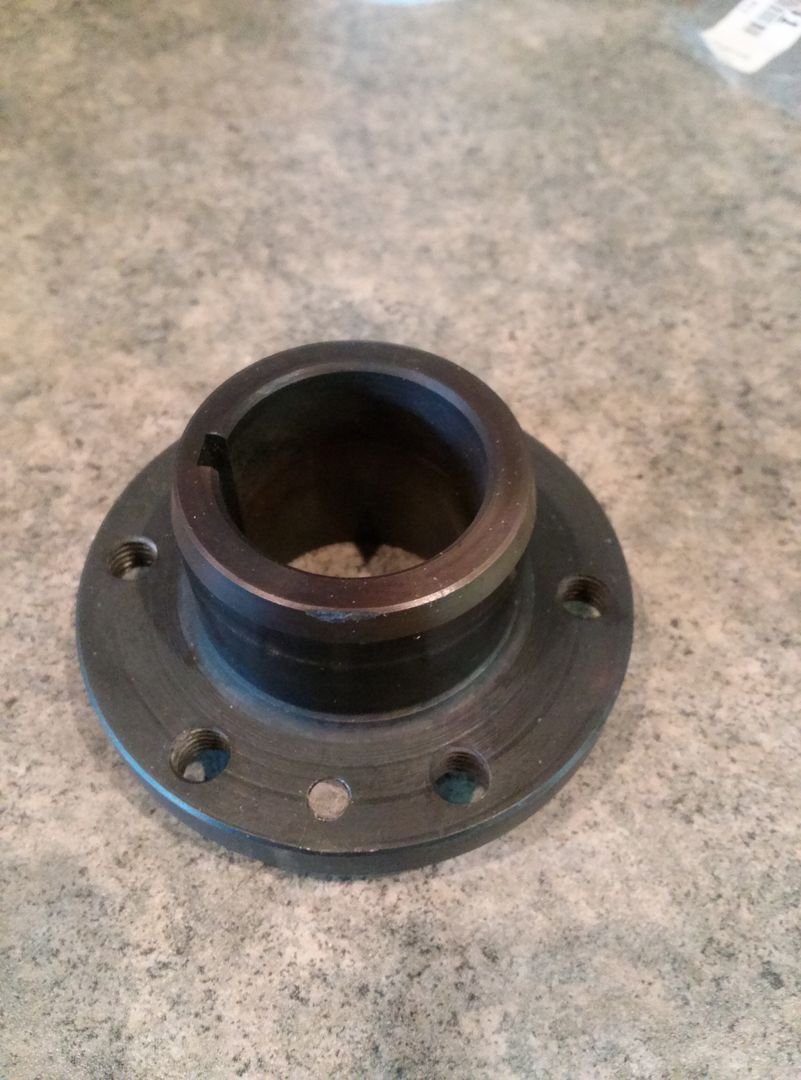 At that point I went to attach the crank pulley but bent the mounting surface by trying to draw it on using the 6 bolts. It didn't want to go on nice since the fresh paint didn't allow much clearance. I am going to be sanding that ID out at work and getting it painted back up and installed before the week is over. I am glad I noticed when I did that it wasn't drawing on straight. At this point I was as far as I could get with the engine so I started on the template for the false floor. Initial shape from tracing the carpet and side cubbies and oversizing it a bit  After a bit of trimming I got close to what I need. There are some spots where I cut it too small and I need to tape on pieces to make the template correct. Otherwise it should be pretty good. I did figure out that I will need to make the false floor in two halves because it does not want to fit through the hatch as one piece. I will still wrap it in carpet as one piece though.  My buddy Kyle woke up a little late, but made up for it by getting a lot of the seams left on the strut towers welded up. Next time he comes out he will be smoothing them all out. He did start welding on the firewall but it was short lived. He was welding it and I turned and said we should peel the carpet back to keep it from burning. I opened the passenger side door and the car was filled with smoke. I looked under the glovebox and didn't see anything initially. After a few more seconds I could see some embers coming through the carpet and at that exact moment, my buddy Jory threw my water bottle to me and said "Douse it!". I squirted the bottle and out it went. I got the glovebox out with the quickness to make sure nothing was by the wiring. It ended up stopping right under the carpet. The foam carpet insulation helped slow the fire down which is great. I am happy I said something when I did and I have to get a new carpet anyways=) Next weekend the engine timing should be all sorted out so that I can get the engine together further. I might even start making the false floor with MDF. I also found a new daily that I will hopefully be rolling in soon=) __________________ 95 318ti & 96 318ti Quote: Originally Posted by eurohb Im Jelly.. enough said. | Follow me on instagram: earlmeyeriii | | | | | 03-10-2014, 07:40 PM | #468 | | Senior Member Join Date: Dec 2011 Location: SoCal Posts: 702 |
Ohh exciting, that fire could of been potentially very bad. Good thing you got it stopped! That false floor looks interesting, hopefully it will have a good result. I don't get where you get your patience from though, taking time for every little nut, I would get impatient and just want it done to drive. Keep it up.
Also looking forward to what new daily you will be driving lol. __________________ 
***328ti Build thread. ***
Even more important:
SUPPORT 318ti.org! CLICK THE LINK ABOVE!
Hosting a forum like this is not free. 318ti.org is one of the best BMW forums on the web because it is member supported, not vendor supported. The cost to become a Supporter is a nominal $10.00... A YEAR! DO IT! NOW!  | | | | | 03-10-2014, 07:46 PM | #469 | | Senior Member Join Date: Mar 2012 Location: West Bend, Wisconsin Posts: 1,055 |
I think the new daily will be something of your interest=)
Also, I am not so much patient as I am overly anal. It drives me crazy but I don't want to half ass any of this. __________________ 95 318ti & 96 318ti Quote: Originally Posted by eurohb Im Jelly.. enough said. | Follow me on instagram: earlmeyeriii | | | | | 03-10-2014, 07:50 PM | #470 | | Senior Member Join Date: Dec 2011 Location: SoCal Posts: 702 |
Quote: Originally Posted by Earl I think the new daily will be something of your interest=)
Also, I am not so much patient as I am overly anal. It drives me crazy but I don't want to half ass any of this. | I guess half-ass has a different definition to different people, if it works then its fine for me, but your taking the time to like polish and scrub every little bit, I totally admire it because I can't do that lol. I mean look at the ti in my sig, mismatched fenders? Well the fender is technically the same and works so who cares just drive the damn thing!  That being said I am slowing being converted to pretty and confortable side of the tuning world.  __________________
***328ti Build thread. ***
Even more important:
SUPPORT 318ti.org! CLICK THE LINK ABOVE!
Hosting a forum like this is not free. 318ti.org is one of the best BMW forums on the web because it is member supported, not vendor supported. The cost to become a Supporter is a nominal $10.00... A YEAR! DO IT! NOW! | | | | | 03-10-2014, 08:08 PM | #471 | | Senior Member Join Date: Mar 2012 Location: West Bend, Wisconsin Posts: 1,055 |
Your car is purr function though =) I am building mine for pure form=) If this was going to be a racecar I would go at it a whole different way __________________ 95 318ti & 96 318ti Quote: Originally Posted by eurohb Im Jelly.. enough said. | Follow me on instagram: earlmeyeriii | | | | | 03-10-2014, 08:16 PM | #472 | | Senior Member Join Date: Dec 2011 Location: SoCal Posts: 702 |
Quote: Originally Posted by Earl Your car is purr function though =) I am building mine for pure form=) If this was going to be a racecar I would go at it a whole different way | I want both  , some of my previous cars where actually pure function (think complete stripped interior,no A/C, Radio,Airbags etc) but back then I thought I was fast (big lol to that), but this is your story not mine, so lets stay on track. Keep the build up ! __________________
***328ti Build thread. ***
Even more important:
SUPPORT 318ti.org! CLICK THE LINK ABOVE!
Hosting a forum like this is not free. 318ti.org is one of the best BMW forums on the web because it is member supported, not vendor supported. The cost to become a Supporter is a nominal $10.00... A YEAR! DO IT! NOW! | | | | | 03-10-2014, 08:20 PM | #473 | | Senior Member Join Date: Mar 2012 Location: West Bend, Wisconsin Posts: 1,055 |
Haha I don't mind. I sure will though. That fire almost ended the build so I am glad that didnt happen. __________________ 95 318ti & 96 318ti Quote: Originally Posted by eurohb Im Jelly.. enough said. | Follow me on instagram: earlmeyeriii | | | | | 03-13-2014, 05:47 PM | #474 | | Senior Member Join Date: Mar 2012 Location: West Bend, Wisconsin Posts: 1,055 |
I sent ECS a message yesterday about my hubs binding/making contact with the inner dust caps and they told me they would get right on the issue. I was expecting them to take a week or so, but I got an email from them just now already.
Here is what they had to say:
"Earl,
Thank you for your patience. We have not had this issue before with the SKF wheel hub. Based on the pictures, you may have received a mislabeled part (an incorrect part in the correct box). If you compare the hub you have received with our website, it looks vastly different. I truly apologize if this is the case and will work to correct the problem quickly.
I would be happy to set up an exchange for the correct hub. Alternatively, you may wish to purchase the correct hub up front and return the incorrect one for a refund in order to receive it sooner. I could run the same credit card authorization on the new order. I will provide free shipping and a return shipping label to cover all costs. I do apologize for the inconvenience.
I will have our warehouse confirm the replacement part matches our website photos before shipping. This will ensure it is correct this time.
Please let me know how you wish to advance and I will set it up accordingly."
This is the exact reason why I continue to order through ECS when other people say "they suck" or "I hate ECS". I have never had an issue and they are always there to satisfy my needs.
SKF messed up and put the wrong part in the wrong box and instead of ECS referring me to deal with SKF, they are taking it upon themselves. I am very happy and cannot wait for the new hubs to come. Now to figure out how to remove these hubs without having to destroy them.
On a side note I tried fixing my crank pulley that I bent Saturday, but it looks like it is too bent to save so I am on the lookout for another one to use...
Also, the prelude might be sold today and the new daily picked up Sunday=D __________________ 95 318ti & 96 318ti Quote: Originally Posted by eurohb Im Jelly.. enough said. | Follow me on instagram: earlmeyeriii | | | | | 03-14-2014, 10:37 PM | #475 | | Senior Member Join Date: Dec 2011 Location: SoCal Posts: 702 |
They probably read your build thread and are using you to advertise for them  (No ninja emoticon?!?) __________________
***328ti Build thread. ***
Even more important:
SUPPORT 318ti.org! CLICK THE LINK ABOVE!
Hosting a forum like this is not free. 318ti.org is one of the best BMW forums on the web because it is member supported, not vendor supported. The cost to become a Supporter is a nominal $10.00... A YEAR! DO IT! NOW! | | | | | 03-16-2014, 07:32 AM | #476 | | Senior Member Join Date: Feb 2012 Location: Sacramento, CA Posts: 2,451 |
Earl, I hope this finds you doing real well! I have a question for you. Back on page 13, when you were installing the Euro knee panel, I noticed in the photo after you installed it, there was a harness with a number of relays to the lower left side. Was that harness and relay just temporarily to the side or did they not fit in place with the Euro knee panel? I have a set from Kitty as well and just sizing up the replacement before I start cutting brackets. Thanks much! Rich  __________________ 
1998 318ti Sport - "Cali" Schwartz II/Schwartz sport interior, Cali top
1998 318ti Sport - "Max" Schwartz II/Schwartz sport interior, S52
1997 318ti Sport - "Tiny" Schwartz II/Schwartz sport interior
1995 318ti Active - "Blanca" Alpineweib III/Schwartz leather interior
Other Current Bimmers: 2006 530i / 2000 2.3L Z3 / 1997 1.9L Z3 / 1999 540it
1997 318ti Sport - "Huera" - RIP
1995 318ti Active - RIP
1995 318ti Sport - "Tiny" Sold
1994 325i Sedan - "Jade" - Sold
1991 318ic - "Bert" - Sold
1985 635csi sold
1984 533i "Max" Sold
1984 318i sold
BMWCCA #160411
SUPPORT 318ti.org! CLICK THE LINK ABOVE!
Hosting a forum like this is not free. 318ti.org is one of the best BMW forums on the web because it is member supported, not vendor supported. The cost to become a Supporter is a nominal $10.00... A YEAR! DO IT! NOW! | | | | | 03-16-2014, 01:42 PM | #477 | | Senior Member Join Date: Mar 2012 Location: West Bend, Wisconsin Posts: 1,055 |
That is actually everything from my fusebox since I am relocating it inside=) __________________ 95 318ti & 96 318ti Quote: Originally Posted by eurohb Im Jelly.. enough said. | Follow me on instagram: earlmeyeriii | | | | | 03-17-2014, 02:16 AM | #478 | | Senior Member Join Date: Feb 2012 Location: Sacramento, CA Posts: 2,451 |
Quote: Originally Posted by Earl That is actually everything from my fusebox since I am relocating it inside=) | Ah, Ok, thanks! __________________
1998 318ti Sport - "Cali" Schwartz II/Schwartz sport interior, Cali top
1998 318ti Sport - "Max" Schwartz II/Schwartz sport interior, S52
1997 318ti Sport - "Tiny" Schwartz II/Schwartz sport interior
1995 318ti Active - "Blanca" Alpineweib III/Schwartz leather interior
Other Current Bimmers: 2006 530i / 2000 2.3L Z3 / 1997 1.9L Z3 / 1999 540it
1997 318ti Sport - "Huera" - RIP
1995 318ti Active - RIP
1995 318ti Sport - "Tiny" Sold
1994 325i Sedan - "Jade" - Sold
1991 318ic - "Bert" - Sold
1985 635csi sold
1984 533i "Max" Sold
1984 318i sold
BMWCCA #160411
SUPPORT 318ti.org! CLICK THE LINK ABOVE!
Hosting a forum like this is not free. 318ti.org is one of the best BMW forums on the web because it is member supported, not vendor supported. The cost to become a Supporter is a nominal $10.00... A YEAR! DO IT! NOW! | | | | | 03-17-2014, 10:38 AM | #479 | | Senior Member Join Date: Mar 2012 Location: West Bend, Wisconsin Posts: 1,055 |
I didn't make it out to the shop this weekend like I wanted to, but I did pick up my new daily.... 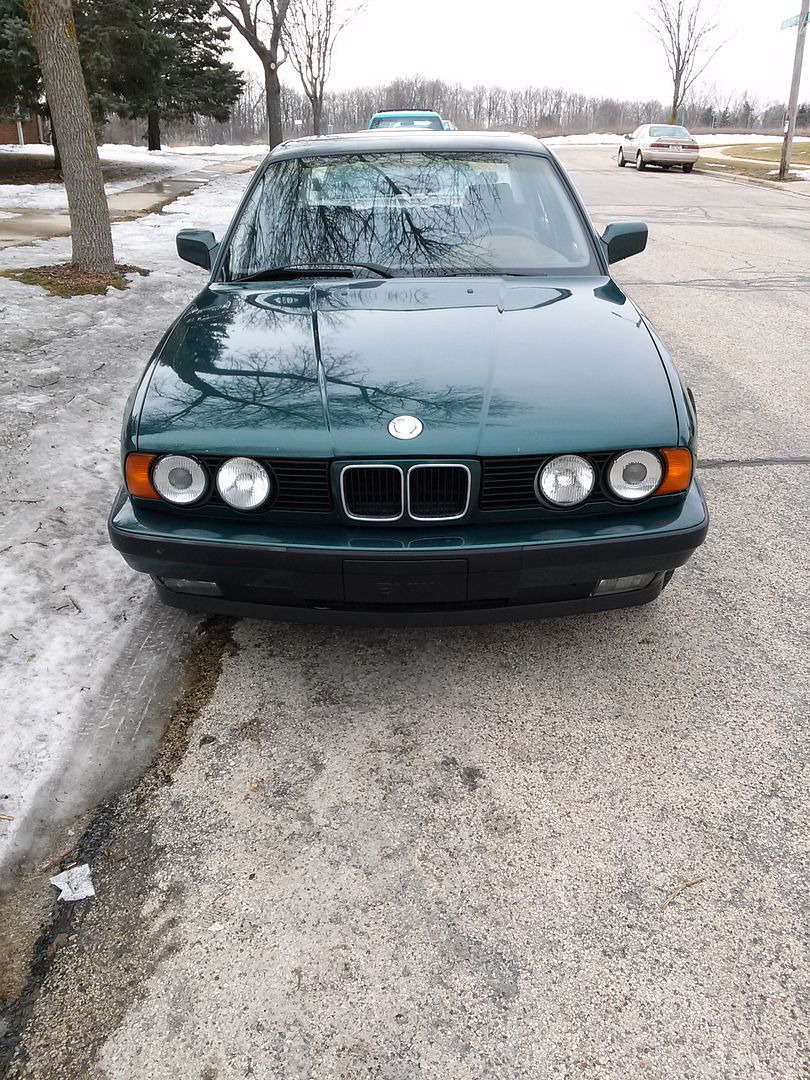 1992 525i, 5 speed, tan interior with black heated seats and black door cards swapped in, ellipsoids, and all rear (poly) and front suspension refreshed (minus strut assemblies). It is such a comfortable highway cruiser and is actually sipping less fuel than I thought it would, which is a plus=D I will be out at the shop this weekend at the latest, but might stop in a few times during the week to look at a few things. __________________ 95 318ti & 96 318ti Quote: Originally Posted by eurohb Im Jelly.. enough said. | Follow me on instagram: earlmeyeriii | | | | | 03-18-2014, 05:59 AM | #480 | | Senior Member Join Date: Jul 2008 Location: South Central, MN Posts: 1,065 |
Nice! Thumbs up! __________________  | | | | | |
| Currently Active Users Viewing This Thread: 1 (0 members and 1 guests) | | |
 Posting Rules Posting Rules | You may not post new threads You may not post replies You may not post attachments You may not edit your posts
HTML code is Off
| | |
|


 Linear Mode
