 » Site Navigation » Site Navigation | | | | » Recent Threads | 1999 M3 Swap 09-07-2023 10:10 PM Yesterday 08:18 PM 6 Replies, 317,598 Views | | | |  |  |  | |  06-27-2006, 05:17 PM 06-27-2006, 05:17 PM | #1 | | Senior Member Join Date: Apr 2006 Location: Oxford, Ohio Posts: 868 |  I painted my fins... I painted my fins...
On my valve cover and Intake
here is a pic. Tell me what you think. |  |  | | 06-27-2006, 05:21 PM | #2 | | TRETEN IRGENDEINES ESELS Join Date: Aug 2004 Location: Rhode Island Posts: 3,687 |
Looks good. __________________ 98 Avus Blue 318 ti Active
clear outs all around,stealth turning signals,blue led interior lights, 35% tinted windows,K&N air filter, 12" Kenwood Sub, MTX Thunder Amp,Alpine cd changer, Leatherz Armrest,ACS Pedals/Handbrake/FloorMats & Vitesse Tuning Carbon Fiber B-Pillars/CF Spark Plug Cover, New 16" MSW Typer 14 Rims on Goodyear Triple Treds 

www.myspace.com/avusblueti | | | | | 06-27-2006, 05:48 PM | #3 | | Senior Member Join Date: Nov 2004 Location: Minneapolis Posts: 1,587 |
I like how that looks on the intake manifold. Get a better pic for us.  | | | | | 06-27-2006, 06:07 PM | #4 | | Senior Member Join Date: Jan 2006 Location: Greece Athens Posts: 302 |
i like it too! __________________
Alpina front lip spoiler,ACS roof spoiler,OEM clear rear-side lights,In-Pro blackchrome front indicators,Lummar tinted glasses,318ti.org decalls,Eibach Sportline 45mm/30mm springs,Bilstein Sprint shocks,16mm rear sway bar,front eccentric wishbone bushes,E46 conv. RSMs,5mm rear lower spring seats,OMP alloy strut brace front,racing24 carbon/alloy strutbrace rear,x brace,K&N panel filter,L&W back box 2x84mm,BBS RK 8x17,Fulda Carat Exelero 225-45-17Y,Brembo drilled front rotors | | | | | 06-27-2006, 07:10 PM | #5 | | Senior Member Join Date: May 2005 Location: PA Posts: 1,906 |
Looks very clean!! Did you use a brush or can? __________________  | | | | | 06-27-2006, 07:40 PM | #6 | | Senior Member Join Date: Sep 2004 Location: Columbia, SC Posts: 528 |
It's different. Subtle. I like it. | | | | | 06-27-2006, 09:37 PM | #7 | | Senior Member Join Date: Jun 2003 Location: Jacksonville, Florida Posts: 322 |
I like that, it's a nice accent. | | | | | 07-06-2006, 10:12 PM | #8 | | Senior Member Join Date: Apr 2006 Location: Oxford, Ohio Posts: 868 |
here's how I did it... I used high temp paint, satin finish and rooled it on with a small diameter foam roller.
First I loaded the paint onto the roller.
Then I rolled it onto a piece of cardboard to get it even on the roller.
Then I "lightly" rolled it on.
I put masking tape between the fins on the valve cover, but I didn't need it. So I did the intake without it.
My valve cover and intake were very clean and I did it off the car. | | | | | 07-06-2006, 10:27 PM | #9 | | Senior Member Join Date: Jul 2003 Location: Northern IL Posts: 263 |
That looks awesome. looks nice and clean. | | | | | 07-09-2006, 01:57 PM | #10 | | Member Join Date: Jun 2006 Location: Muncie, IN Posts: 51 |
Good idea. It's a cheap way of making it look a little better under the hood | | | | | 08-03-2011, 11:15 PM | #11 | | Senior Member Join Date: Nov 2009 Location: Elkhart, IN Posts: 128 |
Now I just need to do my valve cover like yours for a complete copy! lol j/k 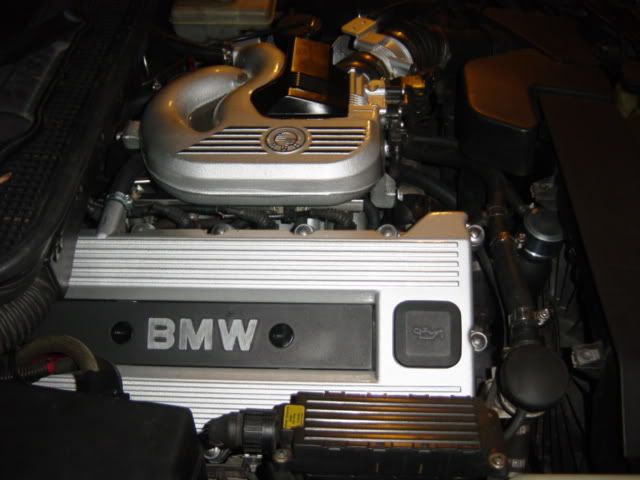 | | | | | 08-03-2011, 11:20 PM | #12 | | NOBODY F's with the Jesus Join Date: Oct 2006 Location: Ventura California Posts: 7,824 |
Meh, I think it'll look way better if you did the whole valve cover in wrinkle black paint, then sanded just the stripes with a rubber sanding block to expose the aluminum. Basically the opposite of what you're doing. I've seen it done before, can't remember where, but it looks much cleaner and almost factory. Otherwise full polish! | | | | | 08-03-2011, 11:34 PM | #13 | | NOBODY F's with the Jesus Join Date: Oct 2006 Location: Ventura California Posts: 7,824 |
Last edited by cooljess76; 08-03-2011 at 11:36 PM. | | | | | 08-04-2011, 03:02 AM | #14 | | Senior Member Join Date: Apr 2006 Location: Oxford, Ohio Posts: 868 |
Geez Jess... I'm not feeling the love  Actually, I did the painted fin job a while ago. I thought it looked clean and I liked the way the engine looked from the front. Because the valve cover and chain cover were both aluminum color. Since then I was bitten by the wrinkle paint bug. After this picture was taken, I have painted the spark plug cover. I did not sand off the fins because I thought the edge of the paint would not be durable. 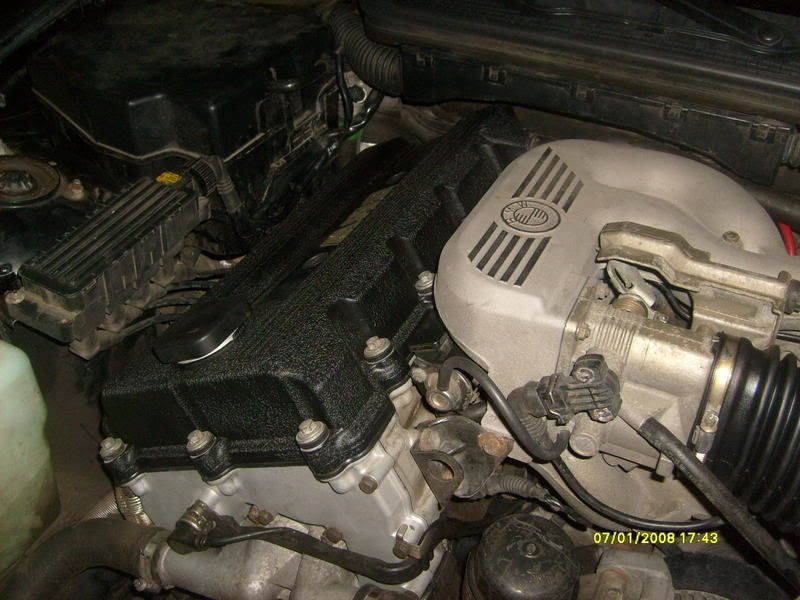 If I were to do it again, I would sand the fins prior to painting. Then mask them using 6mm wide masking tape. Then I'd paint, removing the masking tape before the paint dried. | | | | | 08-04-2011, 04:23 AM | #15 | | NOBODY F's with the Jesus Join Date: Oct 2006 Location: Ventura California Posts: 7,824 |
^^^Much love for ya Dave. I knew I seen it somewhere on this site. +1 on sanding the lines first and masking them off, makes better sense and should net better results. | | | | | |
| Currently Active Users Viewing This Thread: 1 (0 members and 1 guests) | | |
 Posting Rules Posting Rules | You may not post new threads You may not post replies You may not post attachments You may not edit your posts
HTML code is Off
| | |
|


 Linear Mode
