318ti.org forum

Go Back   318ti.org forum > Technical, Maintenance and Modifications > Knowledge Base

Notices

Knowledge Base How to articles and things explained.

.
» Recent Threads
looove
04-16-2024 01:18 PM
Last post by RichardBug
04-16-2024 01:18 PM
0 Comments, 416 Views
Brakes - soft pedal and...
04-14-2024 01:02 PM
Last post by bcp
04-14-2024 01:09 PM
1 Comments, 1,016 Views
lolita porn
04-13-2024 11:45 PM
Last post by Josephtus
04-13-2024 11:45 PM
0 Comments, 213 Views
lolita porn
04-13-2024 11:43 PM
Last post by Josephtus
04-13-2024 11:44 PM
1 Comments, 140 Views
lolita porn
04-13-2024 11:40 PM
Last post by Josephtus
04-13-2024 11:41 PM
1 Comments, 140 Views
lolita porn
04-13-2024 11:38 PM
Last post by Josephtus
04-13-2024 11:39 PM
1 Comments, 143 Views
lolita porn
04-13-2024 11:36 PM
Last post by Josephtus
04-13-2024 11:37 PM
1 Comments, 137 Views
lolita porn
04-13-2024 11:35 PM
Last post by Josephtus
04-13-2024 11:35 PM
0 Comments, 121 Views
lolita porn
04-13-2024 11:34 PM
Last post by Josephtus
04-13-2024 11:34 PM
0 Comments, 126 Views
lolita porn
04-13-2024 11:33 PM
Last post by Josephtus
04-13-2024 11:33 PM
0 Comments, 118 Views
Comment Share/Bookmark
 
Tutorial Tools Display Modes
DIY High Beam French Style
Published by eurohb
02-14-2010
Default DIY High Beam French Style

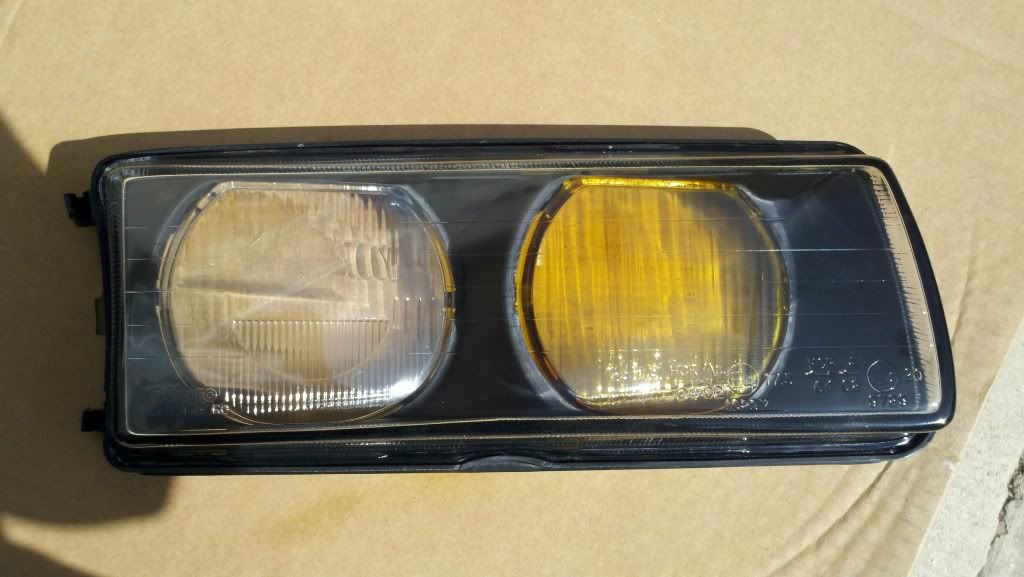
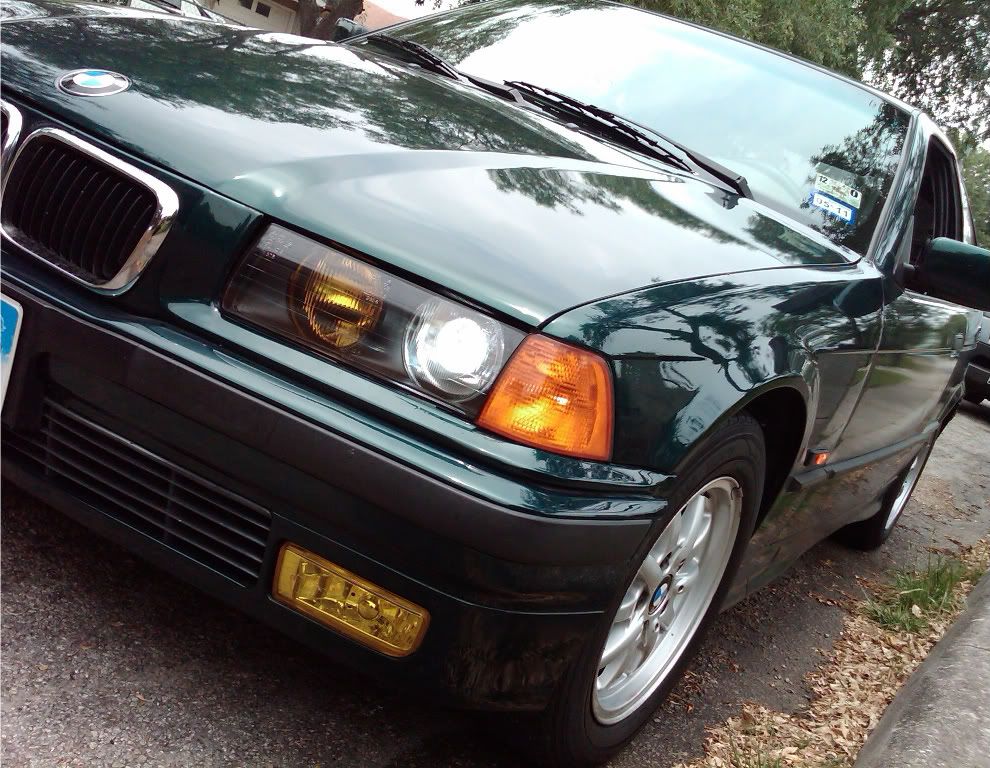
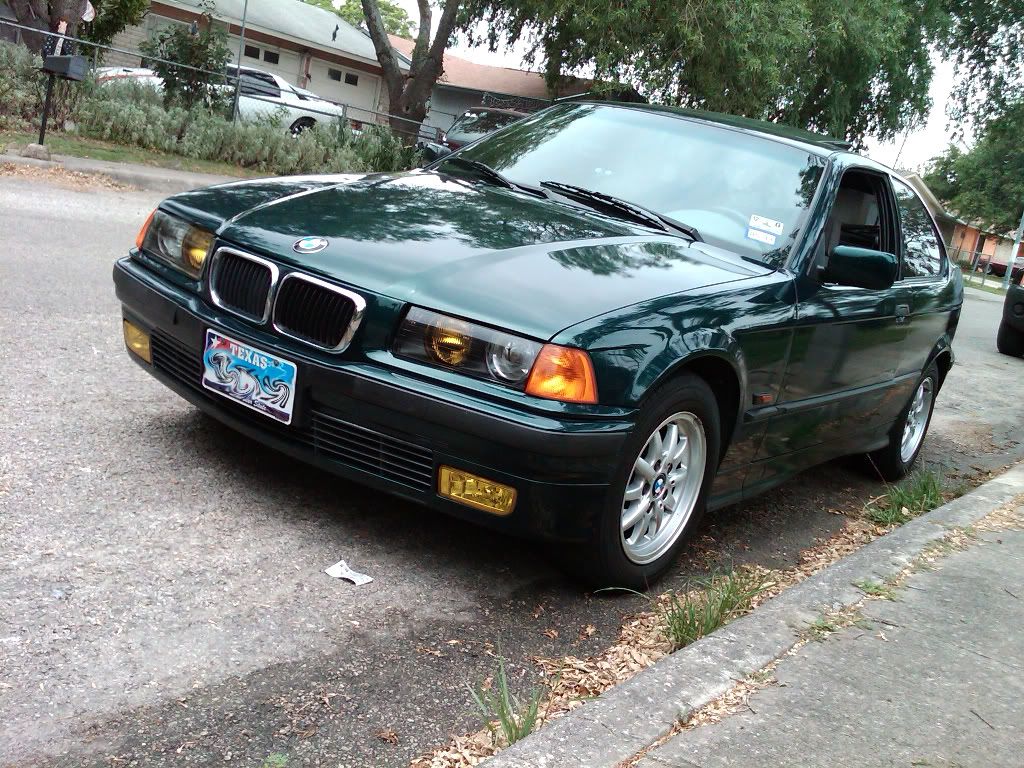
So have you seen other vehicles with Yellow high beams and wonder how they did that? It’s quiet easy and looks GREAT! I will show you how to do them on your very own Fogs and Head Lamps

Tools and Supplies Needed
- Flat Head Screw Driver
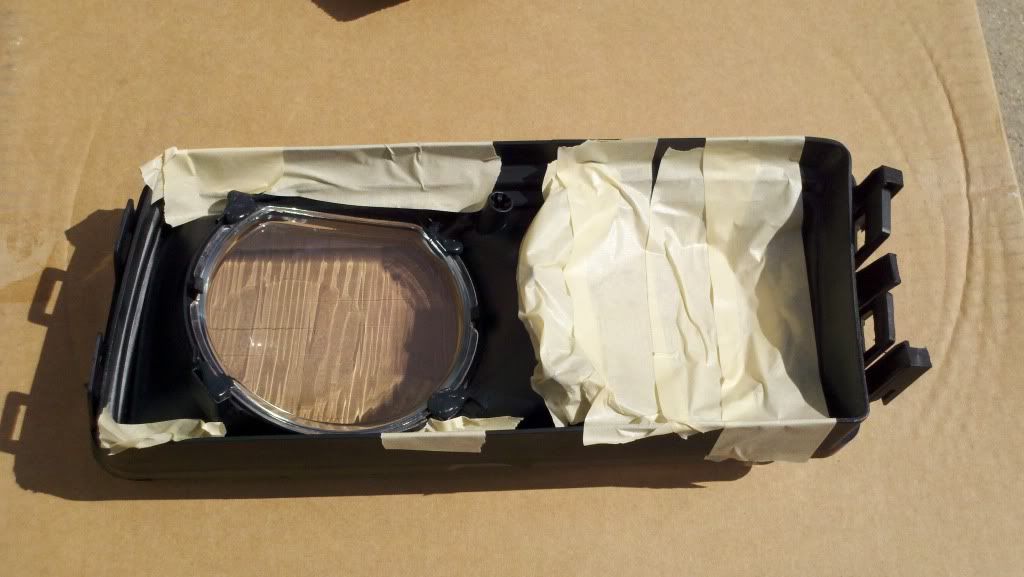
- Glass Paint
- Mineral Spirits or a Cleaner
- Painters tape
- TIME & PATIENCE!
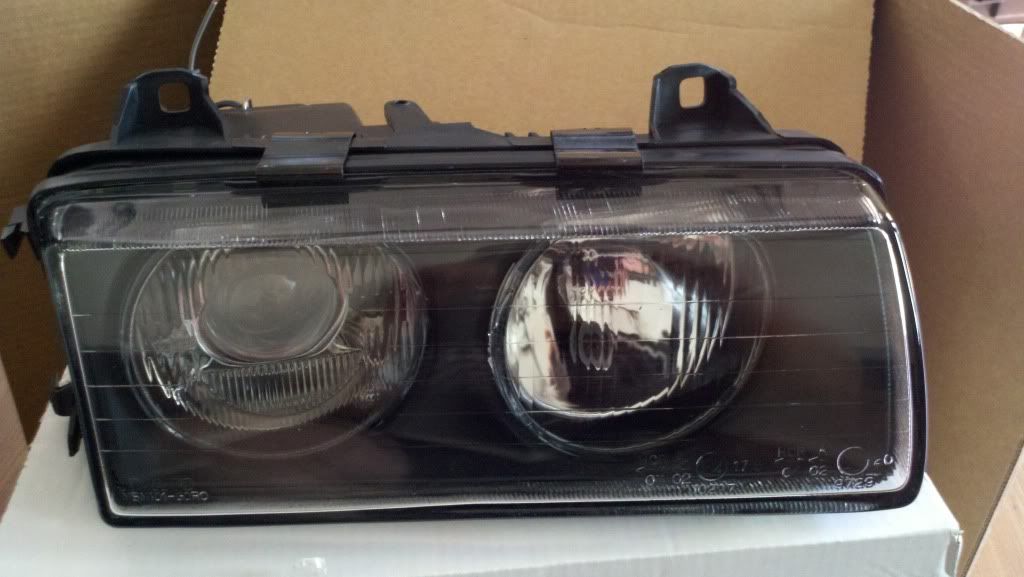
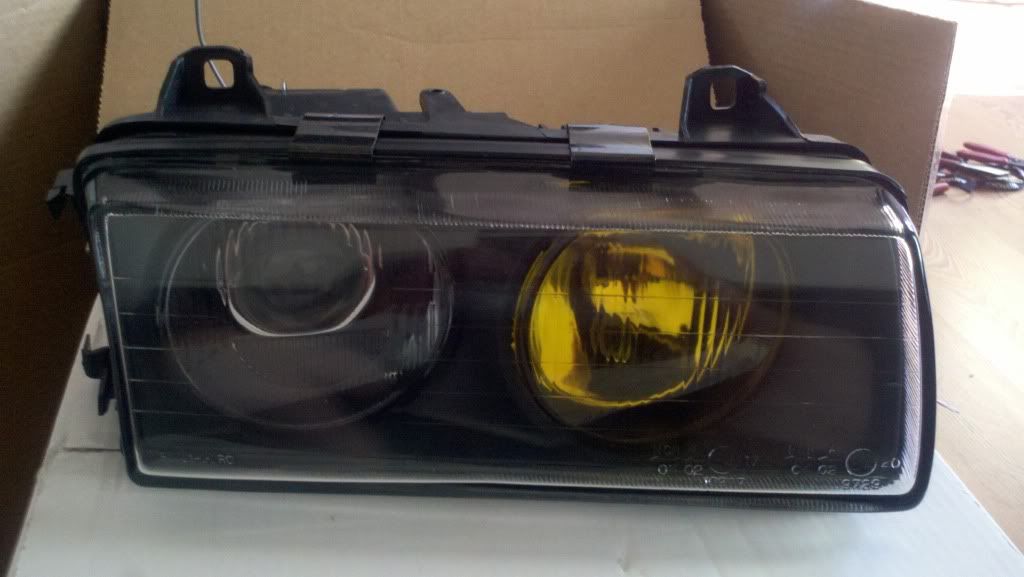
High Beam French Style.

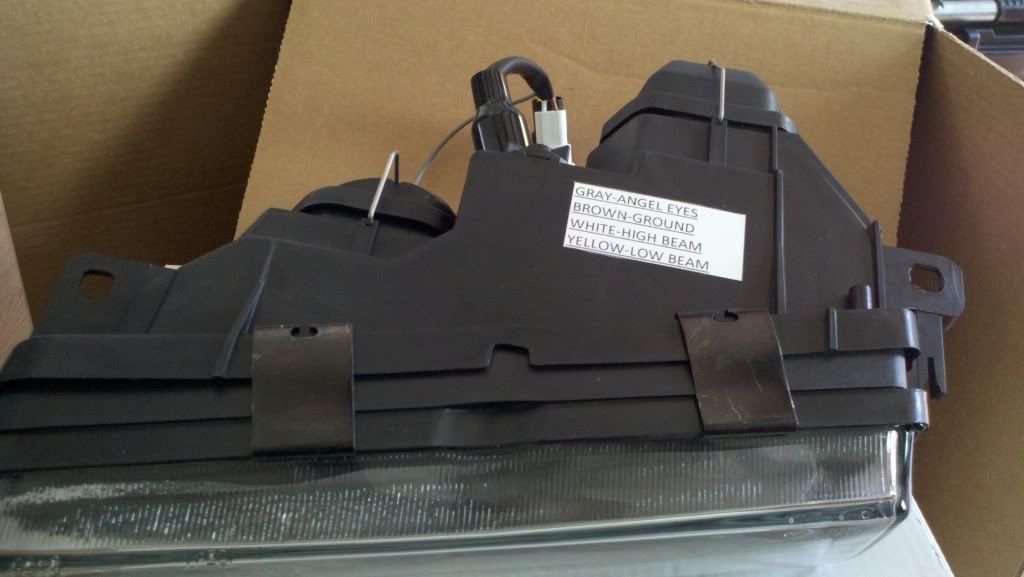
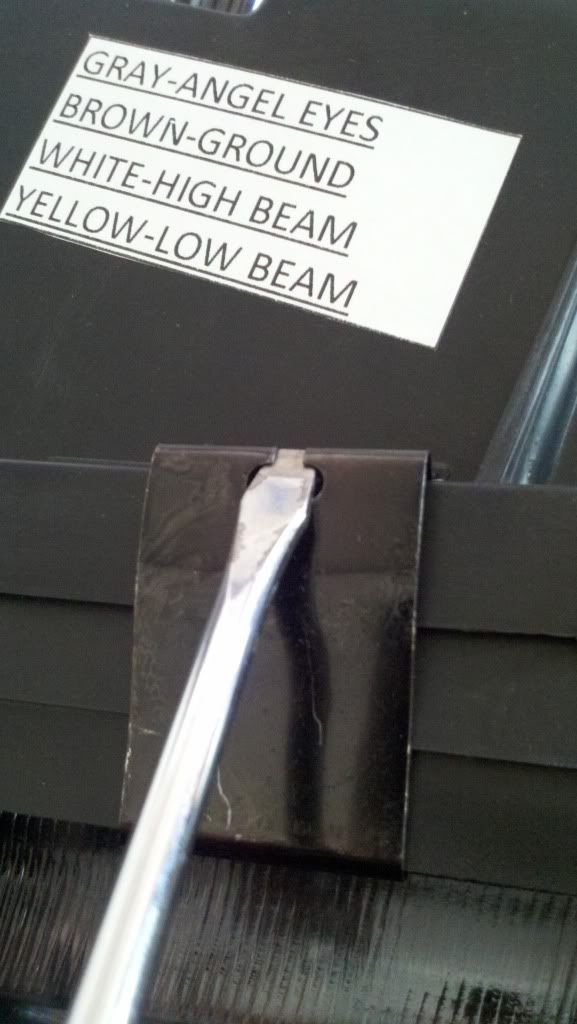
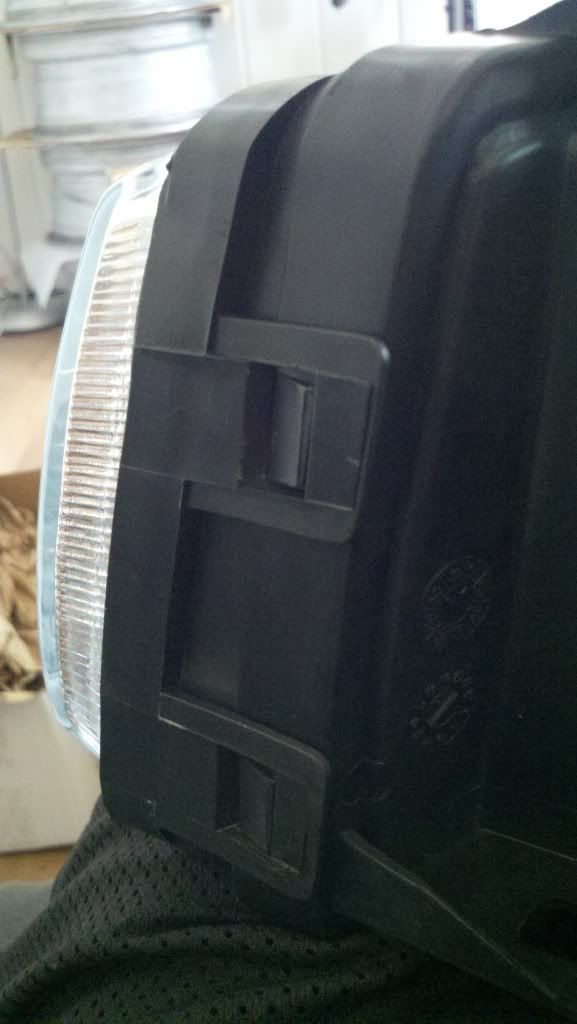
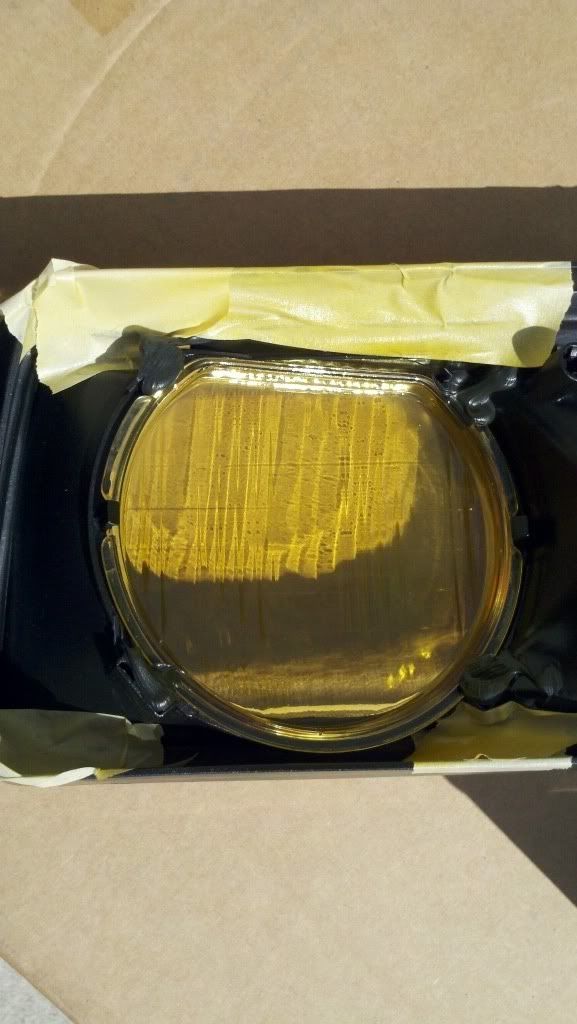
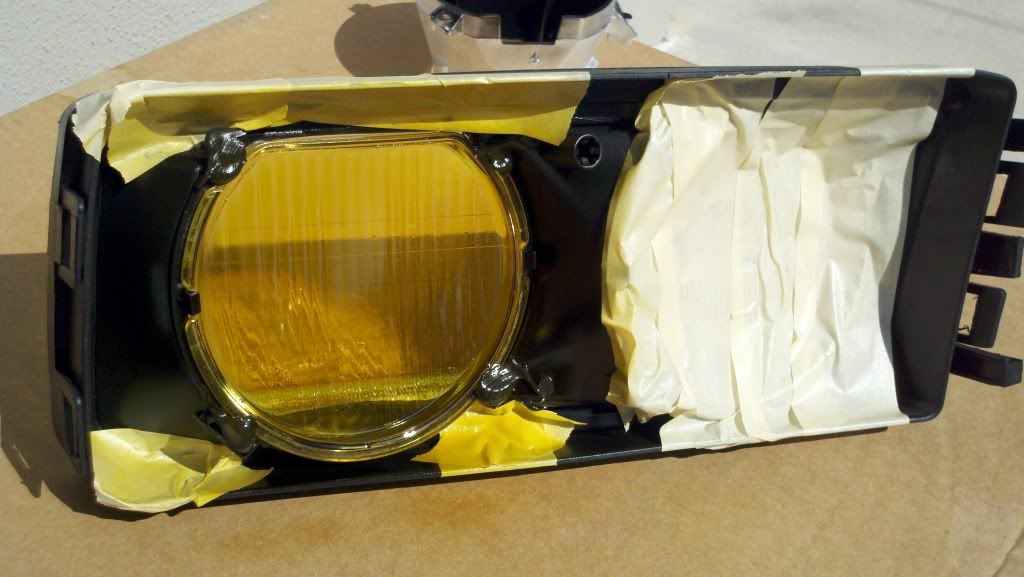
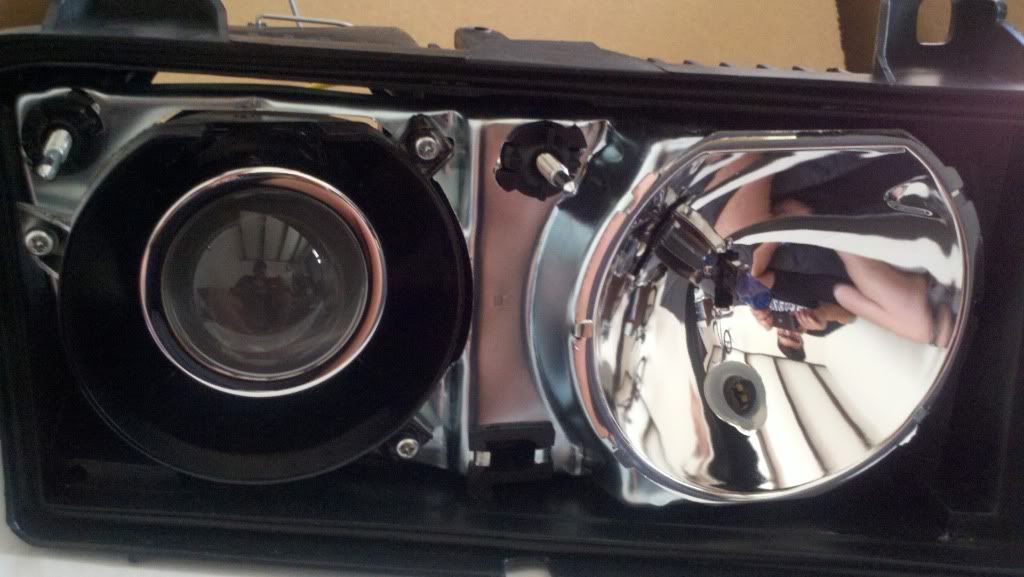
NOTE: CAN ONLY BE DONE WITH AFTERMARKERT DEPO OR DJ AUTO GLASS HEAD LAMPS. YOU CAN TRY WITH YOUR PLASTIC HEAD LAMPS BUT DO AT YOUR OWN RISK I TAKE NO RESPONSIBILITY FOR A BROKEN HEAD LAMP OR ANYTHING THIS IS AGAIN DO AT YOUR OWN RISK!!


Step 1- By now you should have your Headligthts off your vehicle and on a place where you can disassemble them. There are 4 metal clips you must remove first on your headlights to pull them apart. 2 on top and 2 on bottoms


insert your flat head screw driver into the slot and pry it up gentle


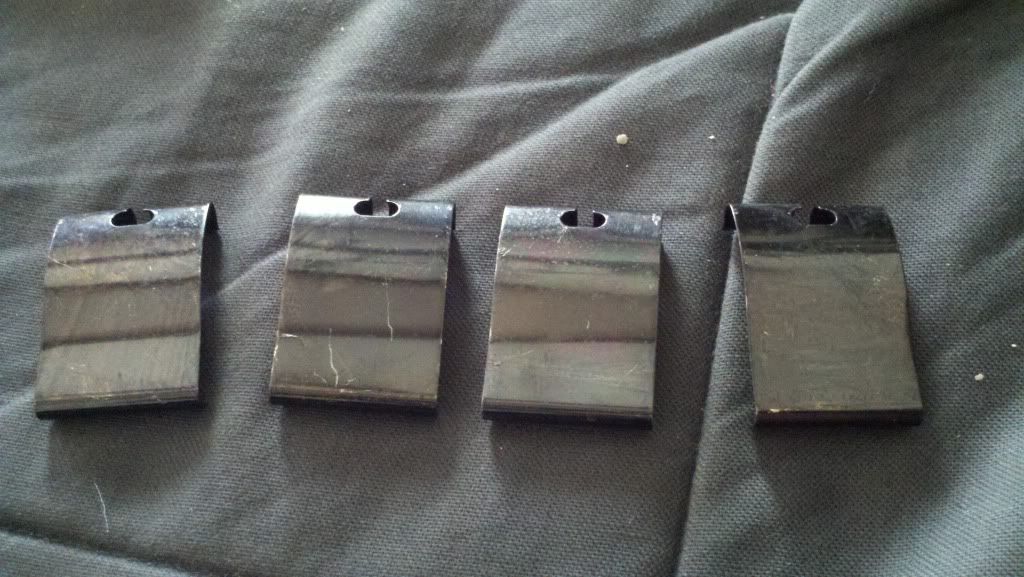
remove all four clips and put them aside like so


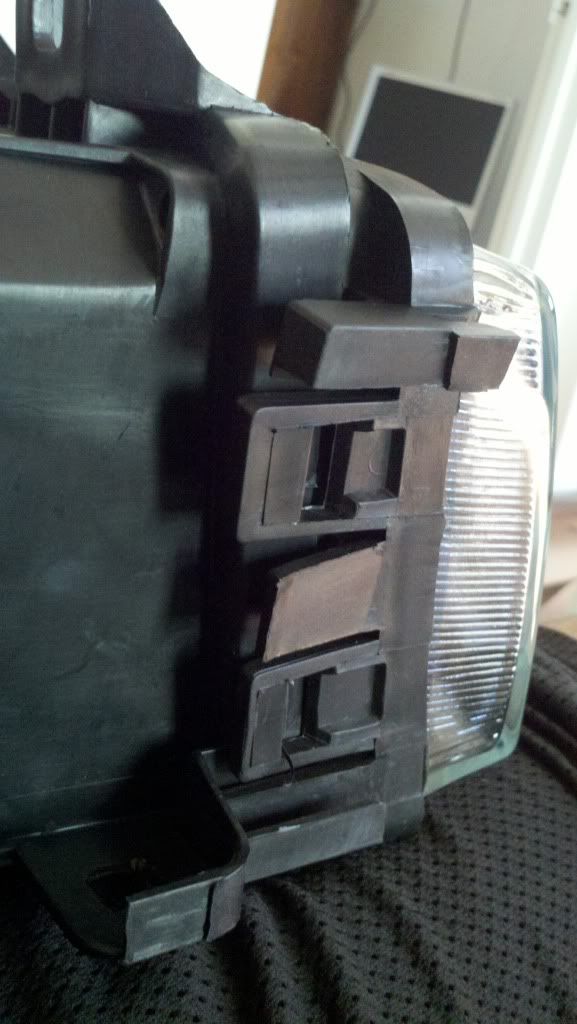
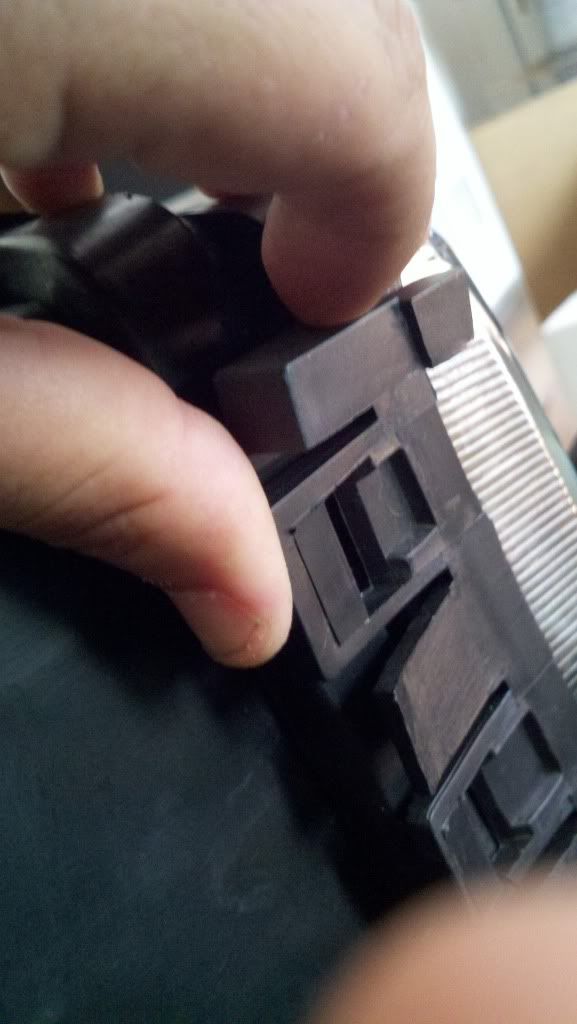
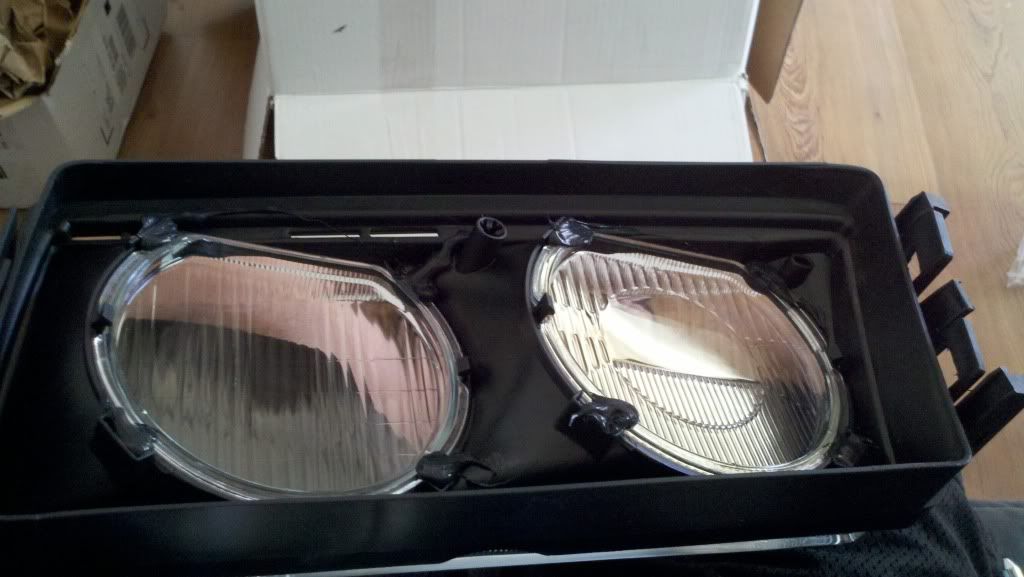
Step 2 - Removing the glass from the housing.

There are 4 plastic clips holding the glass part of the headlight to the housing, two on each side. CAREFULLY PULL THEM BACK AWAY FROM THE HOUSING!! THEY CAN BREAK WITH TOO MUCH FORCE!!

Tutorial Tools

  #1  
By eurohb on 02-14-2010, 09:01 AM
Default

Clip on the other side of the headlight


Slowly pop them up CAREFULLY WITHOUT BREAKING THE TABS!!


once you have done that you should have this in your work area.


Step 3- Painting

This is where you get to paint the hi beam side as yellow as you'd like. I started off by taping the Low Beam glass side very very well (I like to have my work done proper).


I started off with a very light coat on the glass. Remember to shake the can good and spray in a well ventilated area.
Last edited by eurohb; 10-27-2011 at 05:38 AM..
Reply With Quote
  #2  
By eurohb on 02-14-2010, 09:01 AM
Default

After i let the first coat dry for 10mins I continued to lay on a 2nd coat. I waited 10mins between coats, I did a total of 4 coats.


After the paint cured in the sun and kinda baked the paint, I removed the tape around the light. The end result was this beautiful headlight cover.


Also While I the headlight disassembled, I took apart the projector shroud and did the "Shadow Projector" DIY I did.


Reassemble everything and now you have a French Hi Beam.
Last edited by eurohb; 10-27-2011 at 05:44 AM..
Reply With Quote
  #3  
By eurohb on 02-14-2010, 09:03 AM
Default

Headlight Before without any Hi Beam or Shadow Projector Mod


Lights with the French Hi Beam and Shadow Projector Mod


How they Look on my car during the day.


Will post more pics upon request.

BTW Thank you to Alec (Slow Ti) For letting me use his new headlights as a demonstration, he paypal'd me to do his headlights and I did. If you would like for me to do them please PM me and we can discuss everything.
Last edited by eurohb; 10-27-2011 at 05:48 AM..
Reply With Quote
  #4  
By MacUser on 02-14-2010, 11:37 AM
Default

You're awesome! Thanks!
Reply With Quote
  #5  
By MacUser on 03-06-2010, 01:51 AM
Default

If I get tired of the yellow, can it be removed?
Reply With Quote
  #6  
By lysergicsurfer on 03-06-2010, 11:26 PM
Default

I tinted my clear coners and fogs. I was able to wetsand the tint off and they came out looking like new. They were plastic though, since it is glass you should be able to with a high strength paint remover. Maybe alot of work but I am sure your can get is cyrstal clear again.
Reply With Quote
  #7  
By MacUser on 03-07-2010, 01:22 AM
Default

Thanks! That's what I was thinking. I ordered my new headlights ... I'm getting excited!
Reply With Quote
  #8  
By eurohb on 03-10-2010, 10:59 PM
Default

yup i used paint thinner and came right off
Reply With Quote
  #9  
By Superlouis on 03-20-2010, 02:24 AM
Default

wow this looks awesome! i will definitely give it a try when i pick up some depo headlights..
Reply With Quote
  #10  
By Philly on 03-20-2010, 02:43 AM
Default

Using Lamin-x instead of paint is a good alternative if your on the fence with this one and may want to easily reverse it later.

good diy! did your headlights come prewired for city lights? if not, what did you do? I know mine are capable but havn't got around to it!
Reply With Quote
  #11  
By eurohb on 03-23-2010, 09:43 PM
Default

Quote:
Originally Posted by Philly View Post
Using Lamin-x instead of paint is a good alternative if your on the fence with this one and may want to easily reverse it later.

good diy! did your headlights come prewired for city lights? if not, what did you do? I know mine are capable but havn't got around to it!
LaminX over time tends to come off trust me i have had used laminX before and was unsatisfied. The paint is easy to remove, use a little paint thinner and viola its removed.

Thank you it took me a while to get around into doing my DIY ha i was lazy and mine came prewired but i had city lights on my OEM headlamps i just did it myself, i do not like angel eyes and prefer city's over them anytime.
Reply With Quote
  #12  
By Superlouis on 05-09-2010, 07:39 AM
Default

i was scared to try this..but it came out great! just got my depo headlights today..actually the reason i ordered them was cuz i saw this and had to have it lol
bought the stained glass aerosol before i got the headlights so i would be ready..found it at michaels arts store for $10..
will post some pics when i get the chance..definately was feeling this over the angel eyes for my ti
Reply With Quote
  #13  
By Superlouis on 05-09-2010, 08:38 PM
Default

here we are..i know the yellow fogs arent for everyone lol but i like the look..

Photobucket
Photobucket
Reply With Quote
  #14  
By eurohb on 05-10-2010, 04:51 AM
Default

wow bro looks really good! glad you went a better route then angel eyes
Reply With Quote
Comment

Bookmarks


Currently Active Users Viewing This Tutorial: 1 (0 members and 1 guests)
 

Posting Rules
You may not post new threads
You may not post replies
You may not post attachments
You may not edit your posts

BB code is On
Smilies are On
[IMG] code is On
HTML code is On

Forum Jump

Similar Threads
Tutorial Tutorial Starter Category Comments Last Post
French compact rally car ScottishTI Lounge 18 05-12-2009 04:27 AM
Hi-beam bulbs into lo-beam sockets bmvw Electrical 7 04-18-2009 10:18 PM
french fogs and hid? manofgun Exterior 1 01-18-2009 05:33 PM
fs: french fogs jeff318 US and North America 1 11-29-2008 01:16 PM
Dip Beam Rob Gibson Lounge 1 03-29-2005 07:12 AM


All times are GMT +1. The time now is 05:59 AM.


.
Powered by site supporters
vBulletin Version 3.8.8
Copyright ©2000 - 2024, Jelsoft Enterprises Ltd.
Copyright ©1999 - 2024, 318ti.org

Tutorial powered by GARS 2.1.8m ©2005-2006
© vBadvanced CMPS v3.2.2
[page compression: 91.32 k/123.25 k (25.90%)]

318ti.org does not warrant or assume any legal liability or responsibility for the accuracy, completeness, or usefulness of any information or products discussed.