 » Site Navigation » Site Navigation | | | | » Recent Threads | | | looove 04-16-2024 01:18 PM 04-16-2024 01:18 PM 0 Replies, 1,815 Views | |  |  |  | |  03-05-2016, 04:00 PM 03-05-2016, 04:00 PM | #1 | | Senior Member Join Date: Apr 2007 Location: Elizabeth City, NC Posts: 3,877 |  Track ti build (M52) Track ti build (M52)
I've worked my way up the HPDE ladder and I'm at a point where I'd like to take the car into time trials or possibly racing. Either of those would require more power to be competitive.
I'd seriously looked into an M44 ITB but costs were fairly prohibitive and there were no guarantees on the gains.
Anyway, M52 swap is tried and true, I am looking for reliability and reliable power on track.
Last month I picked up the motor (M52b28), wiring harness, DME, manifolds, PS pump, alternator, gauge cluster, airbox, battery cables, and FPR from a 328 part-out. I plan to refresh the motor with new gaskets and seals, clean it up, and simplify as much as I can before swapping it in.
Plans for the motor:
- Beisan vanos seals
- IJ crank scraper
- Valve cover gaskets
- Oil filter housing gasket and freeze plug fix
- New timing chain tensioner spring
- Rear main seal
- Achilles motorsport oil pump shaft upgrade
- Achilles motorsport reinforced oil pick-up tube
- Check/rebuild the oil pump
- Gripforce stage 2 chromoly flywheel
- A/C delete
- Water pressure sender
- Oil temp sender
- Euro expansion tank
- Z3 S54 radiator
- Aluminum tstat housing
- MMW Swap tune
and probably more, the snowballing has taken effect.
To get the car running I'm just planning on using the stock 328 midpipe and adapting it to a Z3 3.0i catback section. Eventually I am going to build a high flow, 2.5" single pipe out the back.
I'll try to update the thread as I make progress. __________________ ~Dave~
98 328ti Morea Grun slicktop
11 128i space gray slicktop
13 JGC WK2 Deep Cherry
Search | RealOEM |  |  | | 03-06-2016, 01:28 AM | #2 | | Senior Member Join Date: May 2013 Location: Seattle Posts: 513 |
This is a great idea. I'd like to follow this thread.
I am planning a M52 build too and your list there looks smart. Remember, imitation is the highest form of flattery! | | | | | 03-11-2016, 11:53 PM | #3 | | Senior Member Join Date: Apr 2007 Location: Elizabeth City, NC Posts: 3,877 |
Thanks Bradestar, glad it might prove useful to someone (or at least be entertaining), lol. This thread needs more pictures...what I'm starting with:    Car Specs: - M44: Midnight tune, COP conversion, Compact Cup airbox mod, highflow midpipe, remus catback - TC Kline SA Coilovers w/ vorshlag camber plates - 28mm Eibach front bar and stock 14mm rear bar - 3.73 LSD 40% lockup - 205/50-15 Maxxis RC1 - Kirk Racing Rollbar - Kirkey Roadrace seats w/ custom seat mounts and G Force harnesses - 286mm vented front rotors, stock rear rotors, stock calipers, PFC 08 brake pads - Weight: 2860lb with me in it and half tank of gas And the new (to me) motor: Day I picked it up 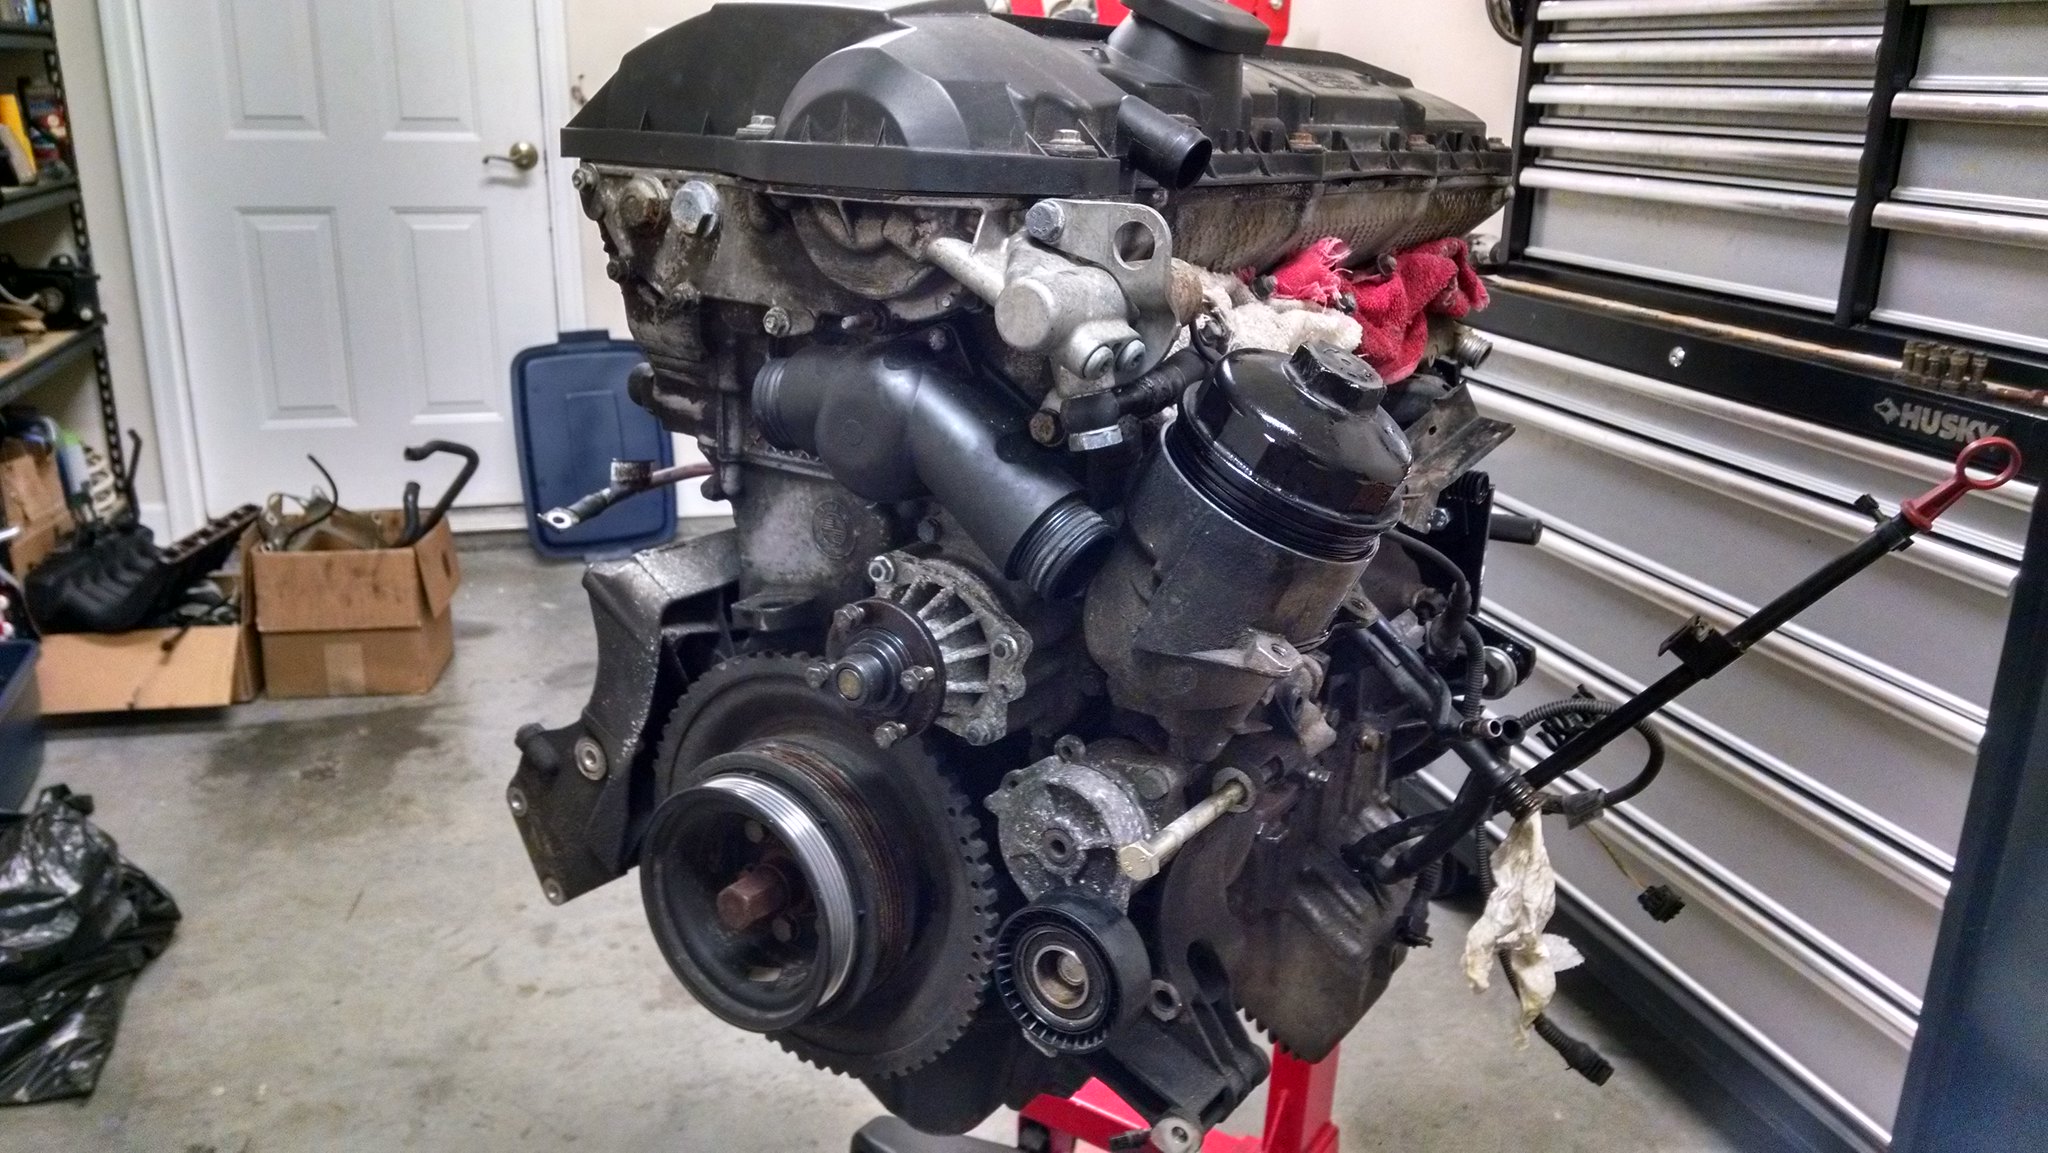 Current(ish) state 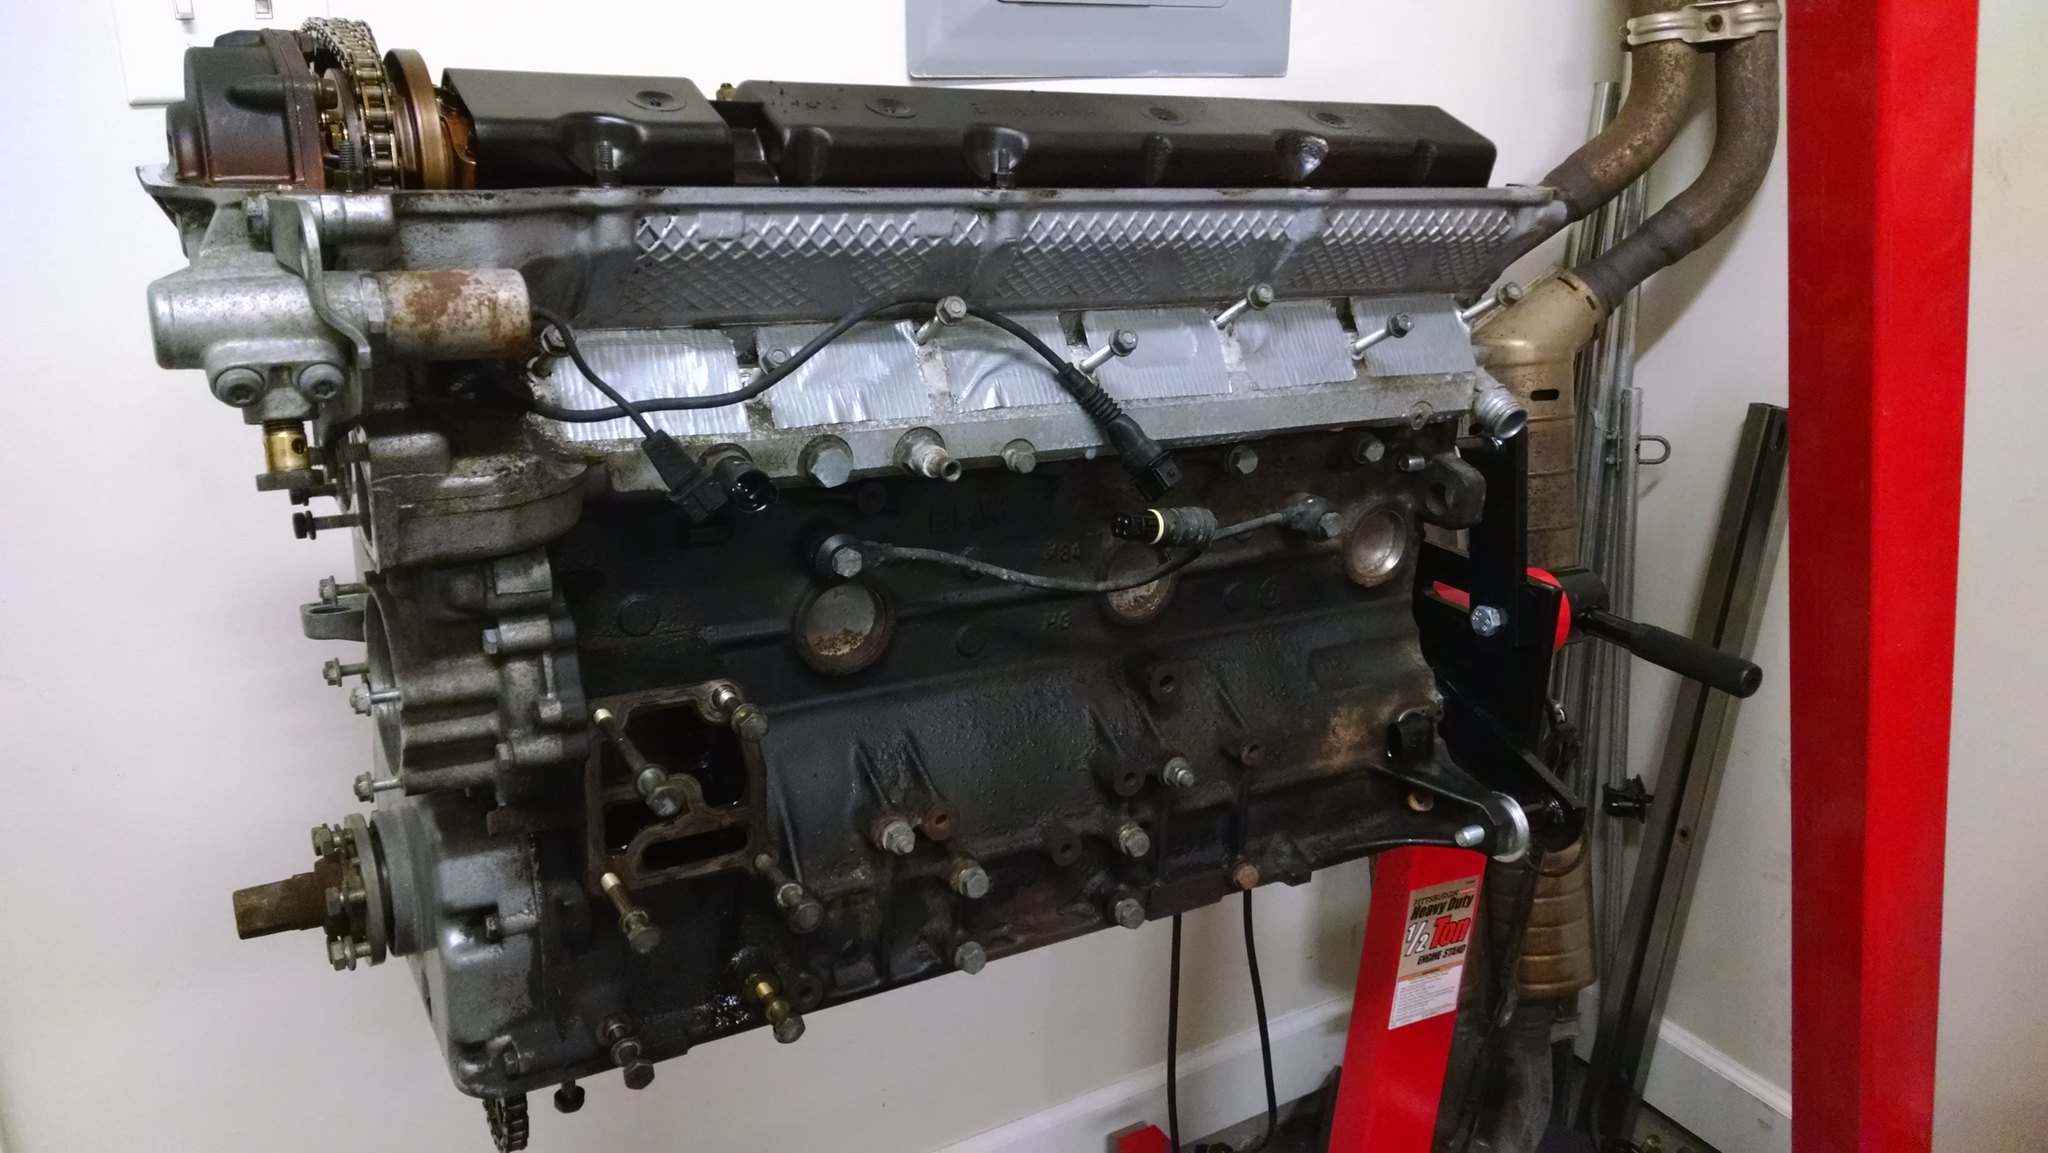 __________________ ~Dave~
98 328ti Morea Grun slicktop
11 128i space gray slicktop
13 JGC WK2 Deep Cherry
Search | RealOEM
Last edited by spidertri; 03-12-2016 at 05:00 AM. | | | | | 03-13-2016, 01:13 PM | #4 | | Senior Member Join Date: Aug 2007 Location: Monterey, CA Posts: 770 |
What wheels are those? | | | | | 03-13-2016, 03:42 PM | #5 | | Senior Member Join Date: Apr 2007 Location: Elizabeth City, NC Posts: 3,877 |
TRM C1 15x8 et20. E30 M3 spec, I had to roll the rear fenders to get them to fit. Fronts were no problem.
Edit - side note, I've bolted them on my Z3 which has 300mm rotors and they clear those brakes as well. __________________ ~Dave~
98 328ti Morea Grun slicktop
11 128i space gray slicktop
13 JGC WK2 Deep Cherry
Search | RealOEM
Last edited by spidertri; 03-13-2016 at 03:47 PM. | | | | | 03-15-2016, 03:37 AM | #6 | | Senior Member Join Date: Apr 2007 Location: Elizabeth City, NC Posts: 3,877 |
I'm somewhat terrible at taking pictures of progress but I've been working along trying to get the motor back together. The motor came out of a 1997 328i automatic convertible with 155k miles (my ti is about to hit 211k). I pulled the oil pan off to get access to the oil pump, oil pickup tube, and crankshaft. IJ crank scrapers needed me to take pictures of the crankshaft to ensure they sent me the correct scraper profile. (Still waiting on that to arrive) 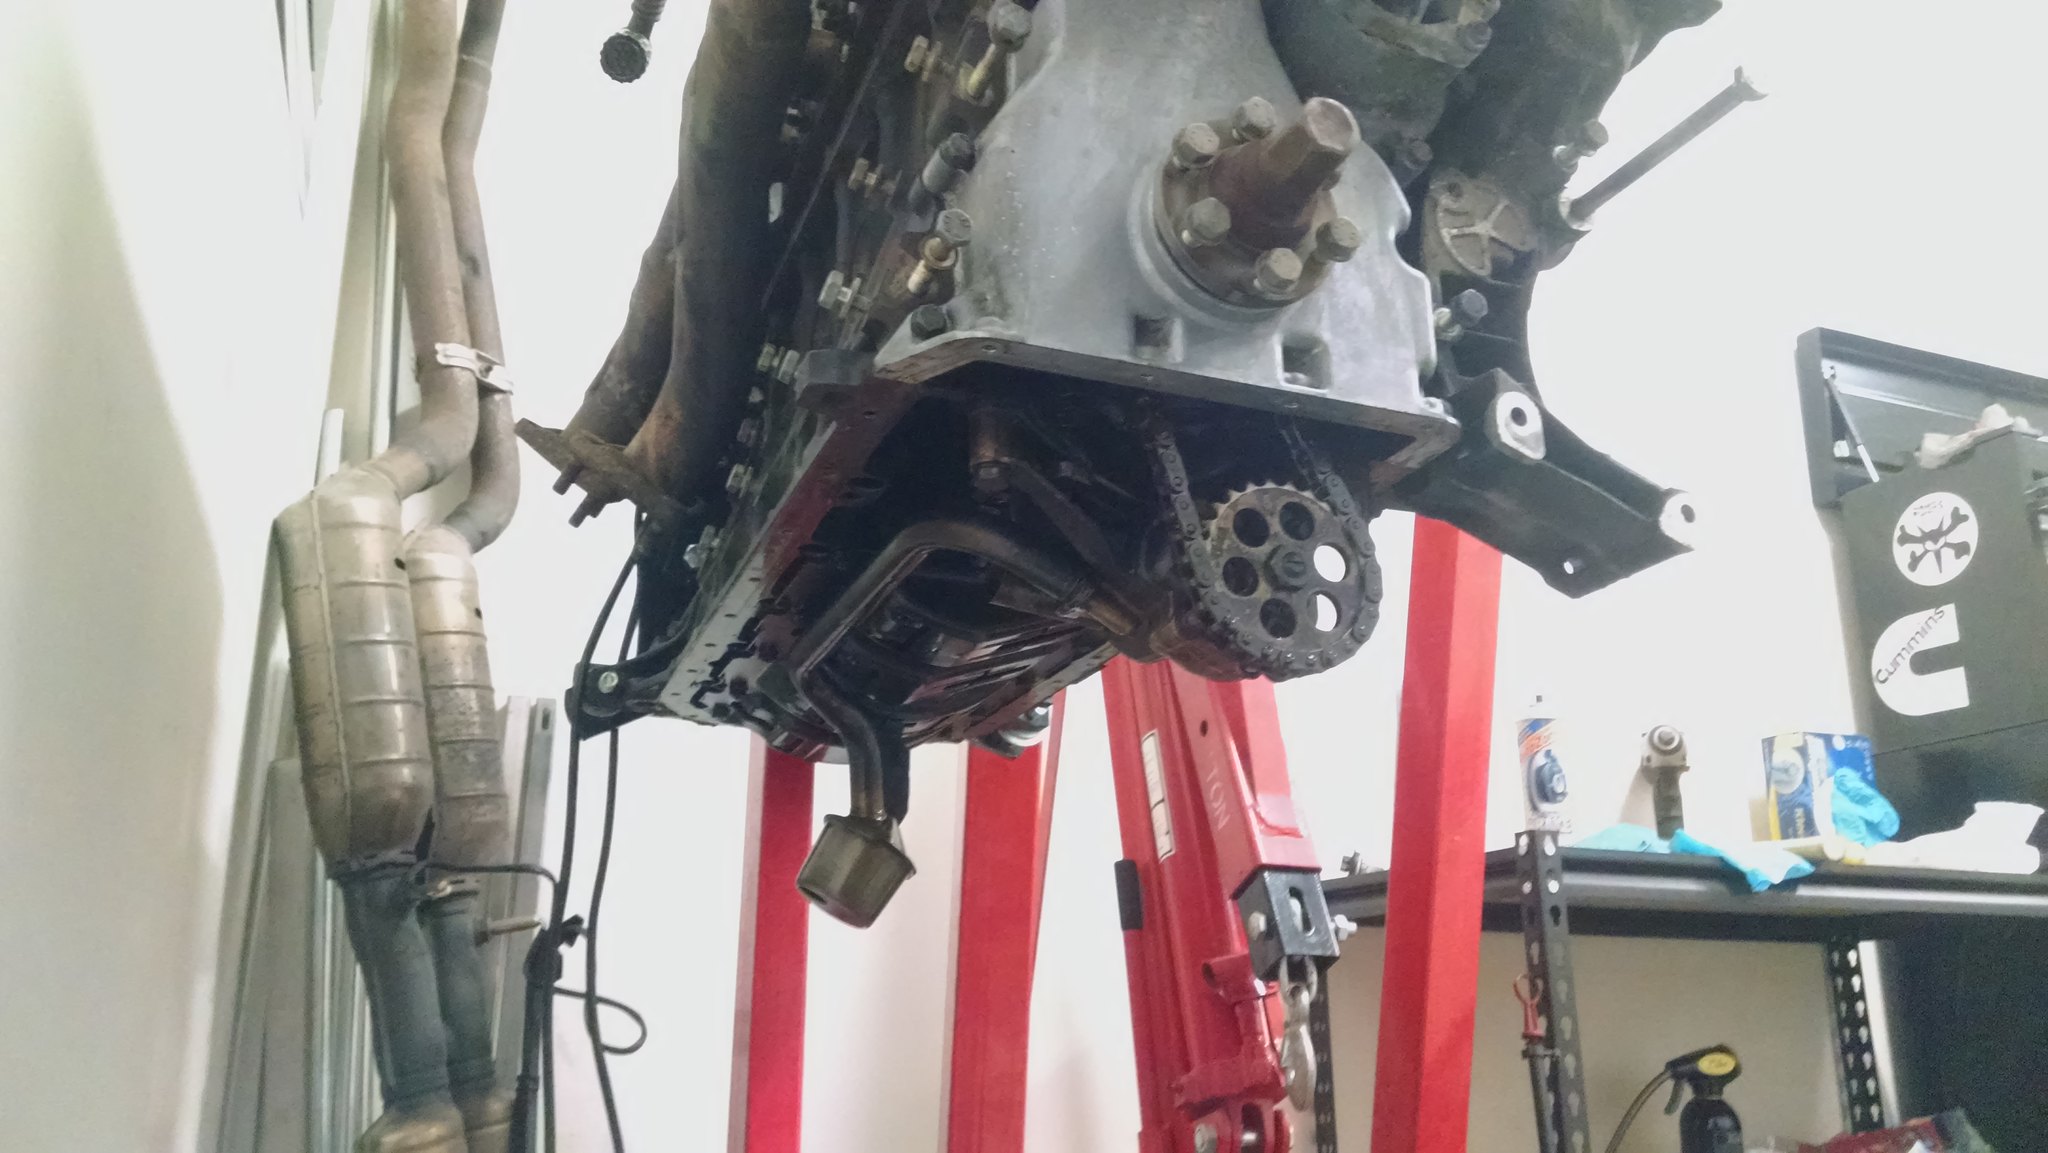 In the meantime, I pulled the valve cover and noticed the wonderful VCG job the previous person did. They just missed a spot tucking the gasket into the groove, no biggie. I'm happy that there appears to be some kind of maintenance done on this motor.  With the valve cover off it was the prime time to replace the VANOS seals and bearing ring (rattle kit). I rented the timing tools from bimmertoolrental.com and got everything pretty quickly. I had to reinstall the harmonic balancer without the AC pulley (use 6x M8x12 grade 8.8 bolts) to set the crank at TDC. 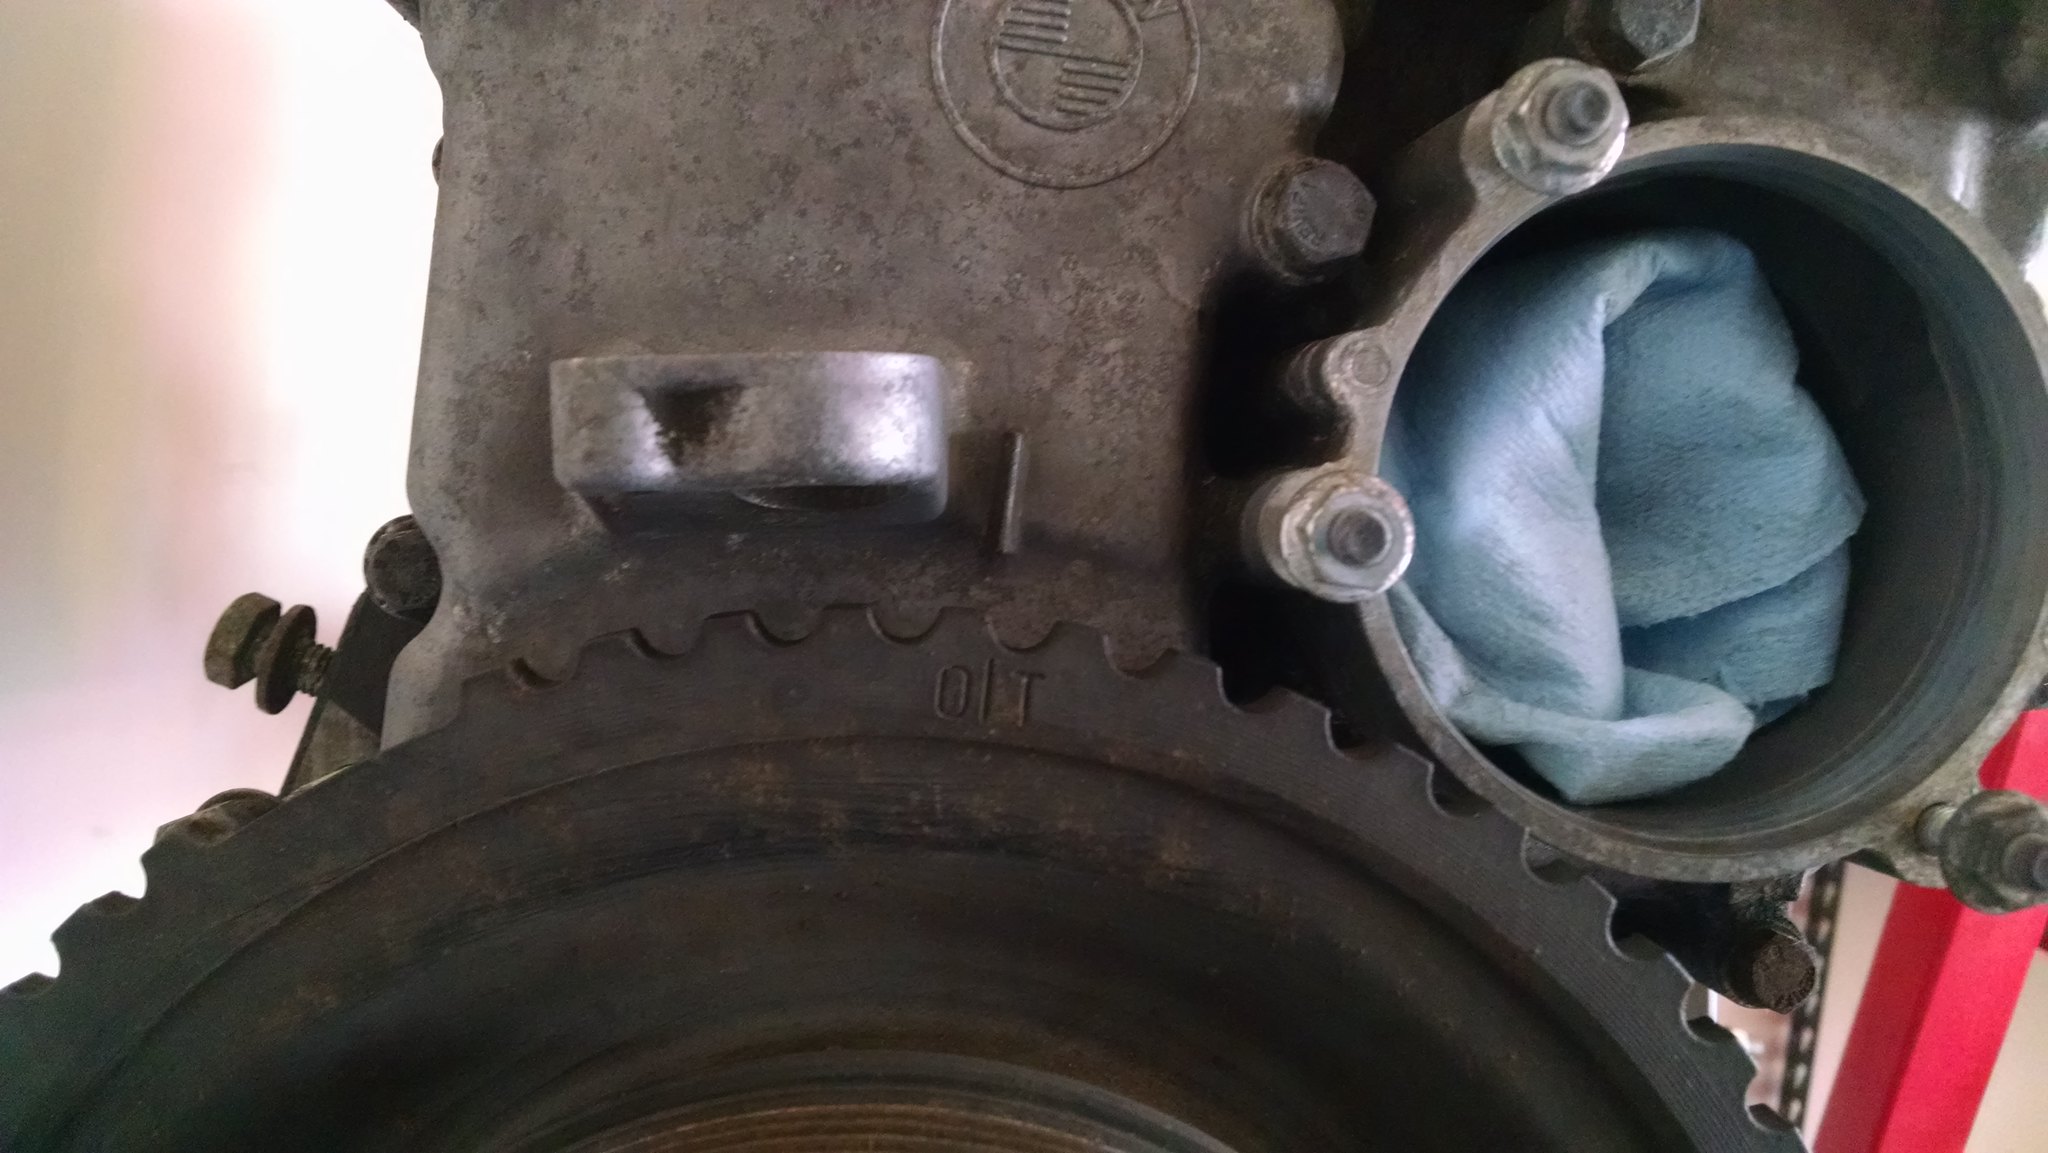 The cam blocks dropped right in and it was ready to go. Of course it was at that point I realized I didn't have an E10 inverse torx so off to Advance Auto. 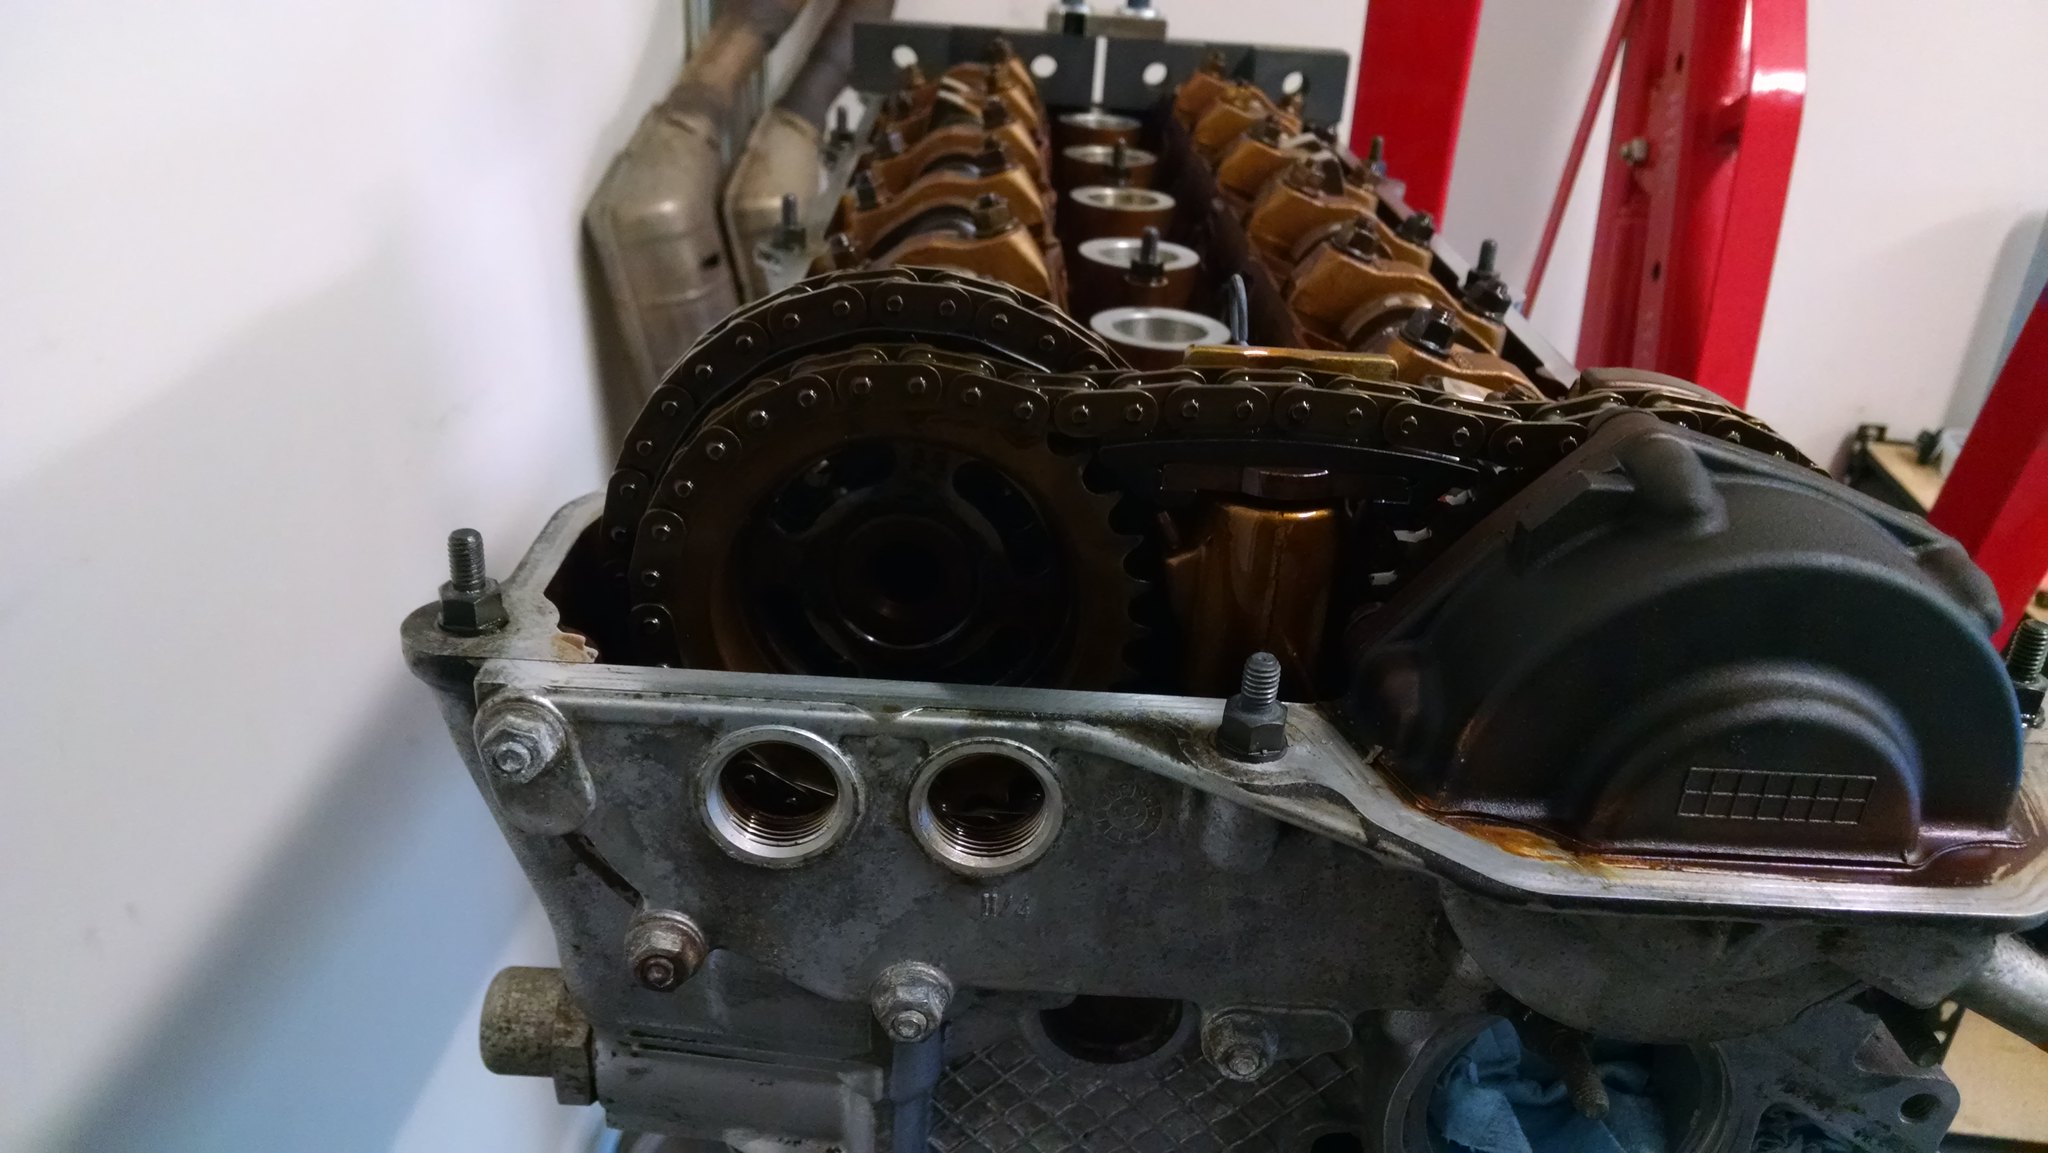 With the E10 everything came apart easily. The rattle kit actually went in without needing any adjusting, which was amazing, and the seals were easy to reinstall. Put it back together and tried to slowly turn the exhaust sprocket without missing any teeth on the intake gear. We'll see if that worked out when I fire it up, lol. 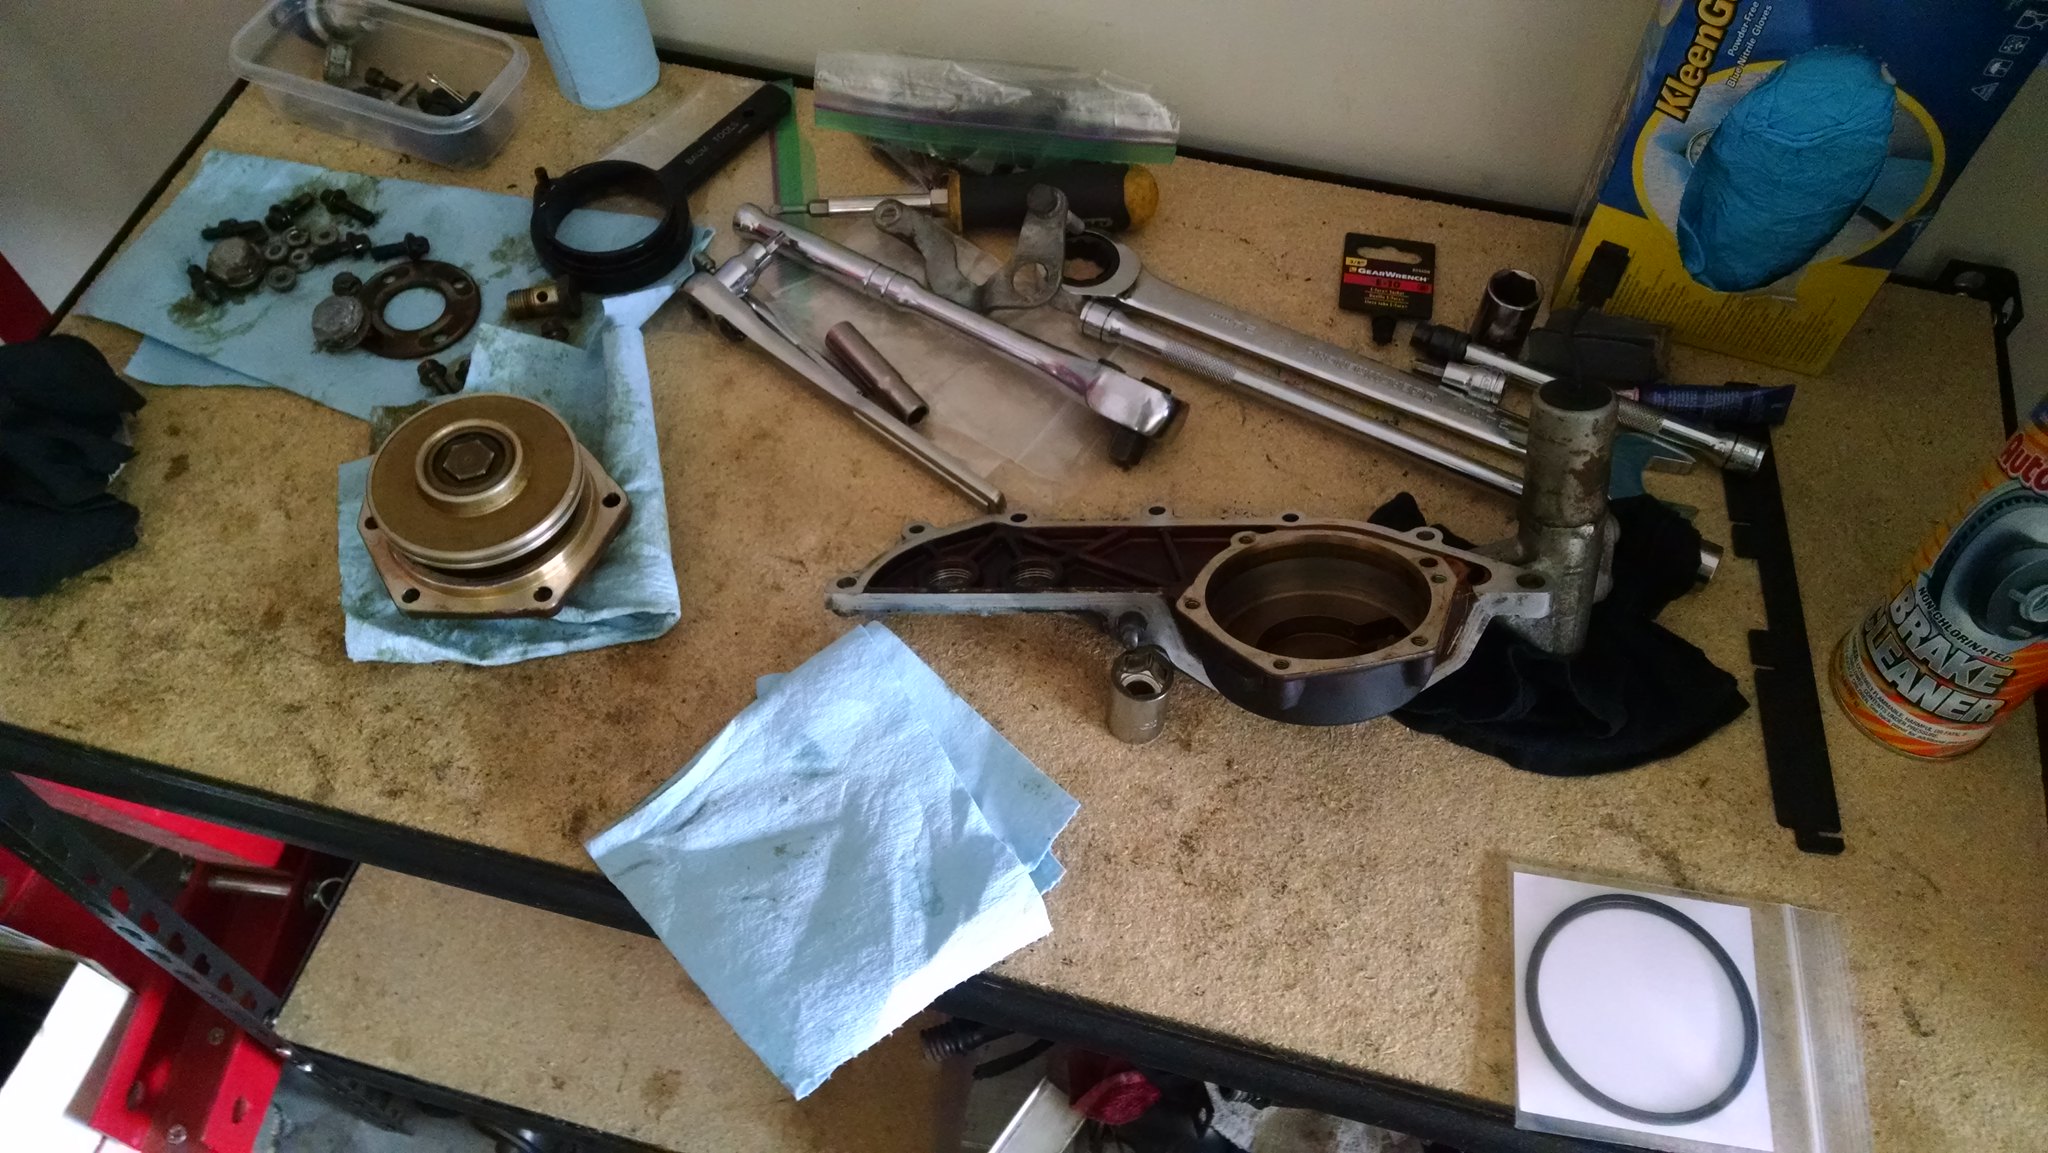 I have to take the oil pump shaft and thermostat housing to my friend's place, he's got a press and endmill. T-stat mating surface was hilariously not flat, no wonder people complain about them leaking. More updates soon. __________________ ~Dave~
98 328ti Morea Grun slicktop
11 128i space gray slicktop
13 JGC WK2 Deep Cherry
Search | RealOEM | | | | | 03-20-2016, 10:01 PM | #7 | | Senior Member Join Date: Apr 2007 Location: Elizabeth City, NC Posts: 3,877 |
So not too much happened this week. I took my thermostat housing and oil pump inner rotor to my buddy's shop to have the housing machined flat and the achilles pump shaft pressed into the inner rotor. I'm not usually an advocate of Uro brand parts, and we'll see what happens with this one, but I'd read that as long as the aluminum housing is sanded flat it will seal well. Well, I sanded and sanded and sanded, that sucker wasn't getting flat. Endmill got it flat, it took .006" off and then it was looking good. 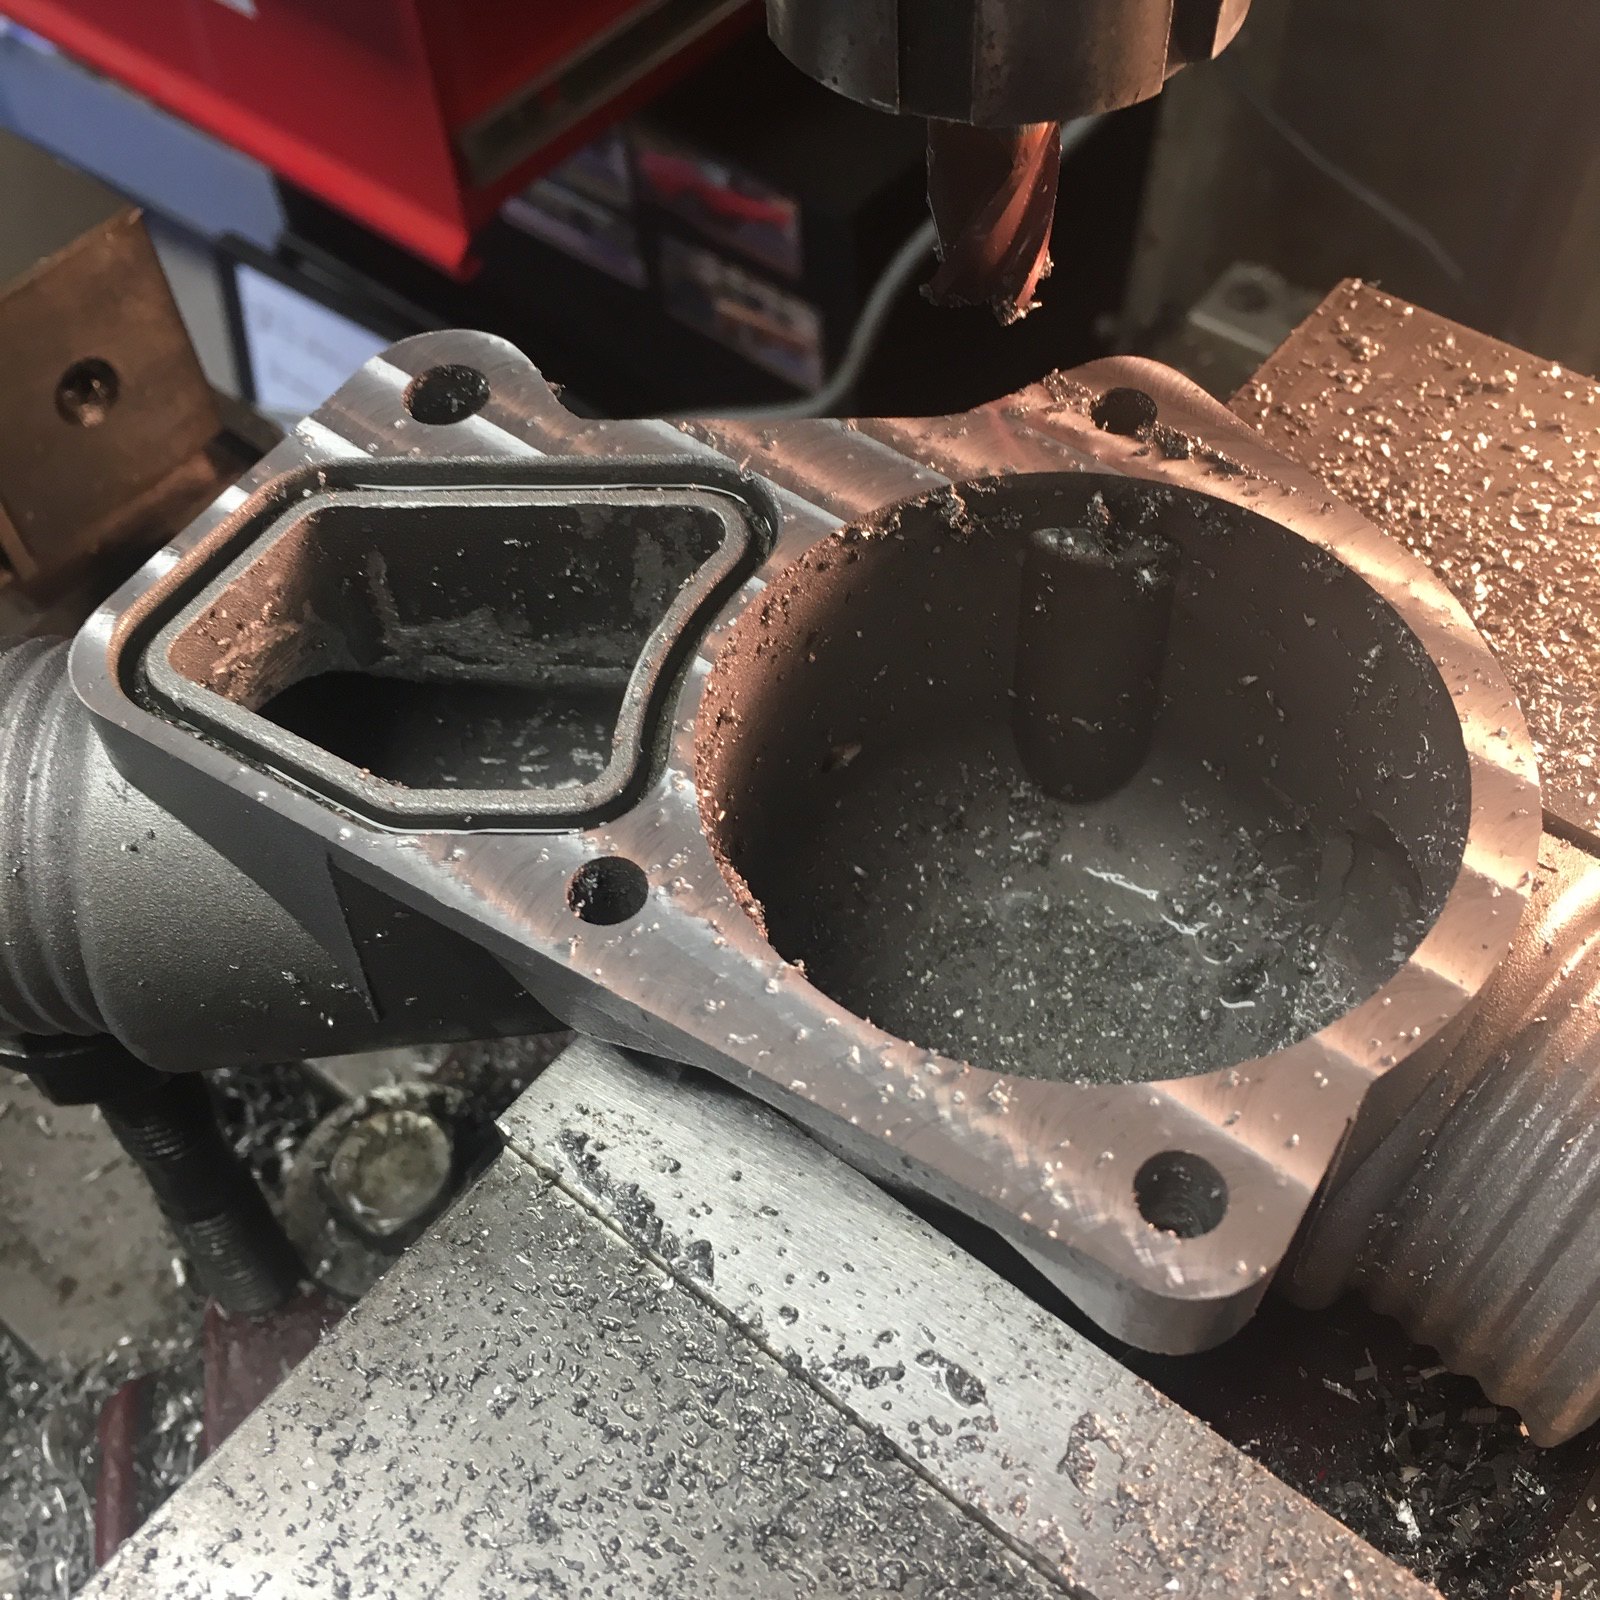 While the oil pump was apart I replaced the relief spring and Oring. Side note, this is the same spring that's used for the timing chain tensioner on the M52. Old spring was about 2mm shorter than the new one. 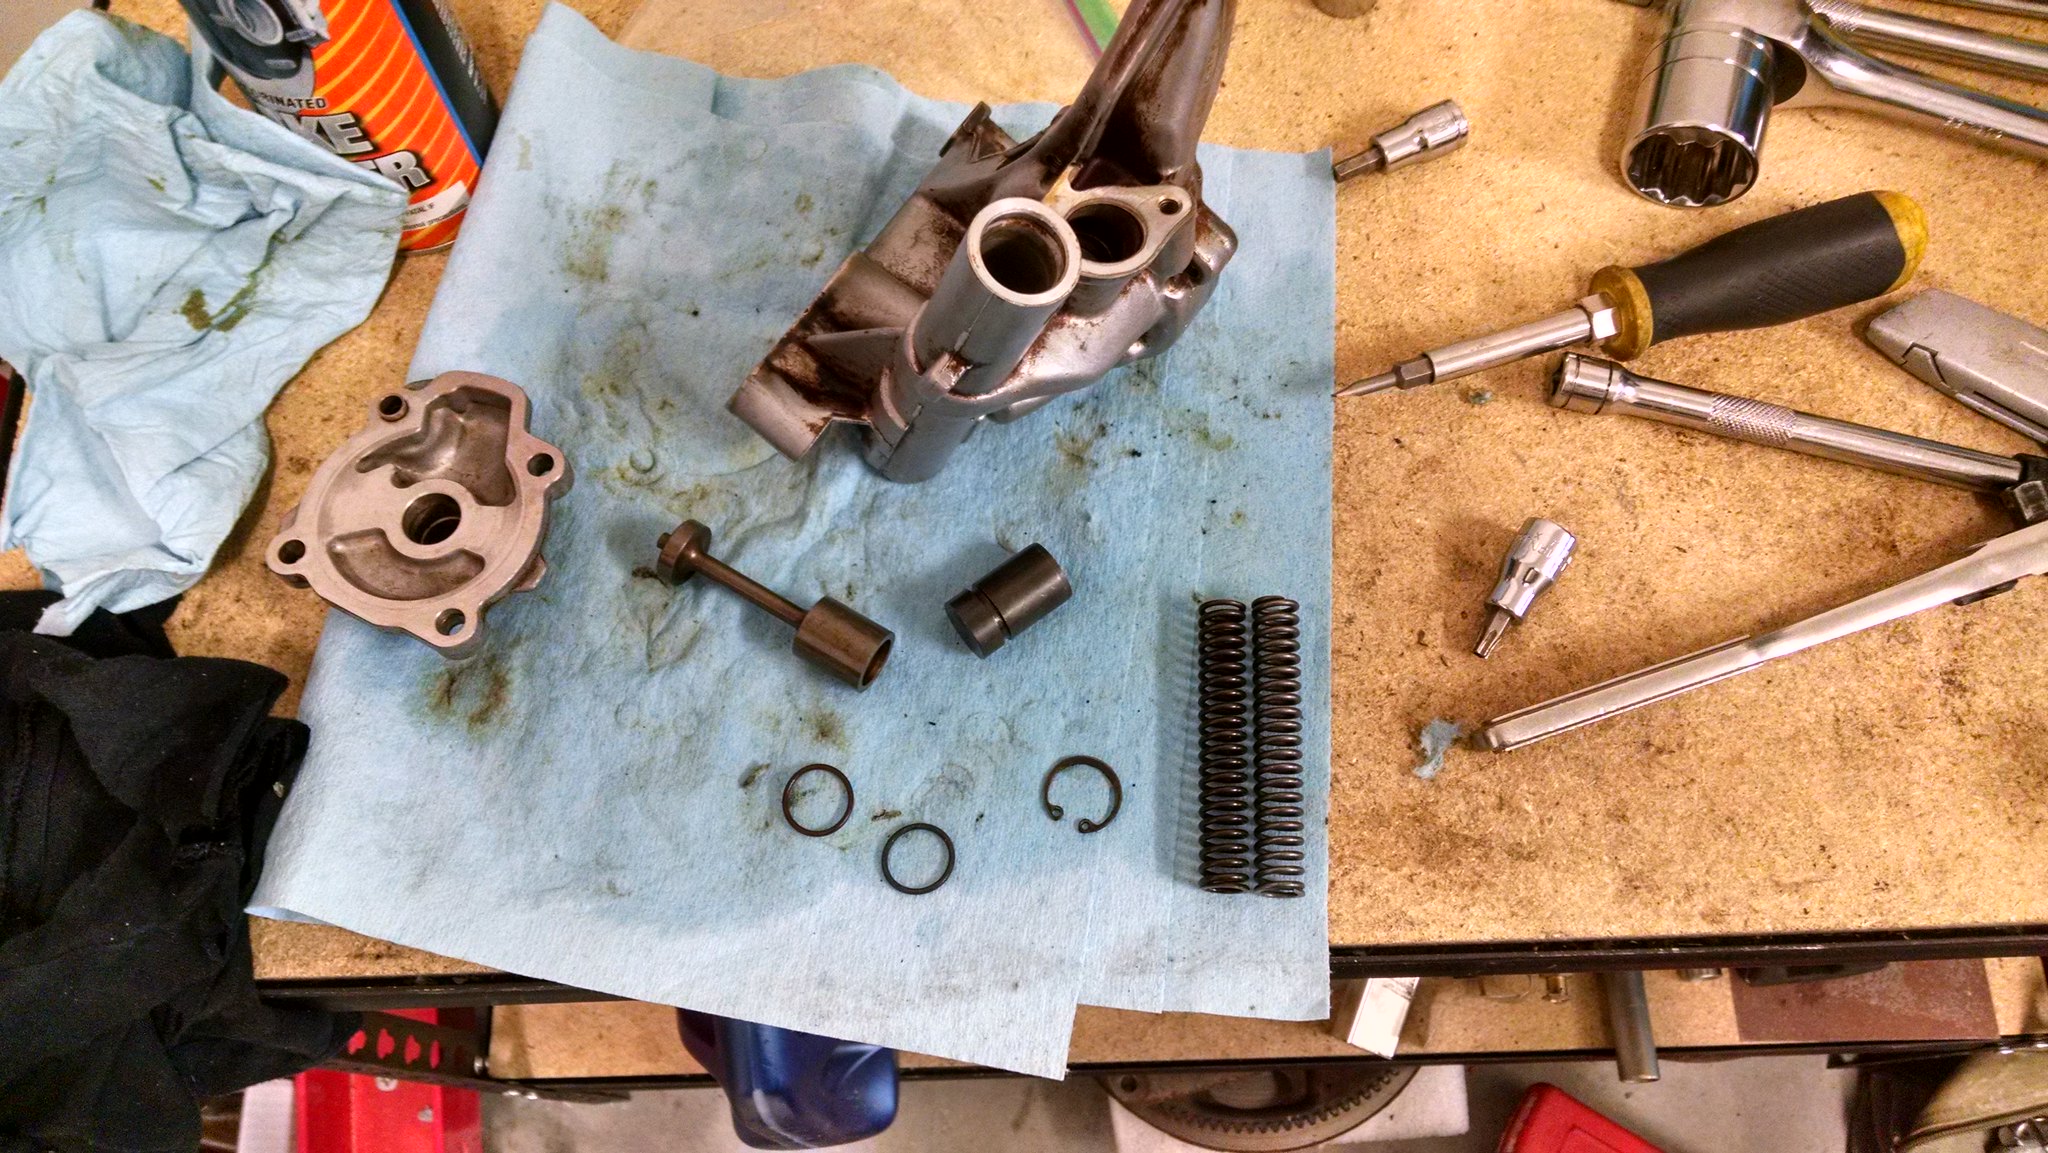 New achilles oil pump shaft pressed into the inner rotor.  Reassembled the internals. Checked the tolerances on the end float (.003"), outer rotor to housing (.004"), and inner to outer rotors (.003"). Never found what the specs should be but those don't seem unreasonable from other oil pump rebuilds. 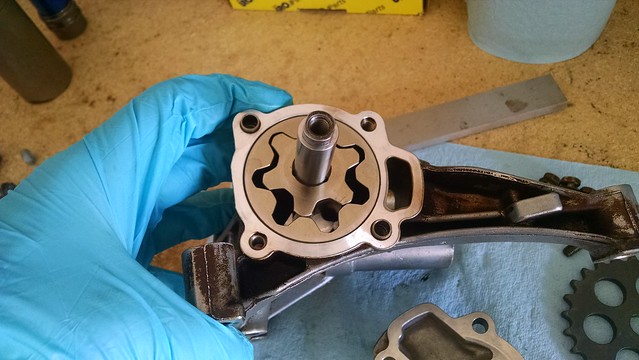 And the oil pump reassembled. 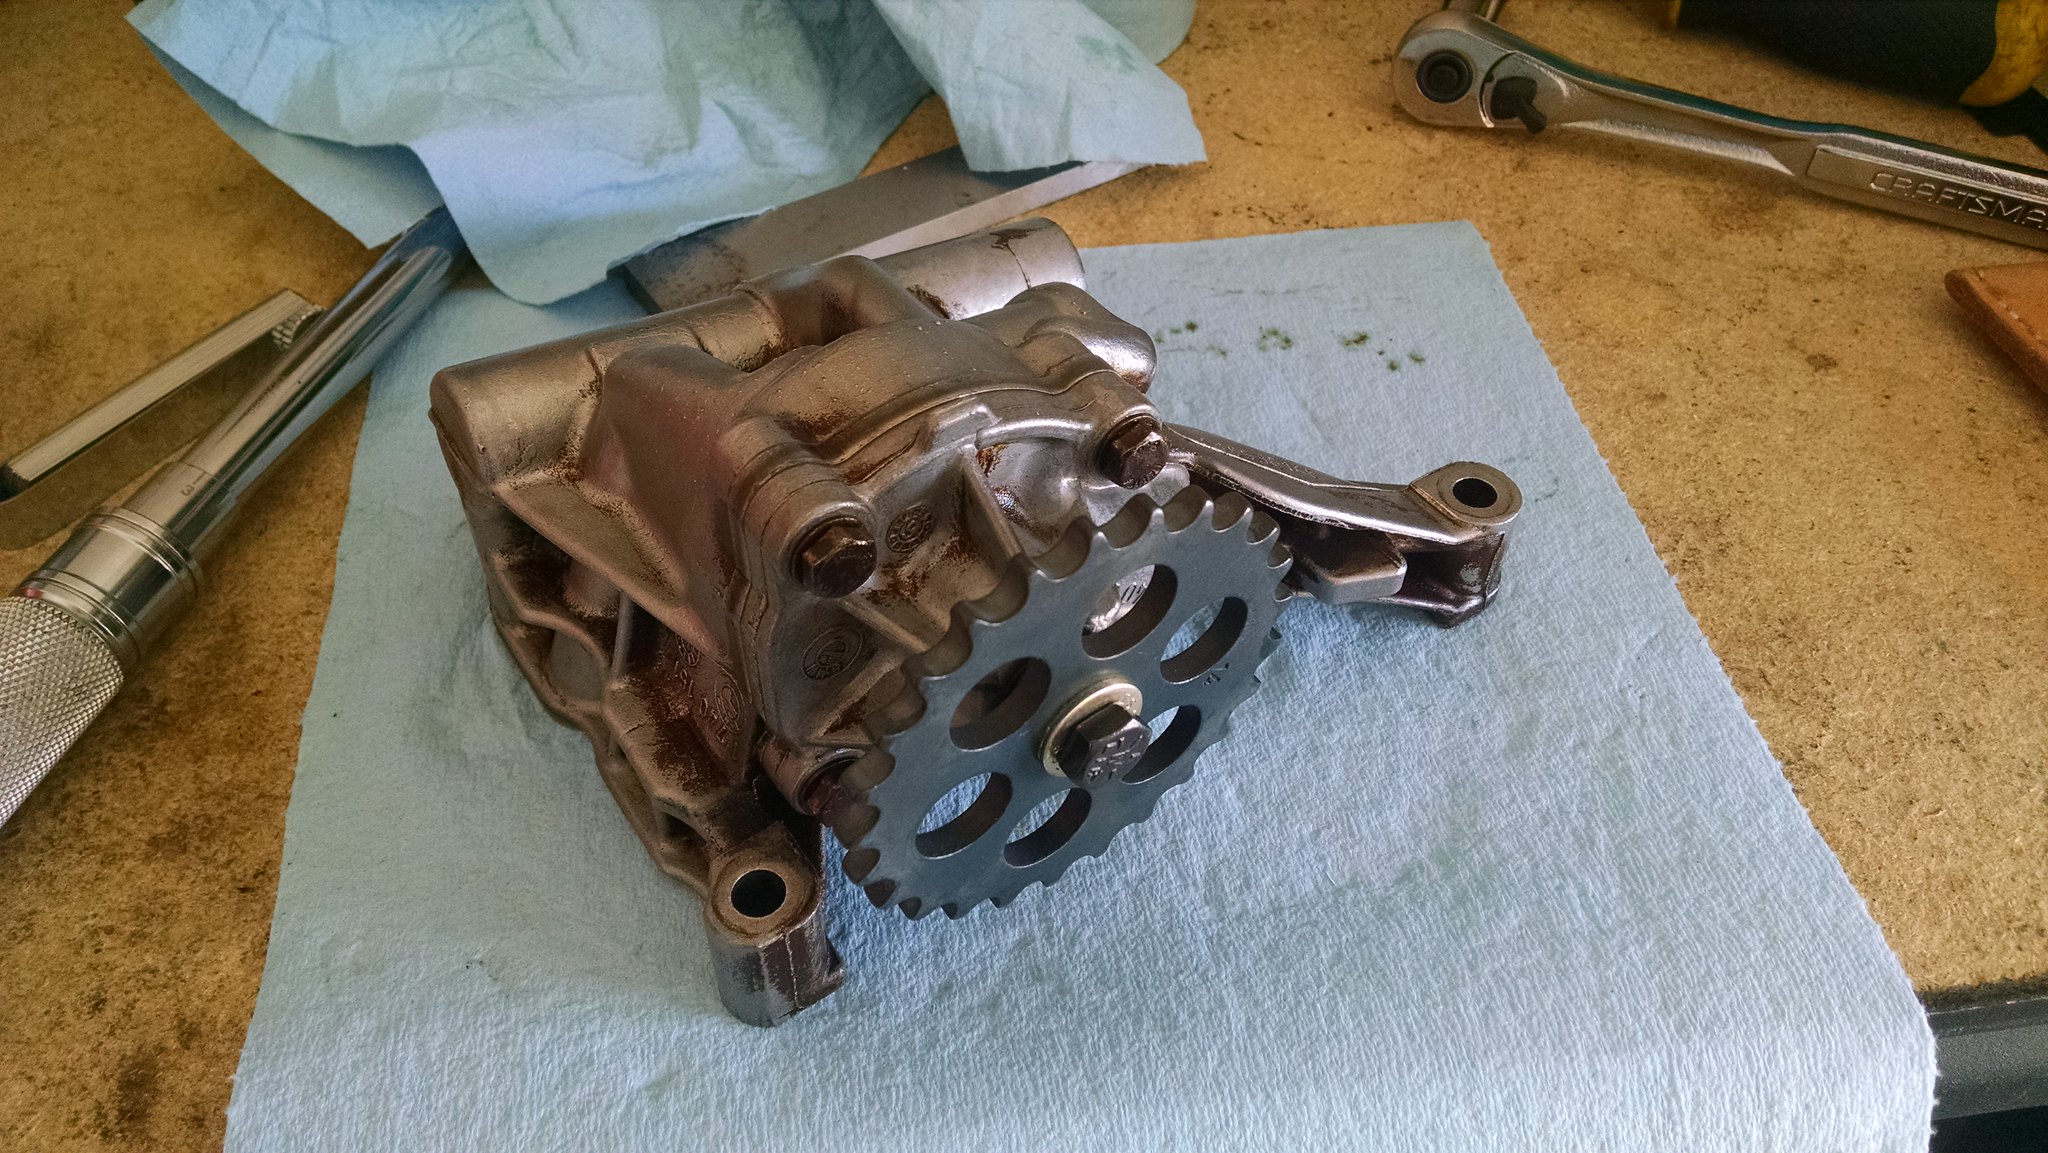 __________________ ~Dave~
98 328ti Morea Grun slicktop
11 128i space gray slicktop
13 JGC WK2 Deep Cherry
Search | RealOEM | | | | | 03-21-2016, 11:49 PM | #8 | | Moderator Join Date: Mar 2007 Location: Maryland Posts: 3,220 |
Very stoked for this build, subscrizzled | | | | | 03-26-2016, 12:47 PM | #9 | | Senior Member Join Date: Apr 2007 Location: Elizabeth City, NC Posts: 3,877 |
Hah thanks Cedric. While I've been waiting for the crank scraper to show up I prepped a few things on the car. Went back to stock headlights, my plastic ones weighed in at 3.2lb vs the glass DDM lights at 7.4lb. Not a huge difference but it's weight that is right on the nose and I gain a lot of space back. 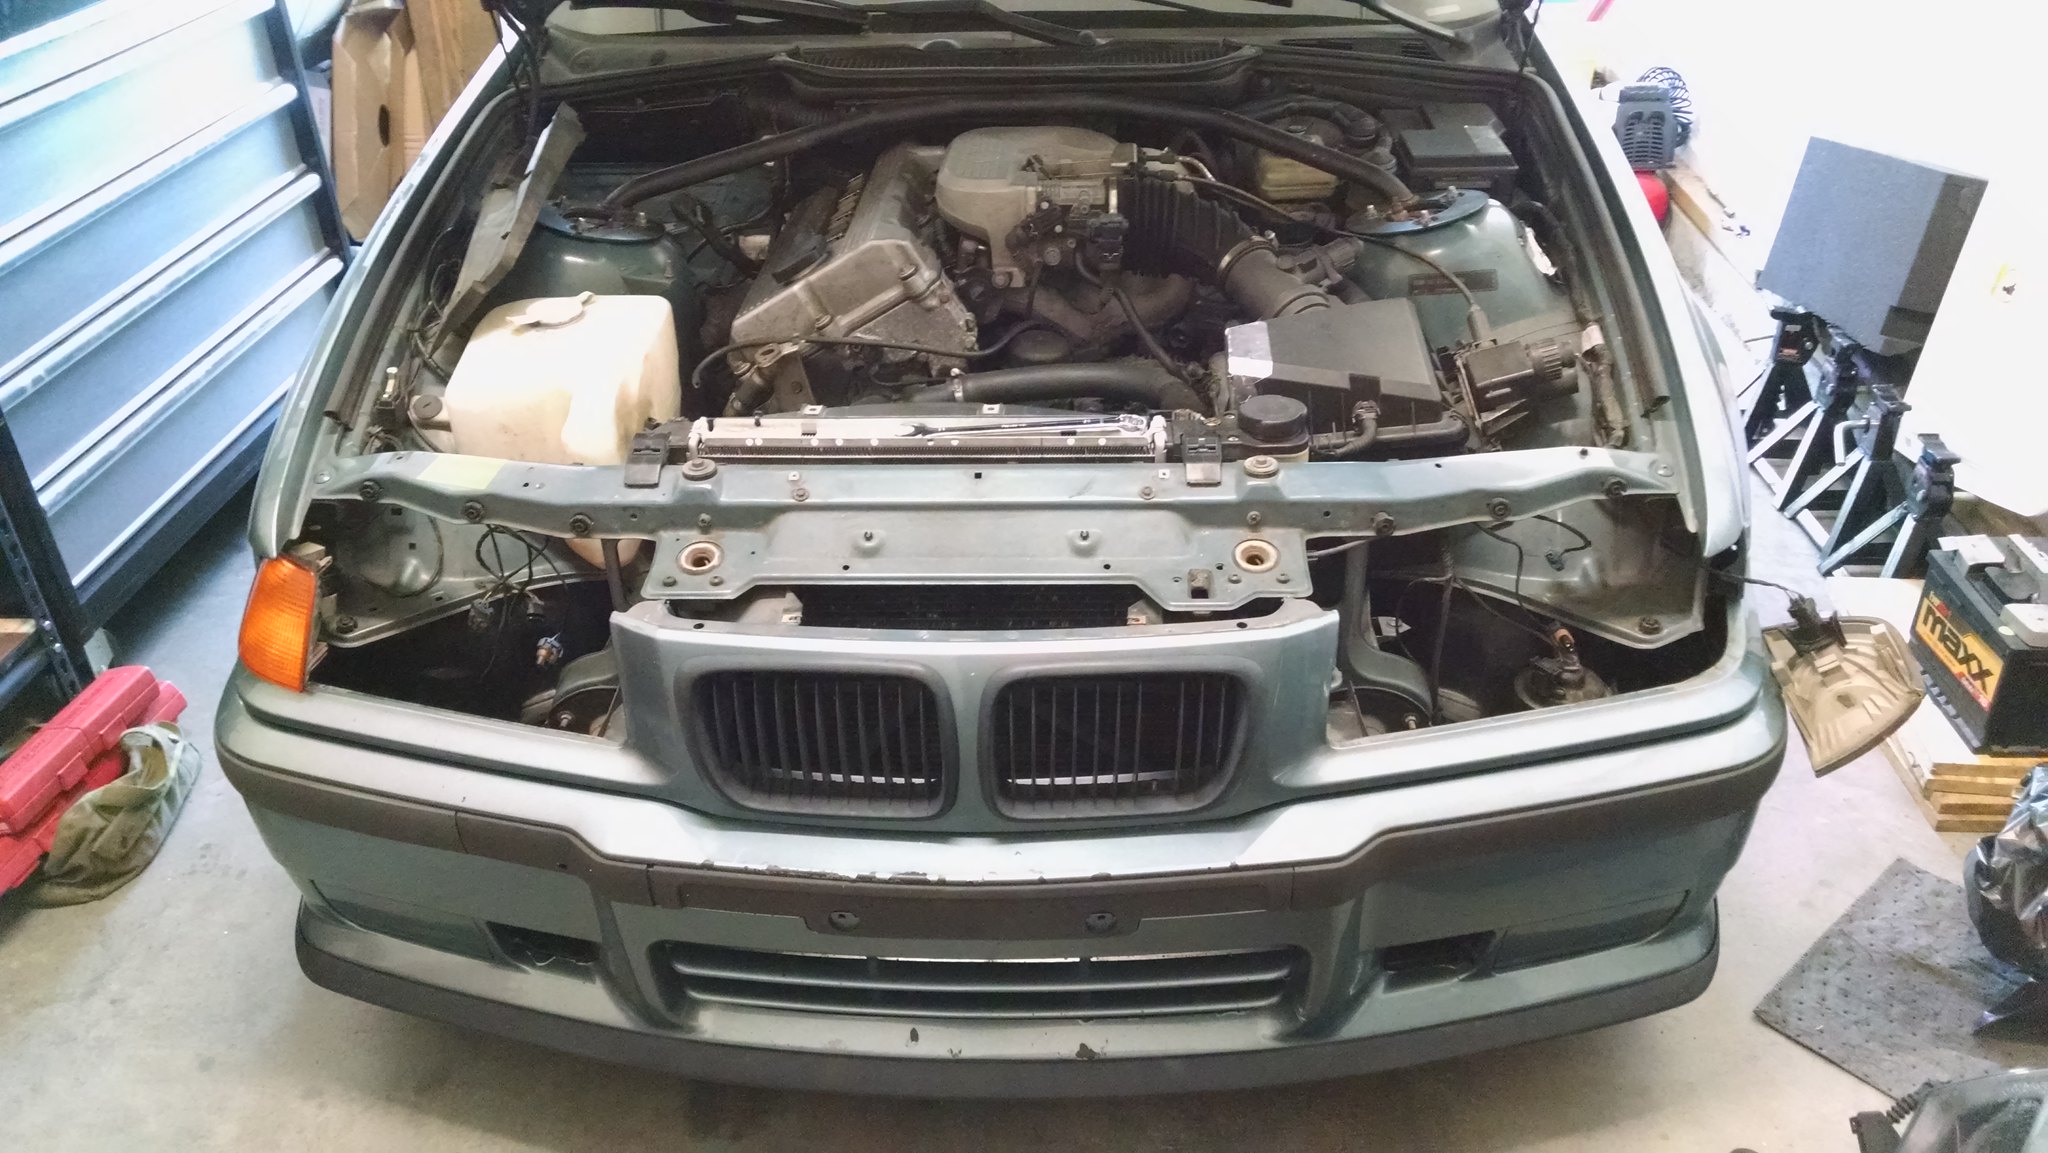 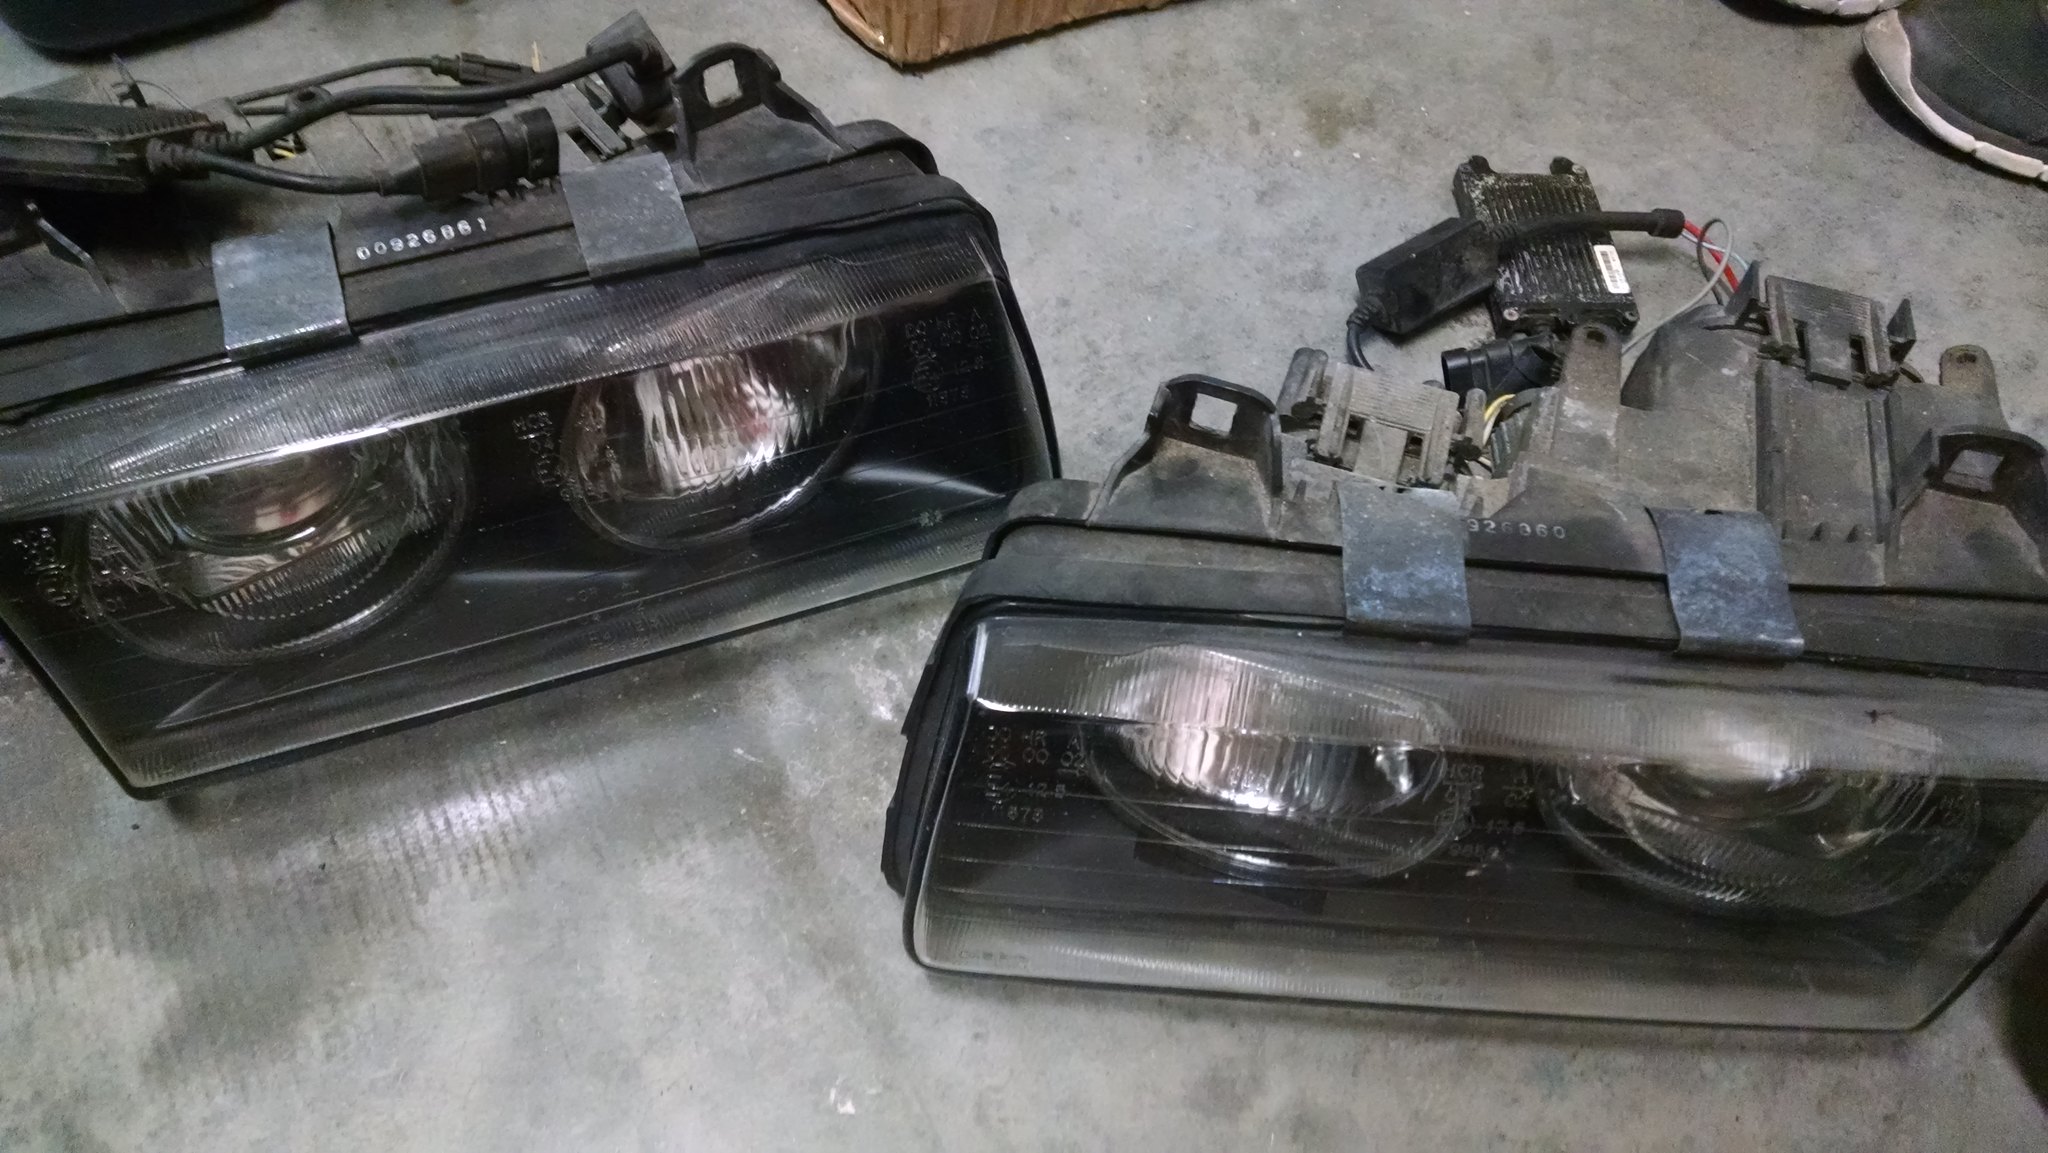 With the headlights out I was able to pull all of the AC system components. I didn't really need to remove everything at this point but I was interested in seeing how much space would be freed up. Only thing still in the car is the condenser. Once I have everything I'll weigh it to see what it comes in at. 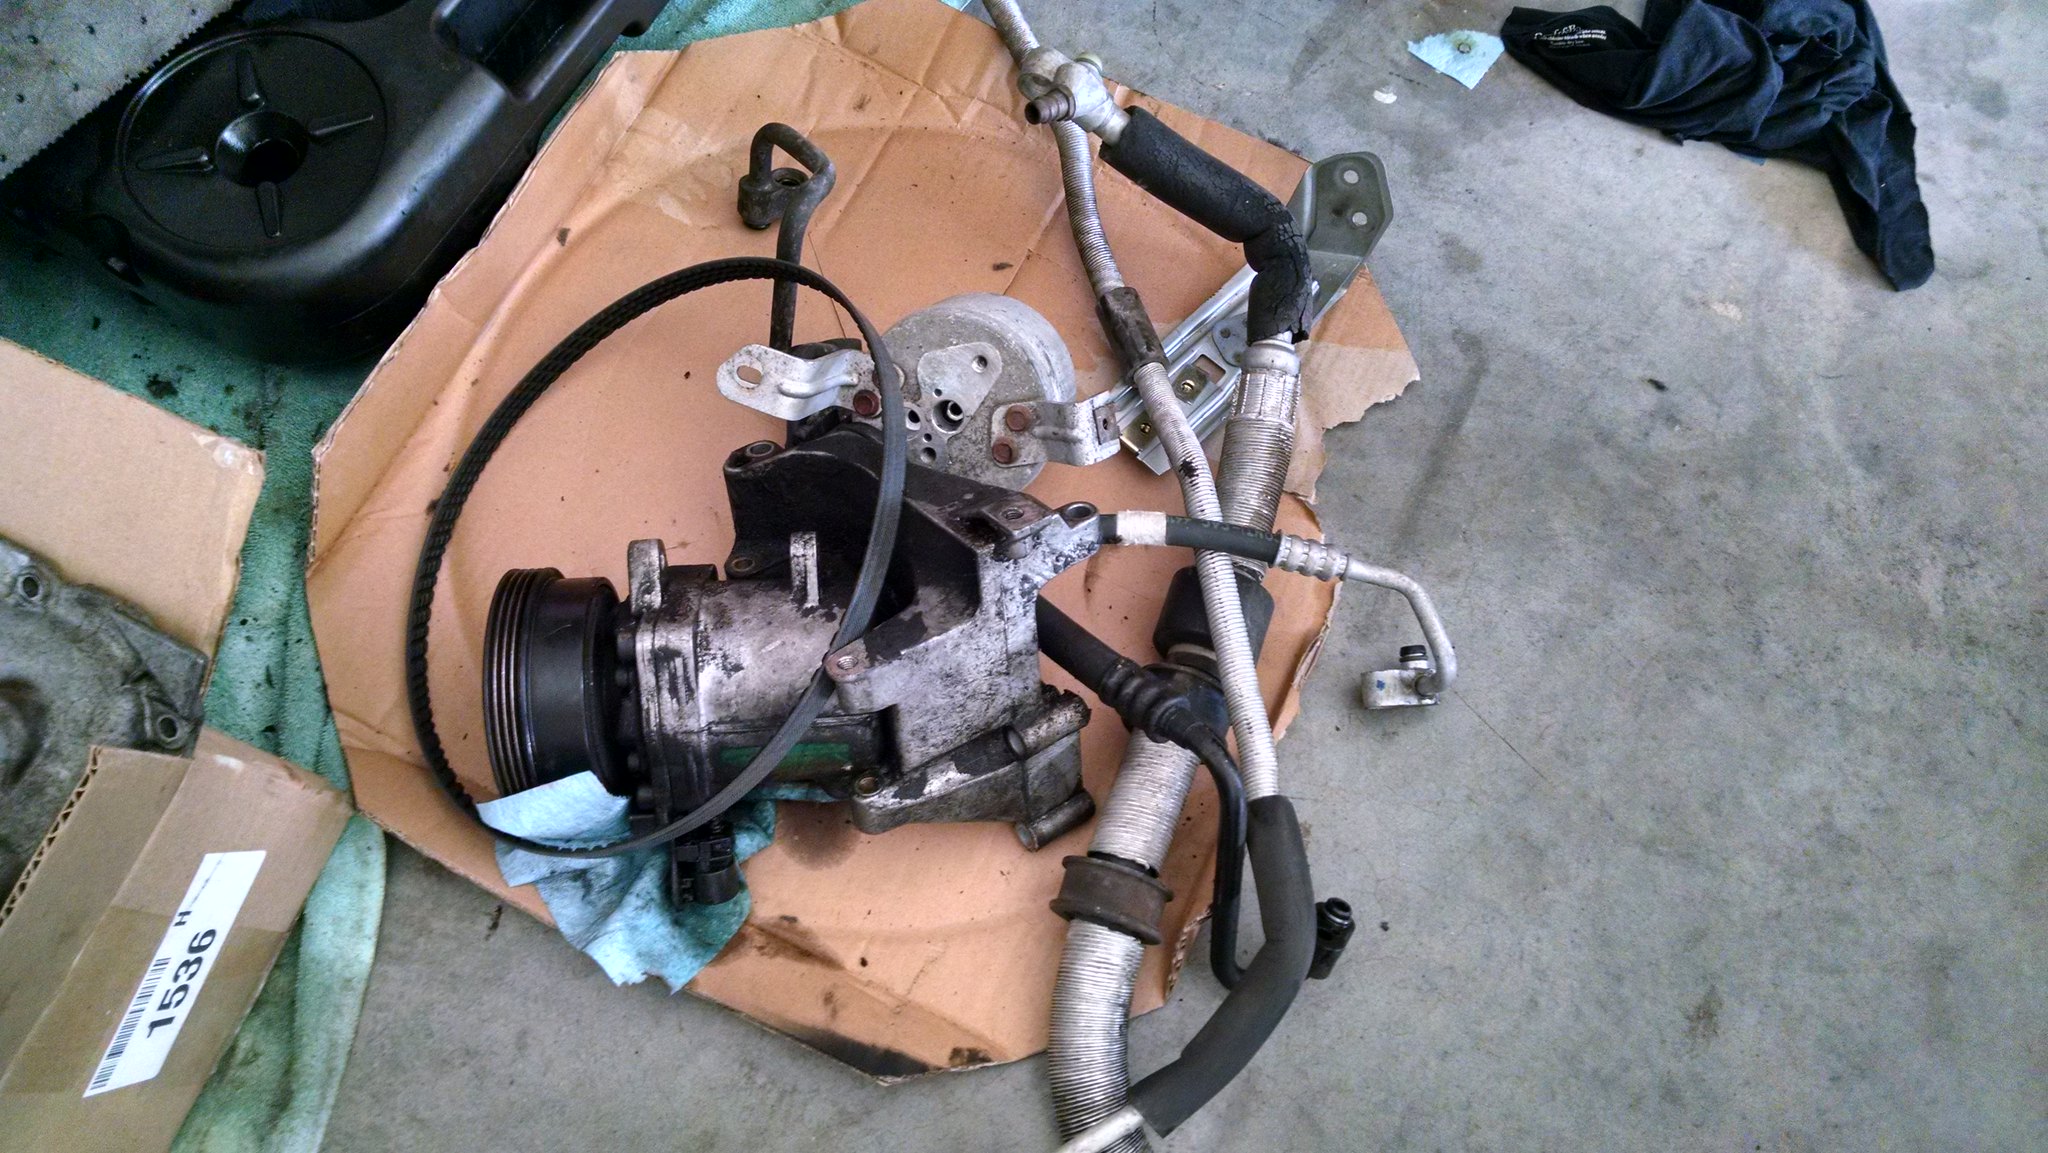 It's also quite apparent that my M44 is leaking oil from the timing cover seals, had I kept the motor and added ITBs I would have gone in and replaced all the seals and timing chain guides. All that was left for now was to run the battery cable to the hatch. It was pretty straightforward with Jesse's writeup. I knocked out the firewall plug, pulled the carpet back and ran the cable to the hatch. I plan to run a miata battery in the small hatch compartment but for now I just ran the cable and reinstalled the engine bay box. 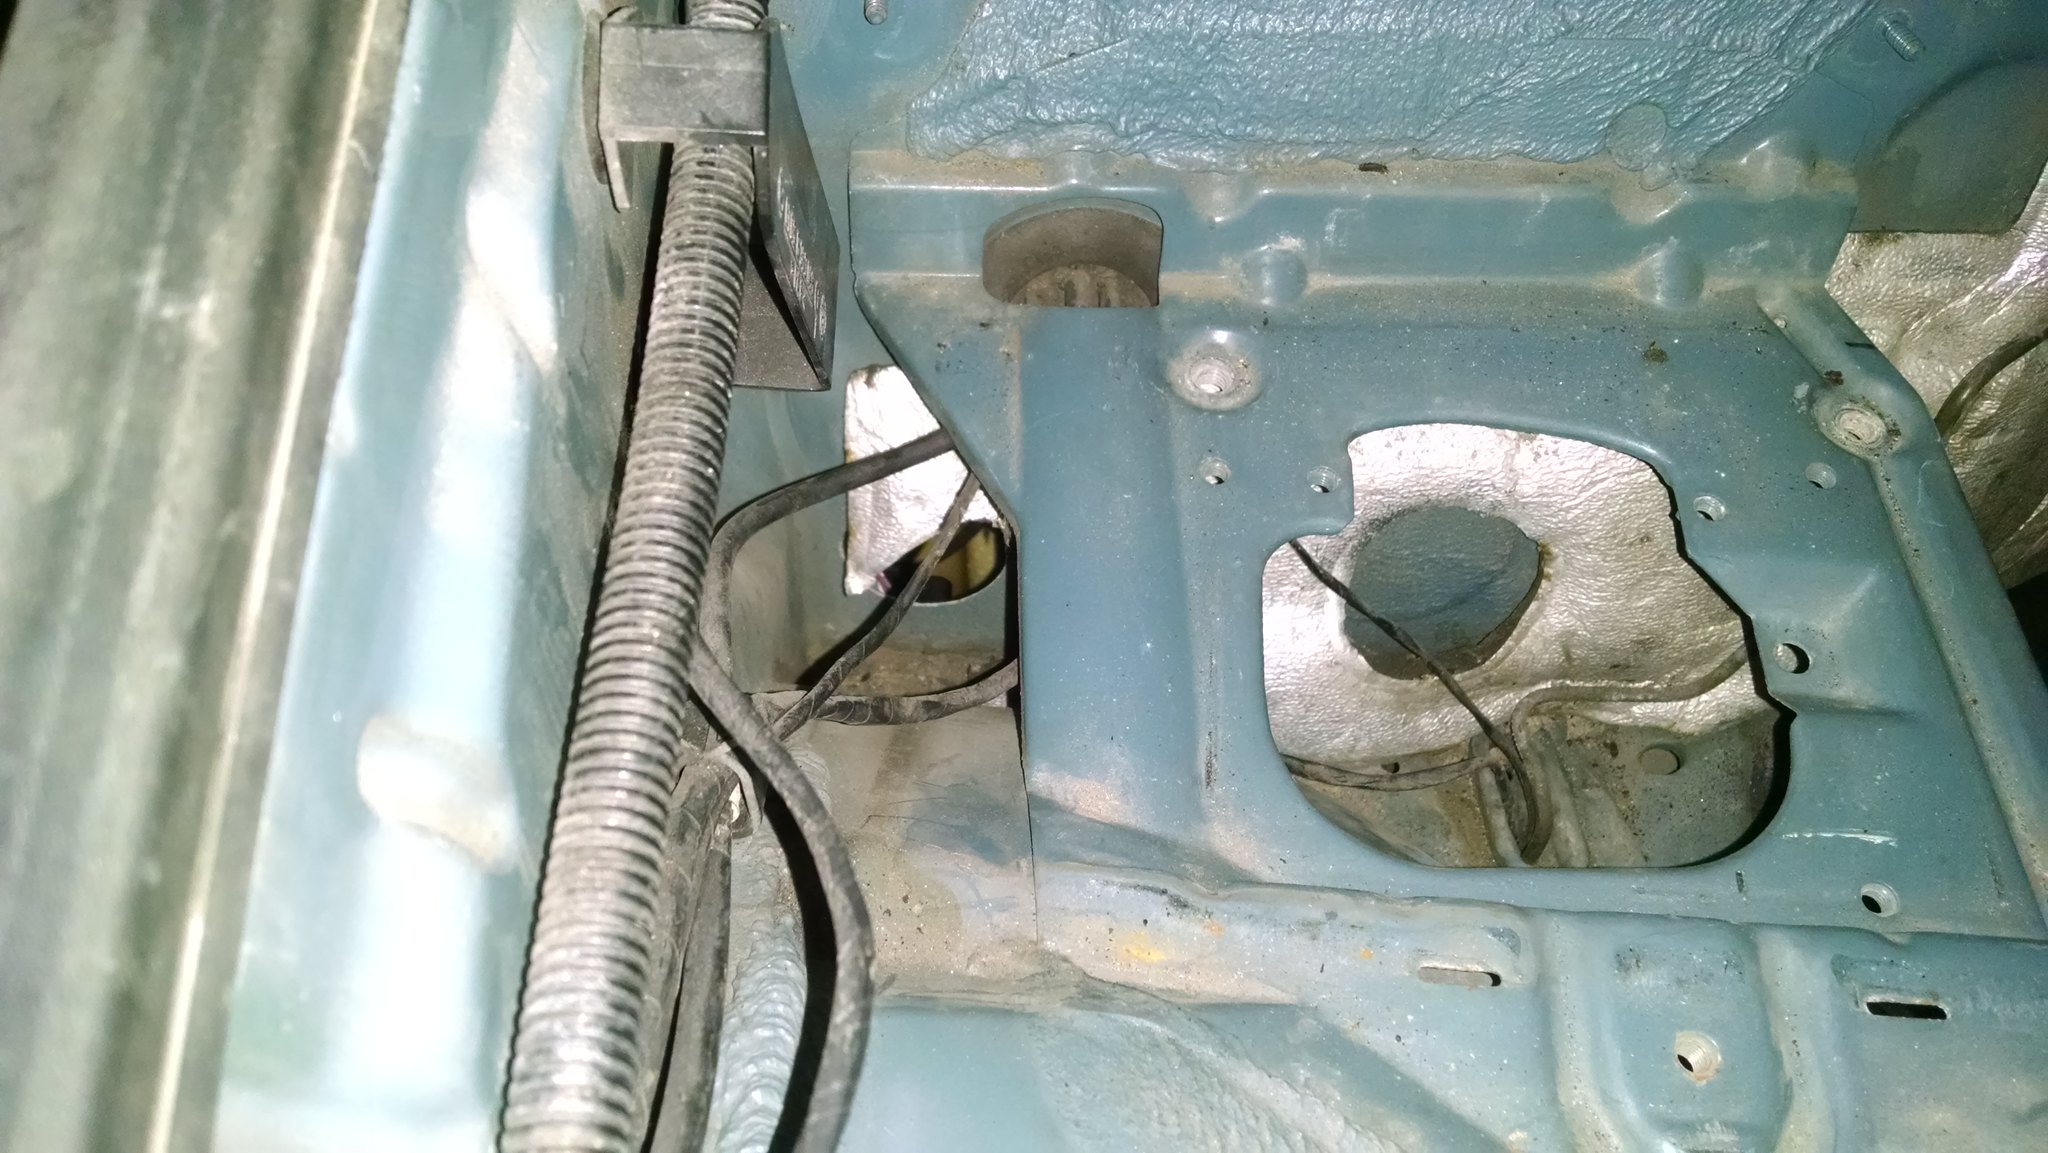 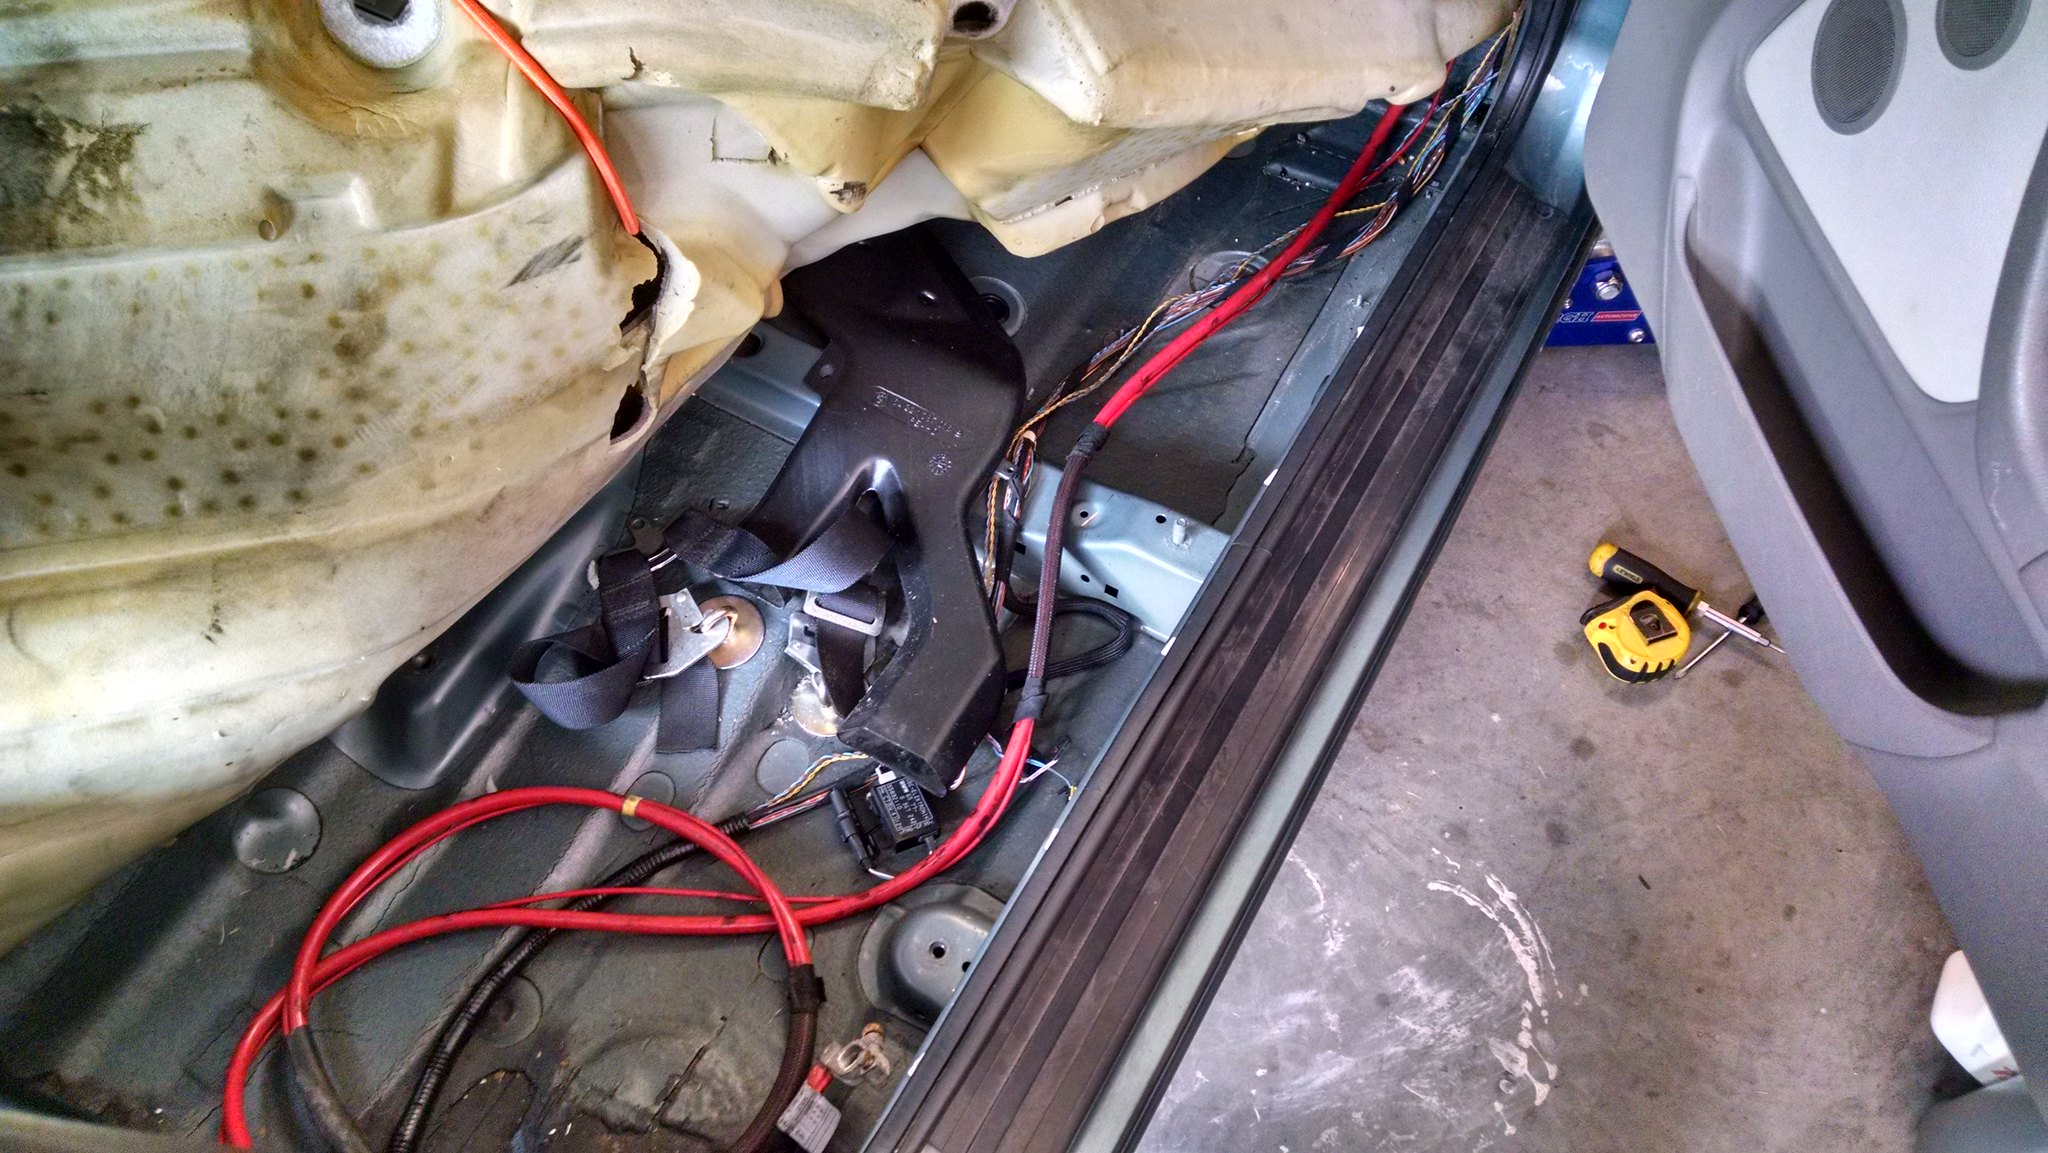 Then finally on Friday the crank scraper came! Yay, I can finish building up the motor. It looks like a quality piece and comes with a small spacer to to keep the oil pick up tube bracket level. I'll be checking clearances and installing it next week. 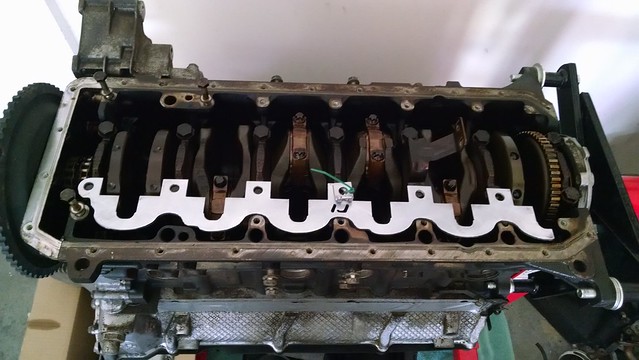 __________________ ~Dave~
98 328ti Morea Grun slicktop
11 128i space gray slicktop
13 JGC WK2 Deep Cherry
Search | RealOEM | | | | | 03-26-2016, 04:41 PM | #10 | | Senior Member Join Date: Jul 2007 Location: norcal - 94590 Posts: 3,186 |
Typical Dave project, everything done right! In for updates! __________________ James 95 active w/leather interior and sport interior conversion, Vaders, full M-Tech exterior conversion. Now m50 swapped* Eibach sway bars, D2 Coilovers, Depo's w/AE's, blacked-out sides and grills, LeatherZ console and door armrests, 1 series starter button mod, and custom finished Style 5's <--- in this color! Named "Roddy":  *M50 6 cyl. swap with fan delete, S50 cams and chip, AFE stage 2 intake, M3 clutch and 11.5 lb Fidanza flywheel, 3.15LSD, battery relocated to rear and complete custom exhaust. Sweet! *M50 6 cyl. swap with fan delete, S50 cams and chip, AFE stage 2 intake, M3 clutch and 11.5 lb Fidanza flywheel, 3.15LSD, battery relocated to rear and complete custom exhaust. Sweet!  97 318ti sport, Alaska Blue, Contours, coilovers, Dove Vaders and custom black/grey interior named "Max" 95 318ti Active in Cosmos, S50 swap in progress... named "Pit" SUPPORT 318ti.org! CLICK THE LINK ABOVE! Hosting a forum like this is not free. 318ti.org is one of the best BMW forums on the web because it is member supported, not vendor supported. The cost to become a Supporter is a nominal $10.00... A YEAR! DO IT! NOW! 97 318ti sport, Alaska Blue, Contours, coilovers, Dove Vaders and custom black/grey interior named "Max" 95 318ti Active in Cosmos, S50 swap in progress... named "Pit" SUPPORT 318ti.org! CLICK THE LINK ABOVE! Hosting a forum like this is not free. 318ti.org is one of the best BMW forums on the web because it is member supported, not vendor supported. The cost to become a Supporter is a nominal $10.00... A YEAR! DO IT! NOW! | | | | | 03-26-2016, 10:56 PM | #11 | | Member Join Date: Jun 2015 Location: DAYTON, OH Posts: 86 |
When you get this all figured out you can do my next.
Thank you for the detailed information. | | | | | 04-03-2016, 04:21 PM | #12 | | Senior Member Join Date: Apr 2007 Location: Elizabeth City, NC Posts: 3,877 |
Haha, thanks guys. I know M52 swaps aren't exactly a new thing but it's cool to actually be going through all the steps and trying to document it.
No crazy updates unfortunately. I've been fitting the crank scraper, it's taken a lot more filing/griding than I expected. There needs to be 1mm clearance from all moving parts to the edges of the scraper.
Obviously, production parts have variance so something like this with tight tolerances needs to be customized a bit for each installation. IJ does offer a Teflon version of the scraper which can be considered self clearancing, it was $100 more and I didn't opt for it...maybe that was a mistake, lol. __________________ ~Dave~
98 328ti Morea Grun slicktop
11 128i space gray slicktop
13 JGC WK2 Deep Cherry
Search | RealOEM | | | | | 05-10-2016, 02:21 AM | #13 | | Senior Member Join Date: Apr 2007 Location: Elizabeth City, NC Posts: 3,877 |
Wow, it has been a while since I updated this thread. I always seem to run out of time to just sit down and crank out an update, still taking pictures though. So about a month ago, I was working on installing the crank scraper. It was a very tedious process. I removed the 7 bearing bolts to install the crank scraper and spacer for the pickup tube bracket. Using the old bolts I was able to snug the crank scraper into place and check clearances. At first I was really only looking at where the counterweights contacted the scraper (which was several spots) and I filed them down until I had 1mm clearance to all the counterweights. Silly me, I thought I was done and then noticed some tight gaps from the edges of the scraper that go to the bolt holes. After several more test-fits I was happy with the clearance to every moving part that gets near the crank scaper. I used 7 new bolts and torqued them to spec. (BMW TIS was very helpful through this process) 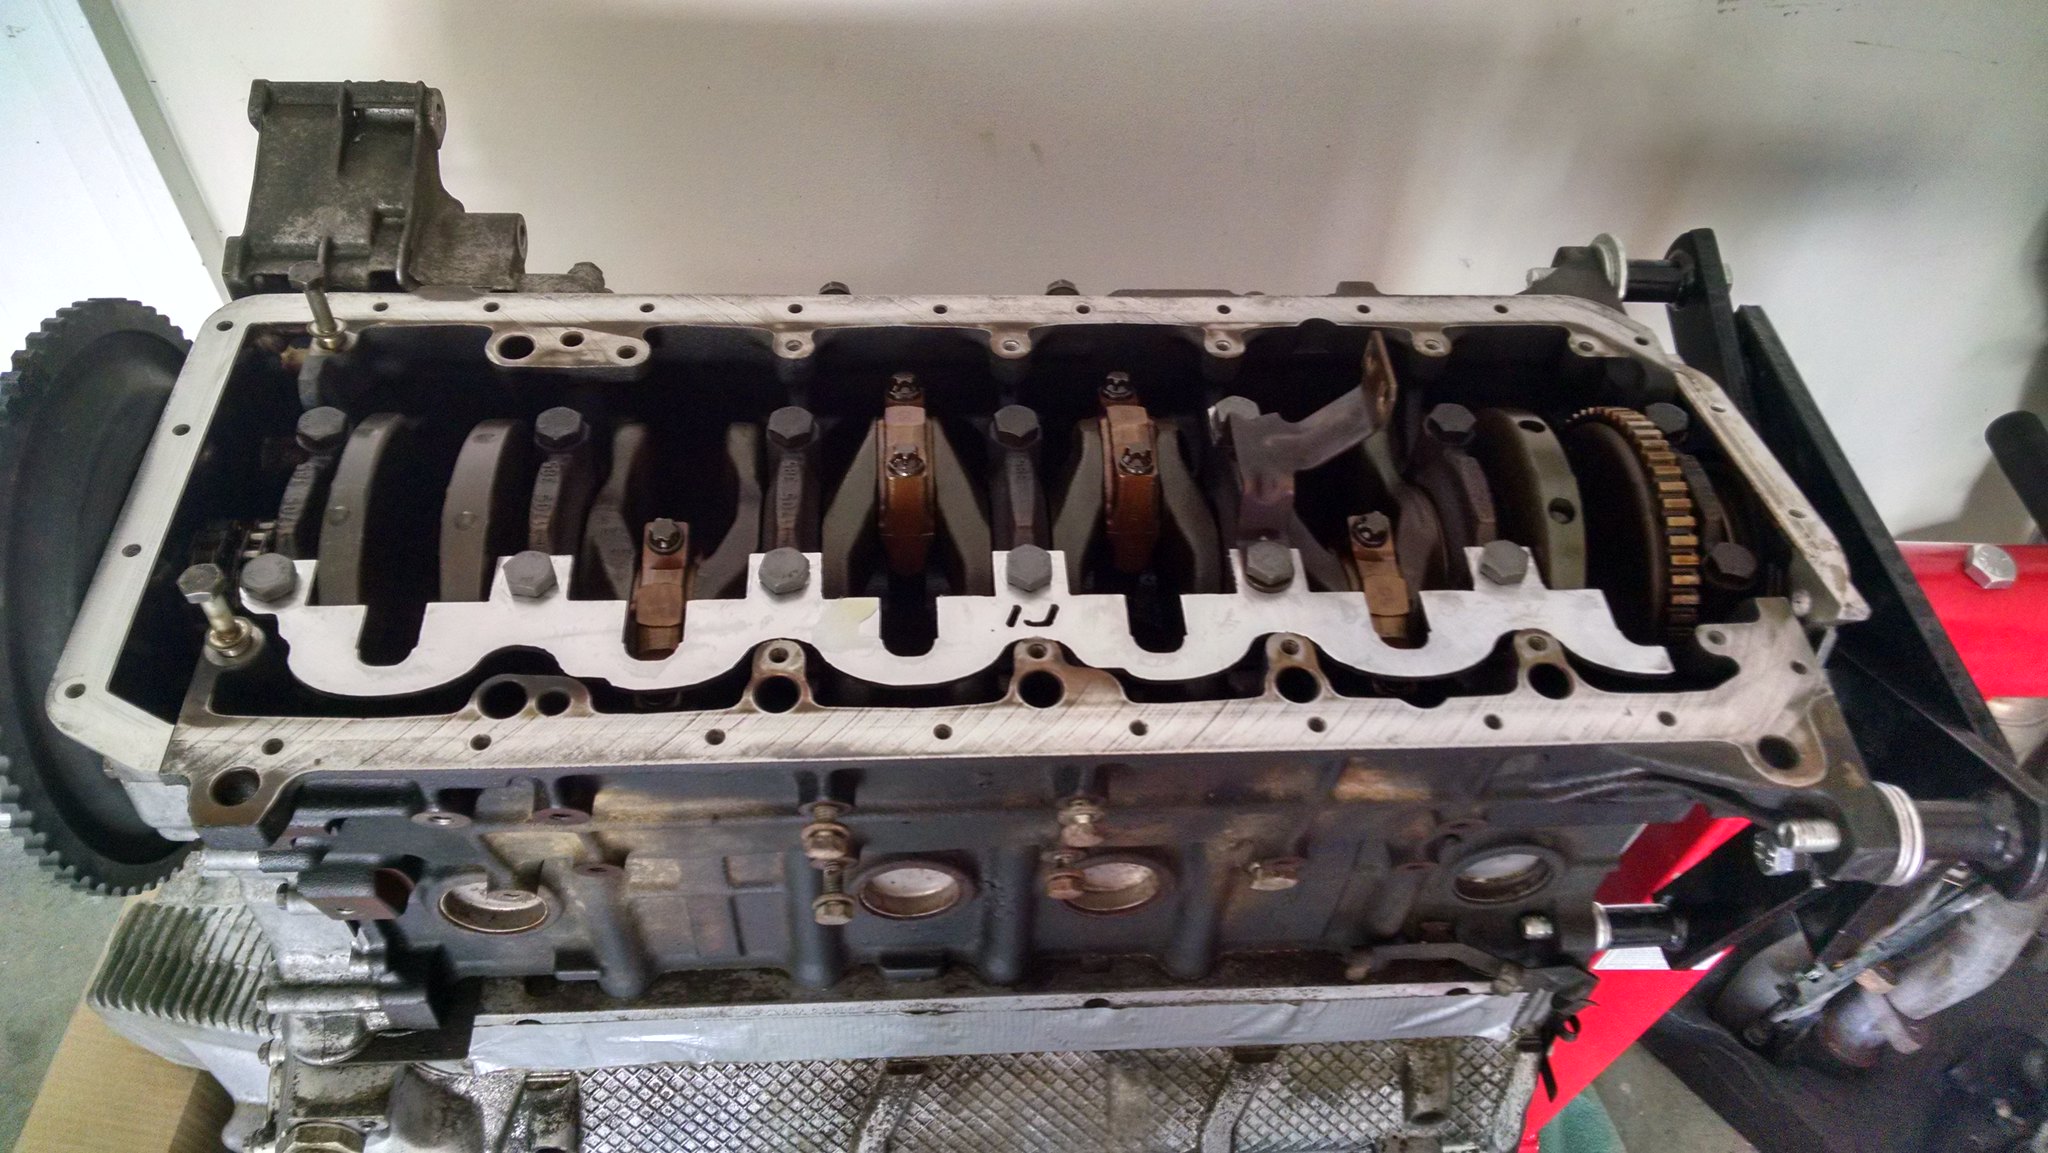 With the crank scraper installed, I was finally able to reinstall the stock oiling parts. Something to note, the stock windage tray was able to be installed but the clearance to the main bearing bolts on the scraper side was definitely reduced. 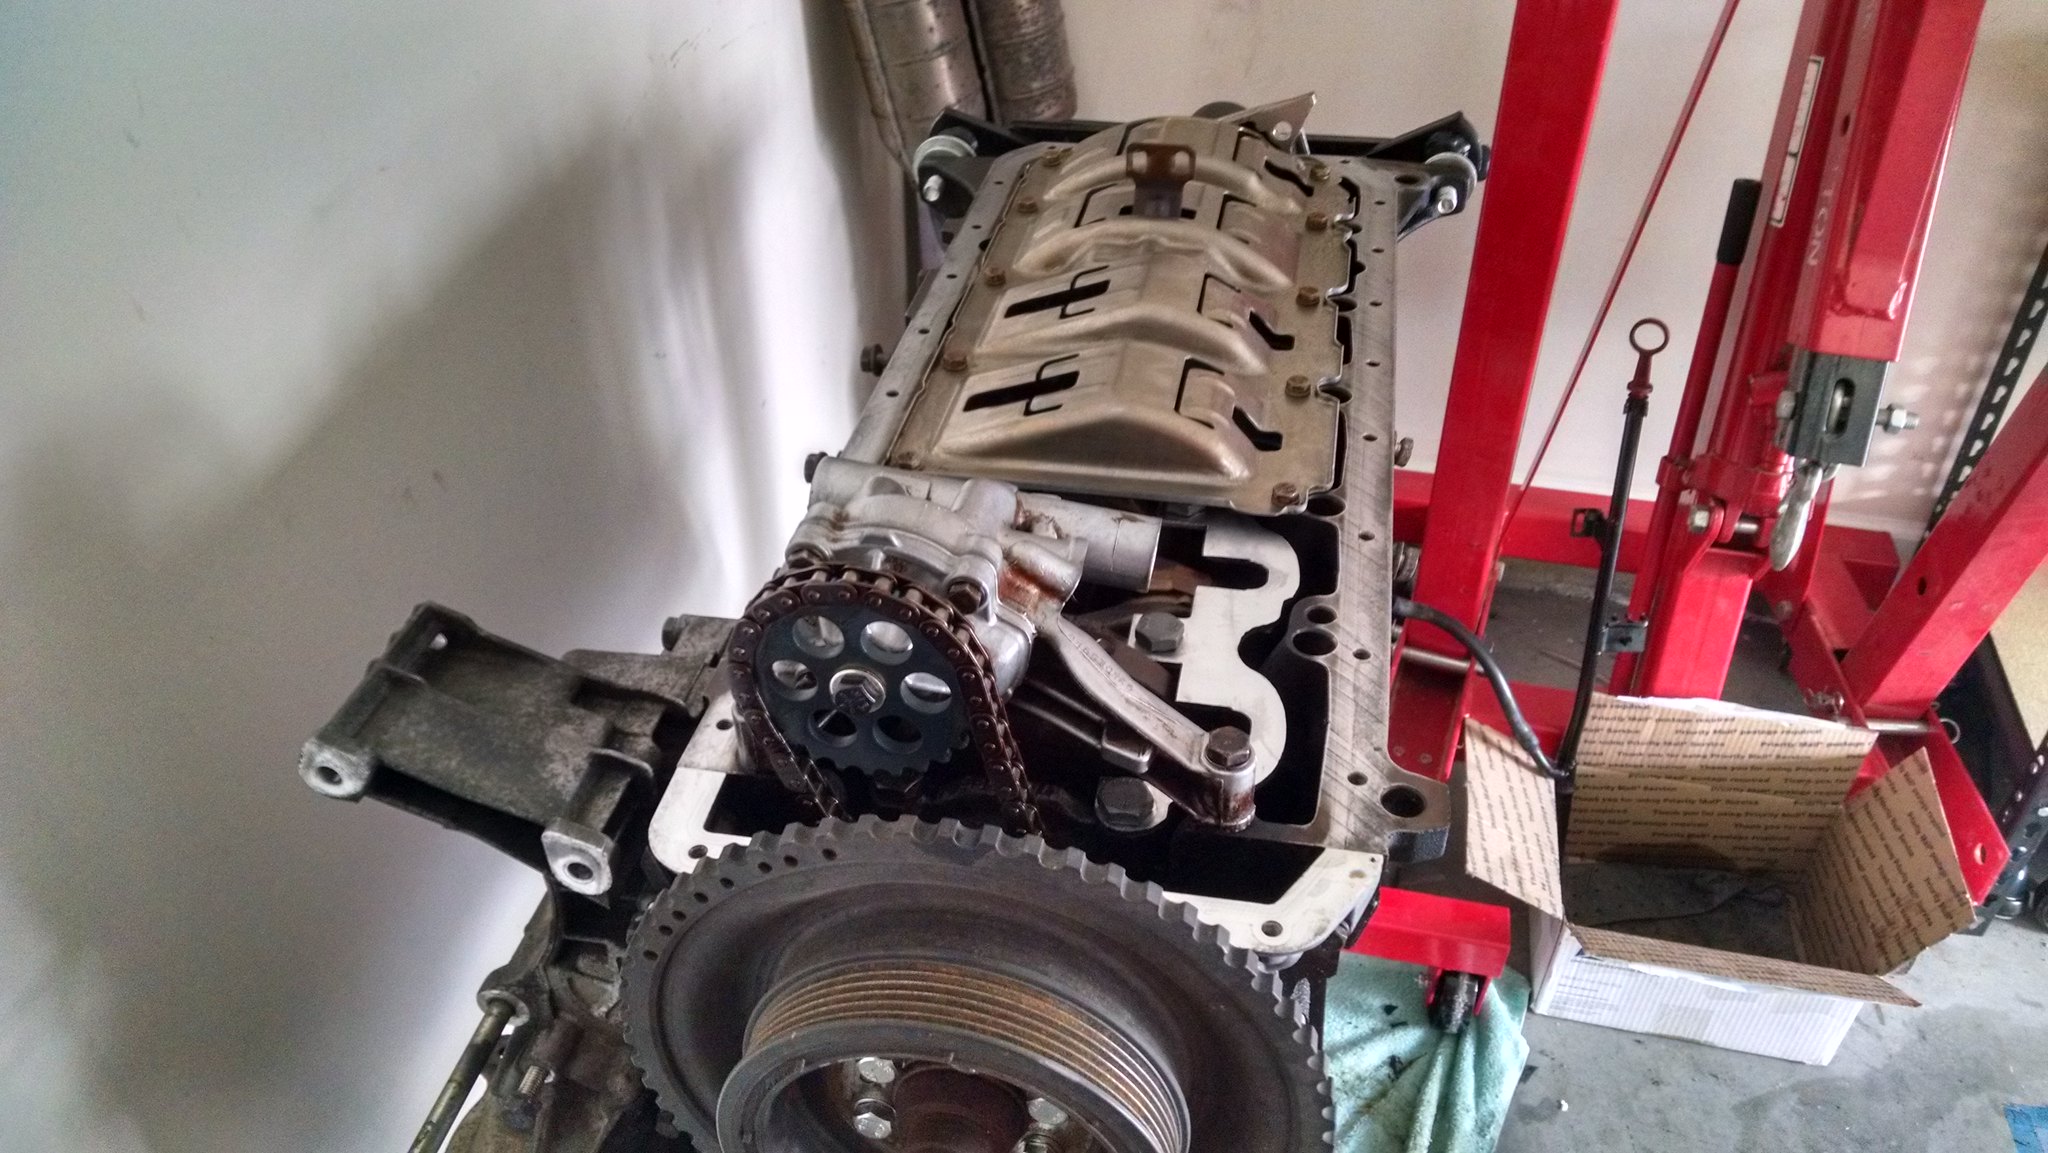 Before reinstalling the oil pump chain I primed the pump with oil and spun the gear by hand. Used a new gasket on the pickup tube-to-pump connection and bolted the tube to the bracket. The Achilles oil pump shaft uses a bolt instead of nut to hold the gear to the pump. It is left-hand thread like the stock nut/shaft. Friend of mine who does aircraft QA came over and safety wired the oil pump bolt. 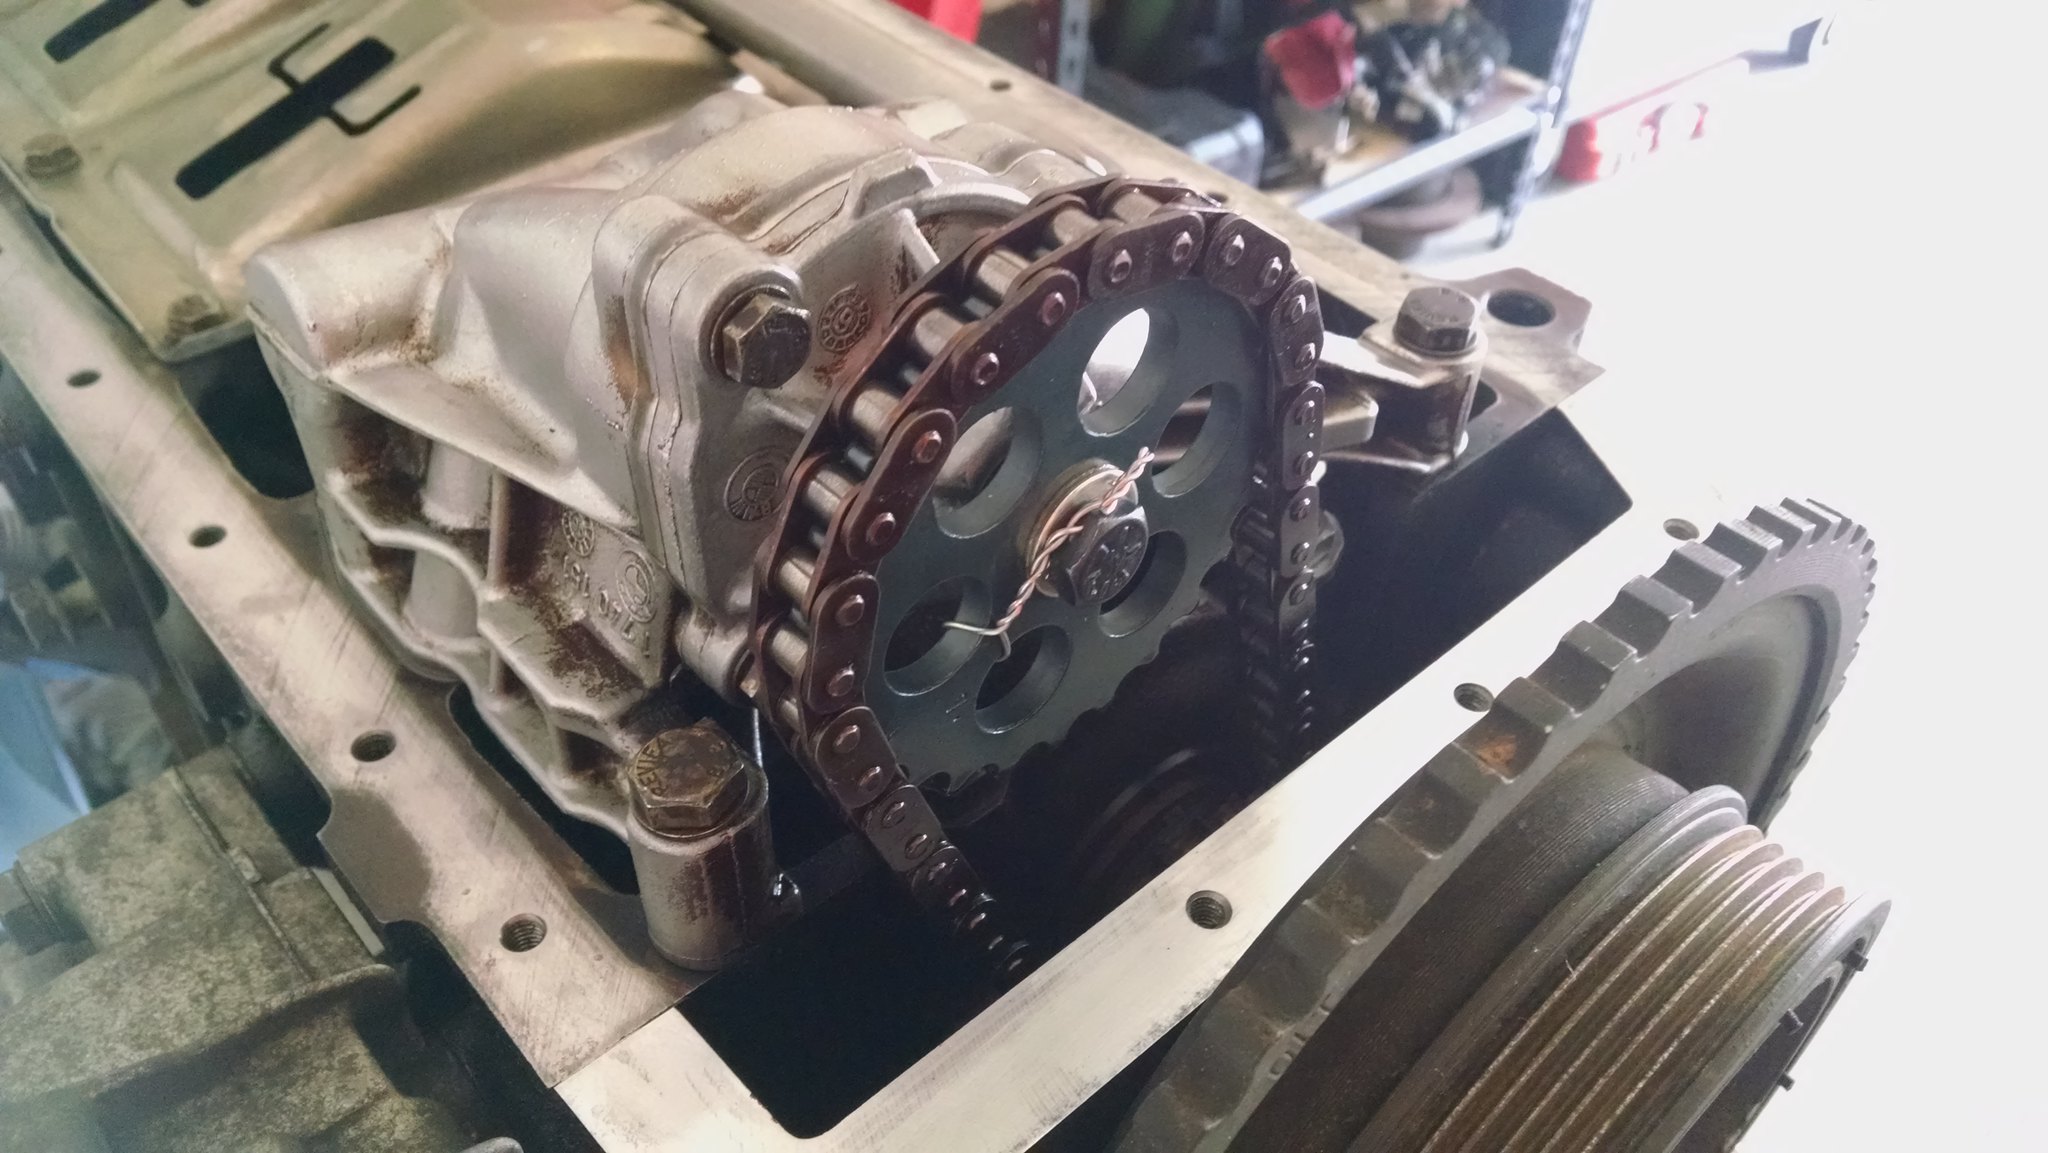 With the oil pump and parts reinstalled, I could finally put the pan back on. Used a fresh gasket and RTV at certain specific locations (timing cover and rear main seal seams).  __________________ ~Dave~
98 328ti Morea Grun slicktop
11 128i space gray slicktop
13 JGC WK2 Deep Cherry
Search | RealOEM | | | | | 05-10-2016, 02:33 AM | #14 | | Senior Member Join Date: Apr 2007 Location: Elizabeth City, NC Posts: 3,877 |
With both top and bottom back on the motor I turned my attention to bolting parts on the sides. First up was the headers, I chose to install all new studs. I went with the torx end studs used on the newer BMW motors, this made install a breeze compared to double-nut removing all of the old ones. While the headers were off I hit them with some high temp paint. Painting is not my forte, but they turned out okay in my makeshift paint booth. 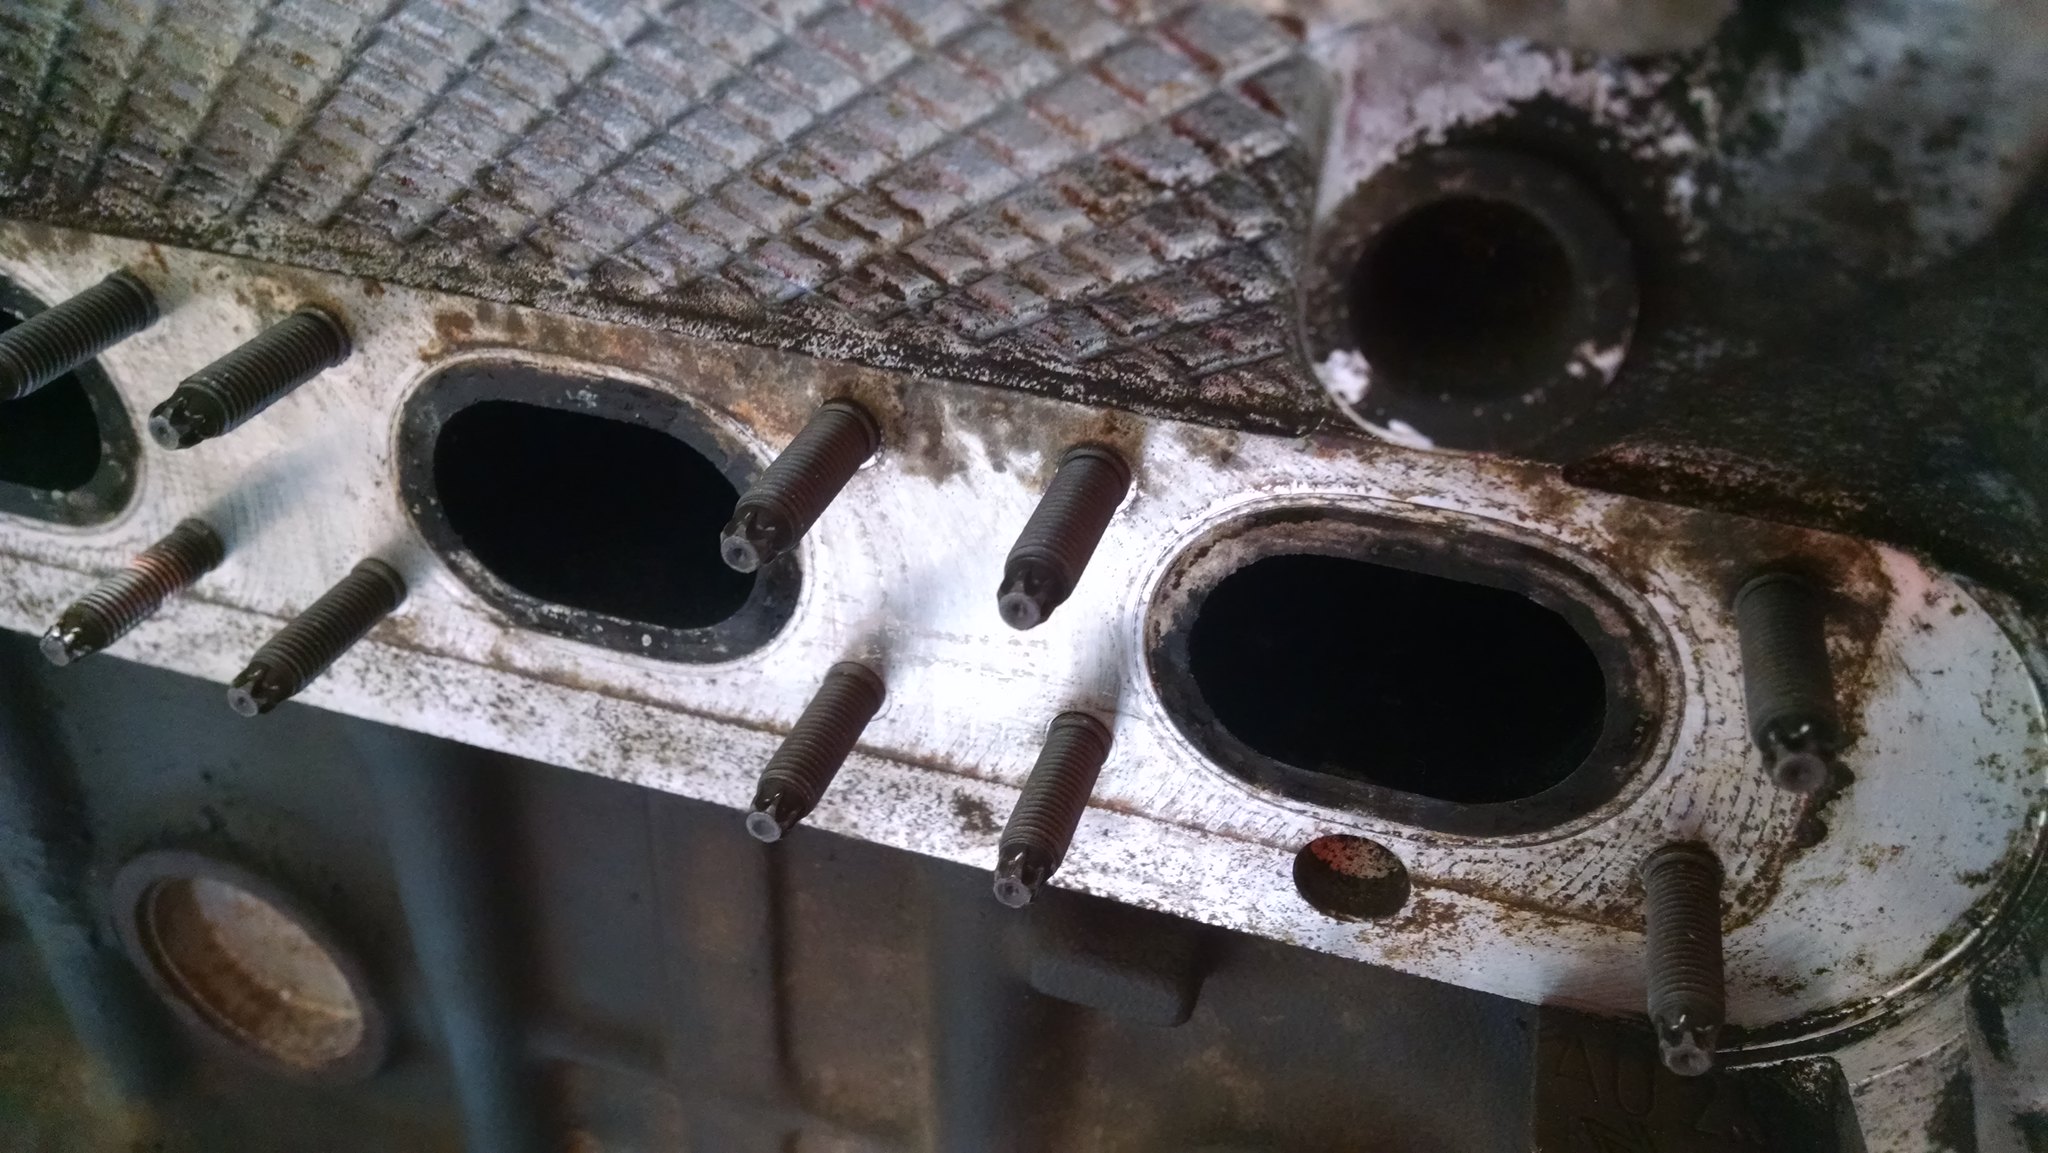 I am deleting the secondary air pump so I got a pair of header block-off plates from an ebay seller. The general shape of the plate was okay but they were far from a bolt-on product. I had to shave down the sides of the ovals to get them to sit flush in the header recess. It didnt take much but still annoying. 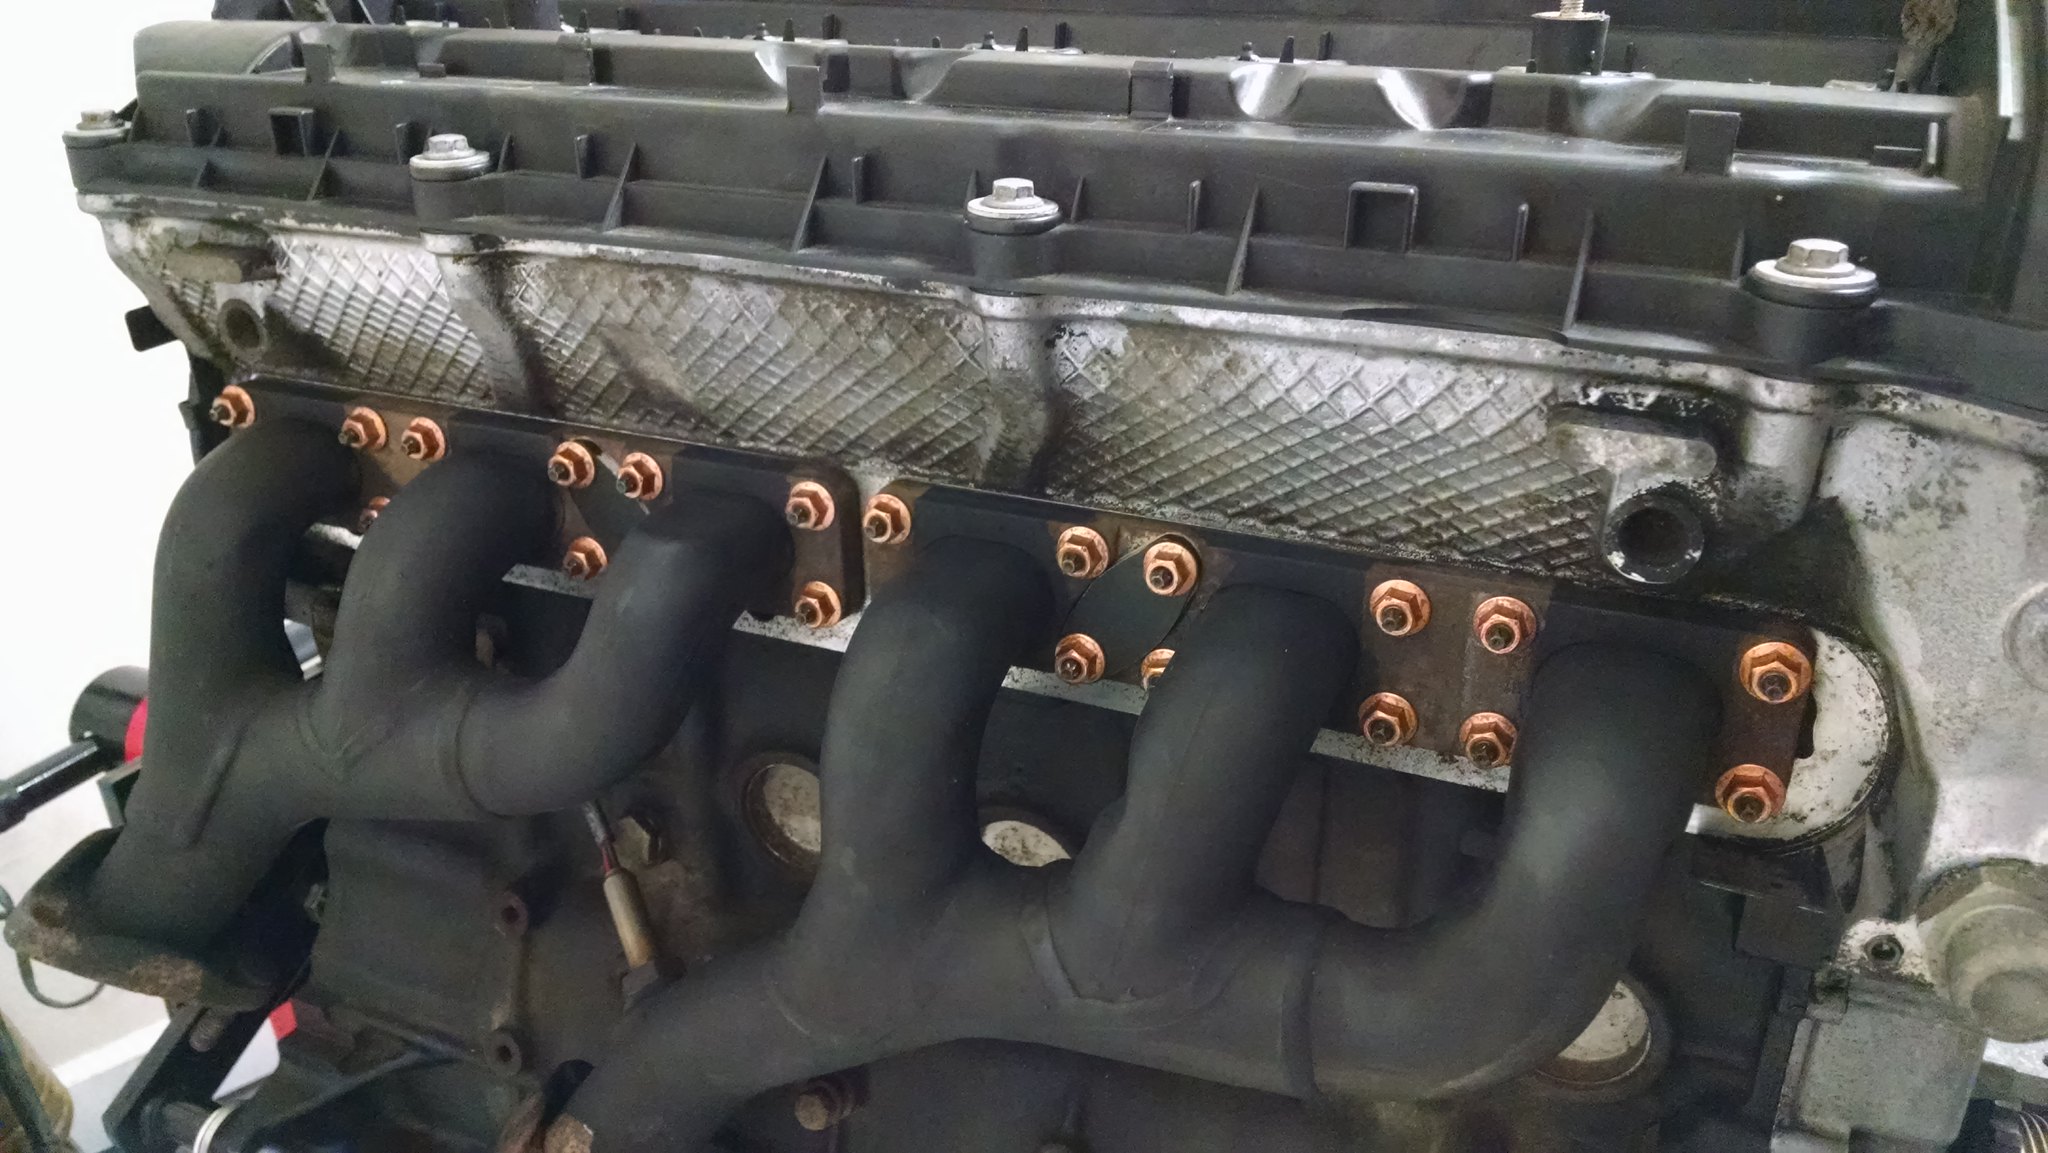 On the intake side, the coolant hardline went back on with new o-rings. Its a shame that no one offers a complete, easy retrofit kit to utilize the euro expansion tank. Several of the European specific parts are blocked from being sold in the USA so I didnt even try to get the European hardline. From what Ive read it really doesnt fit anyway and requires heating and rebending, not something I want to deal with. I plan to use soft line and run it behind the head to get to the expansion tank. It was about this time that I had to prep my Z3 to make the trek to Charlotte, NC for the annual Schuh Syndikat meet. The coupe needed front wheel bearings and I had some different front springs and bumpstops to install. So the M52 was put on the back burner while I worked on the Z. 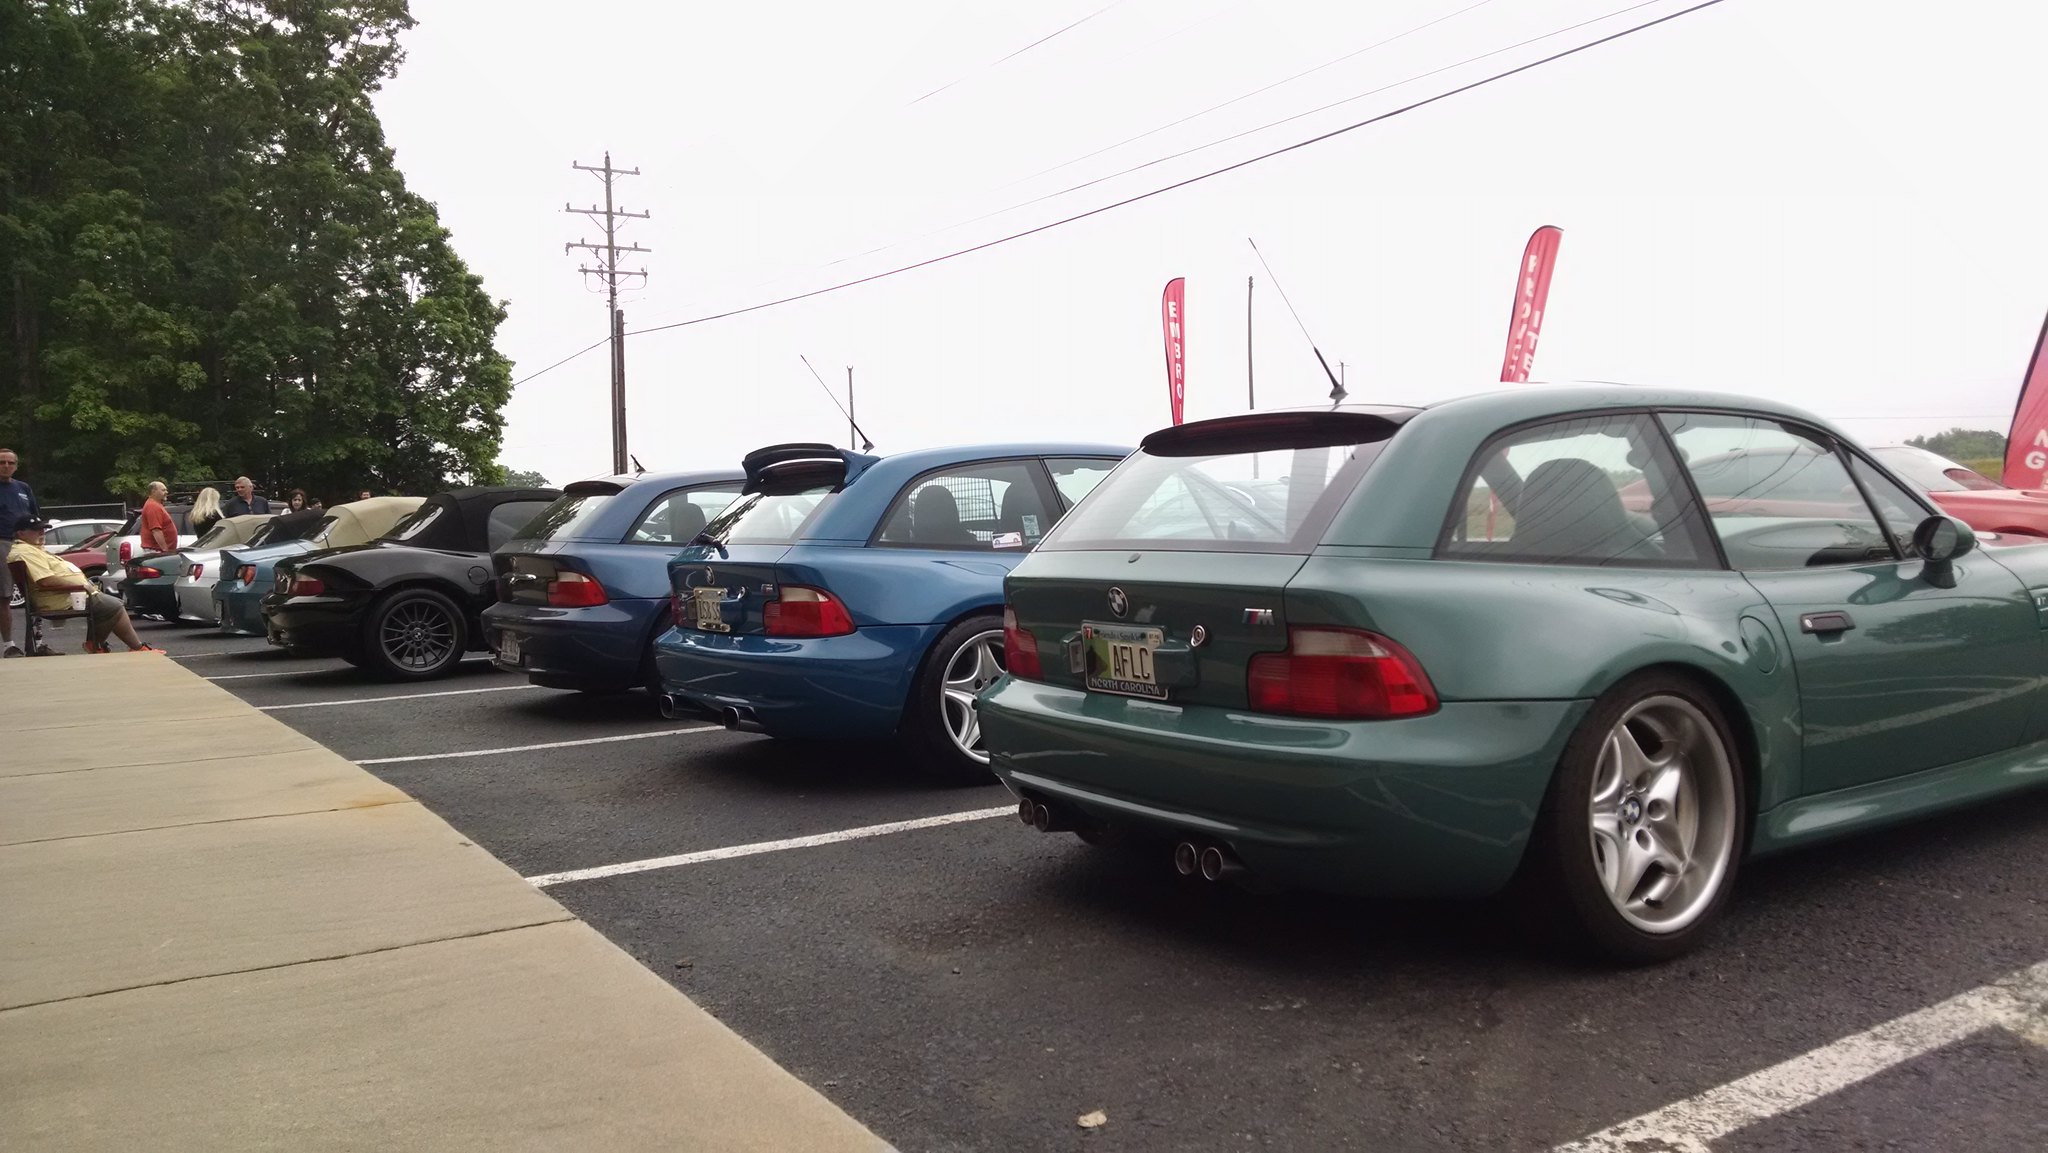 Schuh syndikat was a blast, there were 16 coupes that showed up for the group photo and several other roadsters. The real treat of the weekend was Ed McKernan (bimmerbum) driving his 318ti clubsport all the way from Florida to meet up at Schuh Syndikat. All BMWs are welcome to the event, it is Z3 coupe centric, but its a great group of enthusiasts who enjoy the quirkier BMW models. Eds clubsport has a bunch of Dinan parts and it was really cool to see him representing at the meet. I heard he was hounding the M coupes pretty good on the twisty prelude drive
__________________ ~Dave~
98 328ti Morea Grun slicktop
11 128i space gray slicktop
13 JGC WK2 Deep Cherry
Search | RealOEM | | | | | 05-28-2016, 02:53 PM | #15 | | Senior Member Join Date: Apr 2007 Location: Elizabeth City, NC Posts: 3,877 |
With Schuh Syndikat over I was ready to get back into the M52 swap. The motor was as ready as it was going to get so I pulled the 318 in the garage and started disassembling the front end. Given the limited space I have, my plan was to disconnect everything engine/transmission related while the car was in the garage. Once it was ready, I rolled the ti outside and put it on jack stands in the driveway. This provided space in the garage to maneuver engines, swap the transmission, and scatter parts and tools everywhere. With the chassis outside I could clean the engine bay and give my neighbors a reason to slow down and shake their heads as they drove by. Win-win. 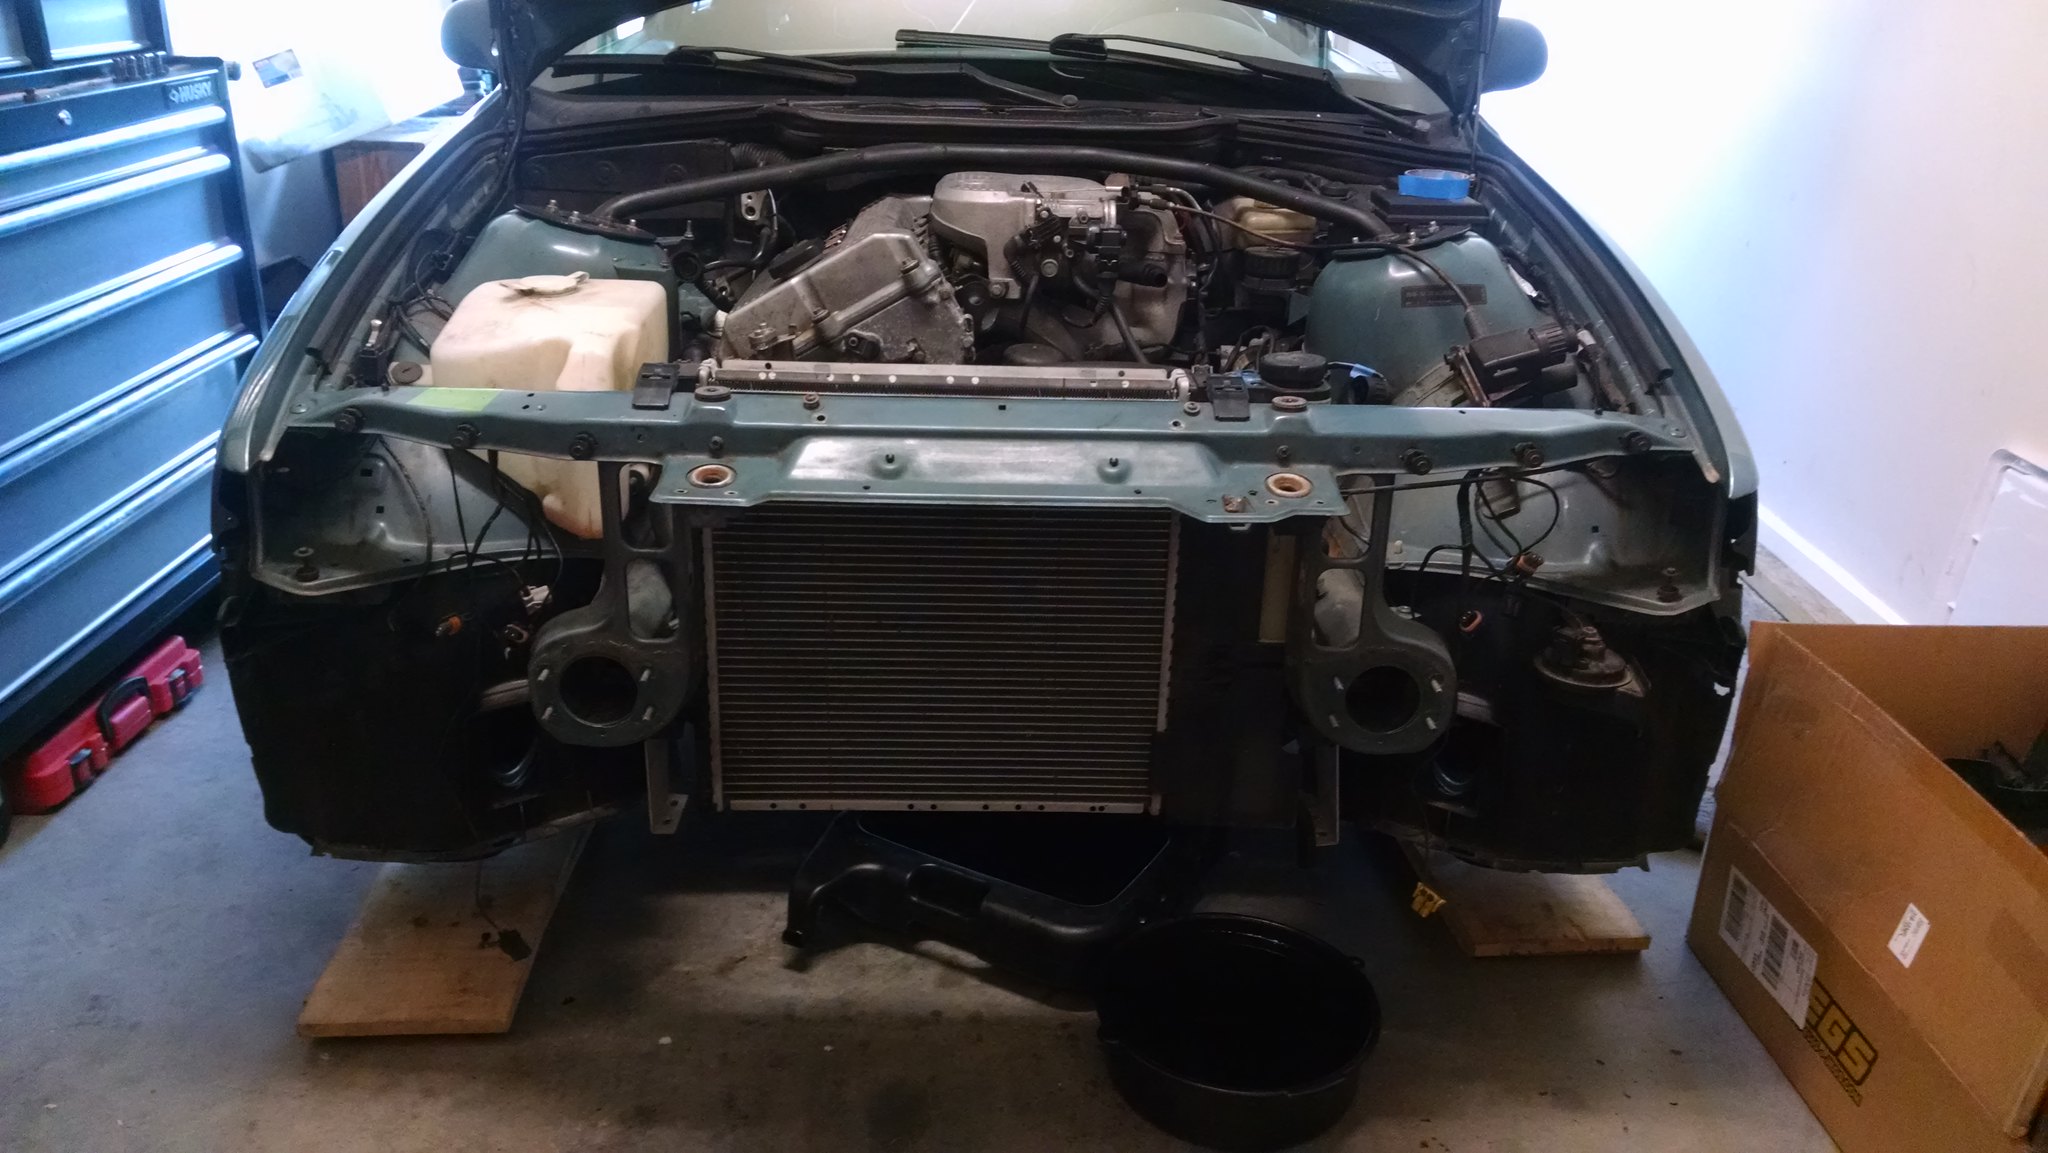 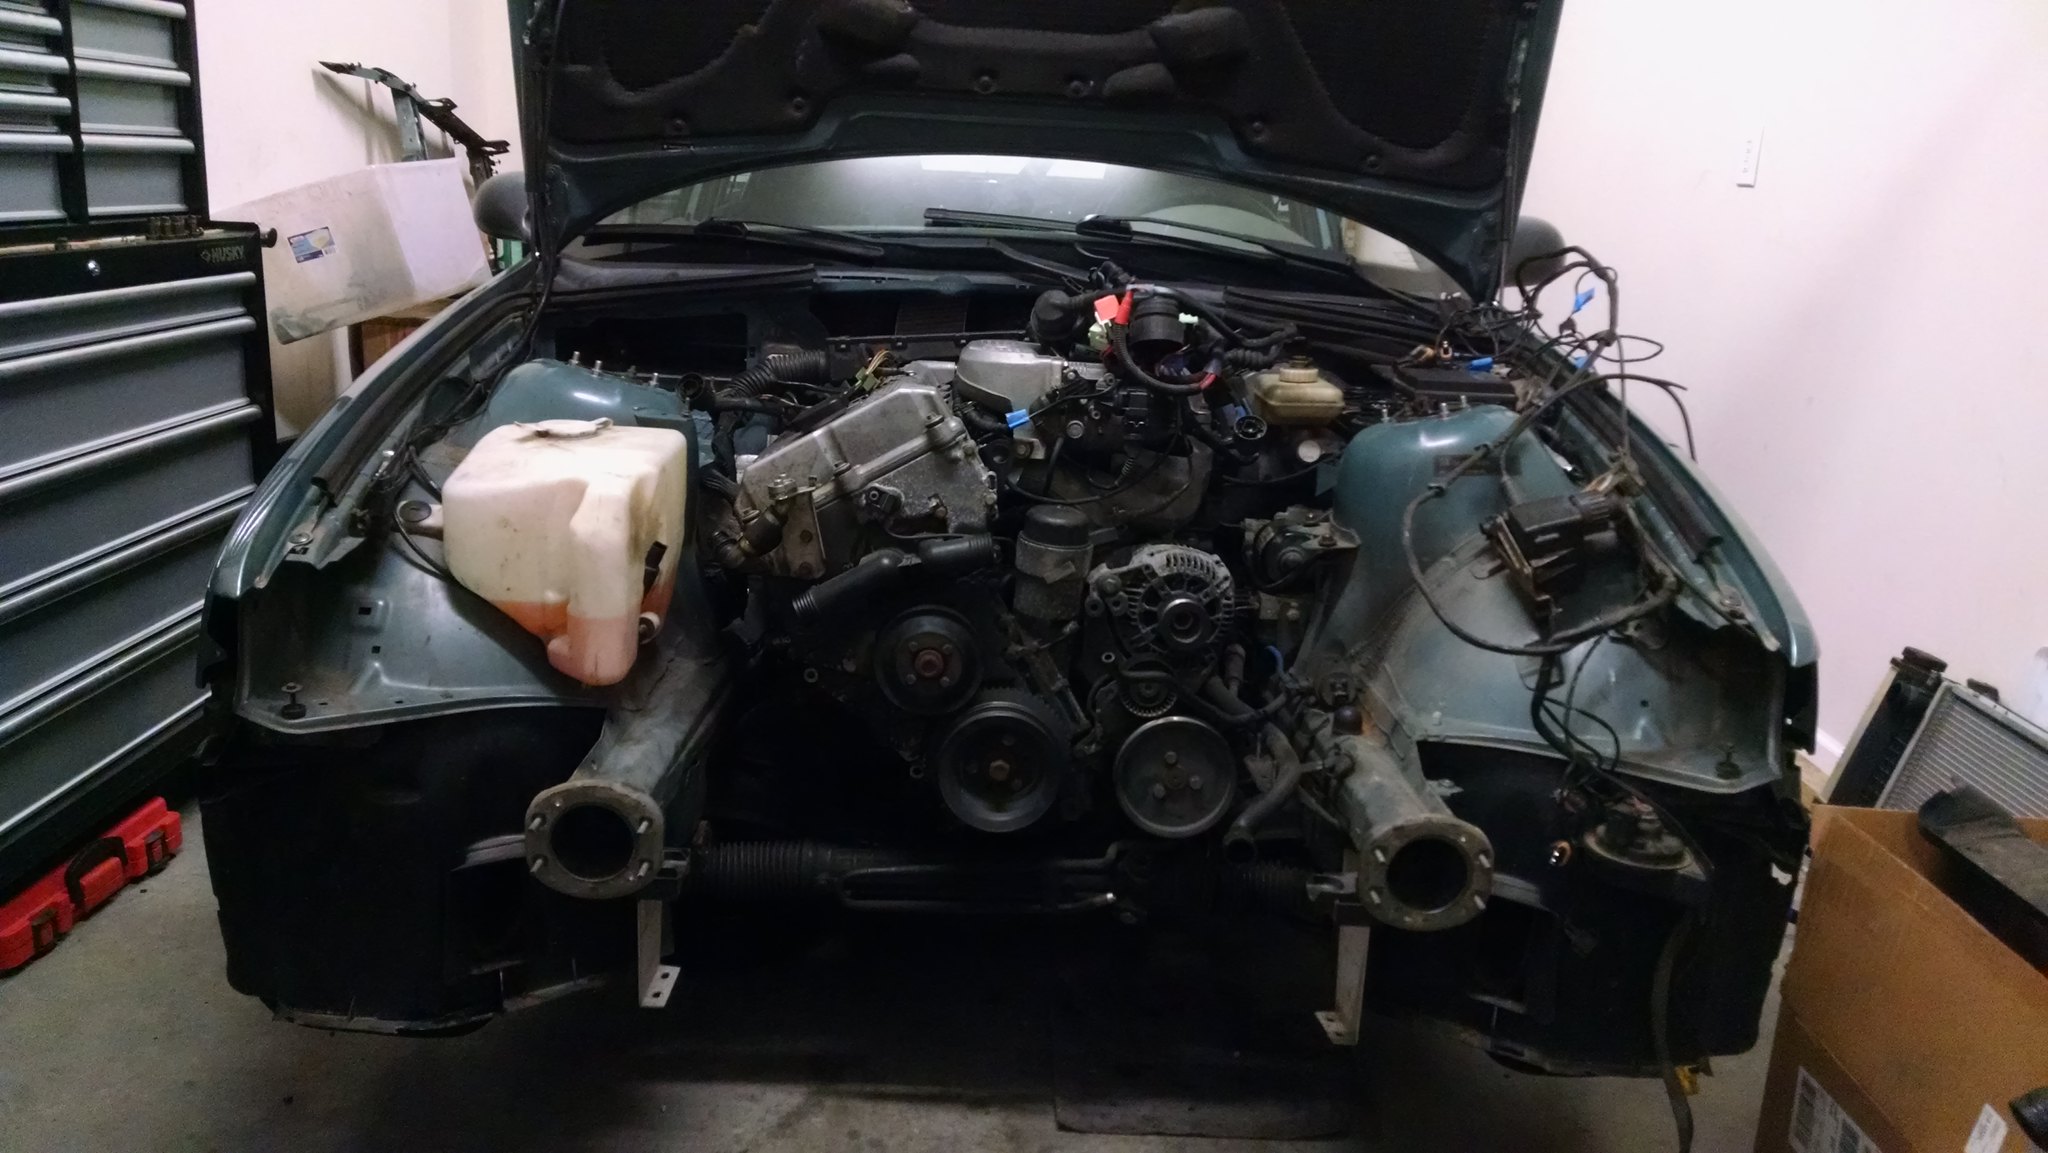 One thing I have never found clear instructions for, or pictures of, is removing the vibration damper from the front driveshaft section. When re-using the 318 drive shaft the torsional vibration absorber (p/n 26111434254) will interfere with the 6 cyl shift linkage. With the front driveshaft section removed it is apparent that the damper on my car (Jan 1998 build) has studs sandwiching the damper to the driveshaft flange. So we have 3 bolts and 3 studs connecting the driveshaft to guibo to transmission. The 6 cylinder cars simply have 6 bolts connecting those pieces. Had I bothered to investigate this before I made my many parts orders I would have bought 3 more bolts. I didnt and decided to reuse the studs. It was very easy to hammer the studs out of the driveshaft with a few sharp blows. [Pro-tip, put a nut on the stud so that you dont damage the threads when hitting it with a hammer.] The damper fell right off, and weighs 3lbs. I put some washers in to simulate the thickness of the removed damper and hammered the studs back in. Good to go.  As far as disconnecting everything else in the engine bay I didnt come across anything that gave me much trouble. Definitely relieve the fuel pressure before disconnecting the fuel lines. Dont forget the wiring harness connectors going to the transmission and FPR and the cooling hoses going to the heater valve. The only parts I removed from the M44 before hooking up the hoist were the airbox/boot up to the throttle body and the exhaust midpipe. The exhaust manifold and intake manifold were installed when I pulled the motor. With the front end removed the motor and transmission came out pretty quickly. I didnt have to mess around under the car with the bitch clip, transmission bolts, or the starter. All of that was easy to disassemble with everything out of the car. 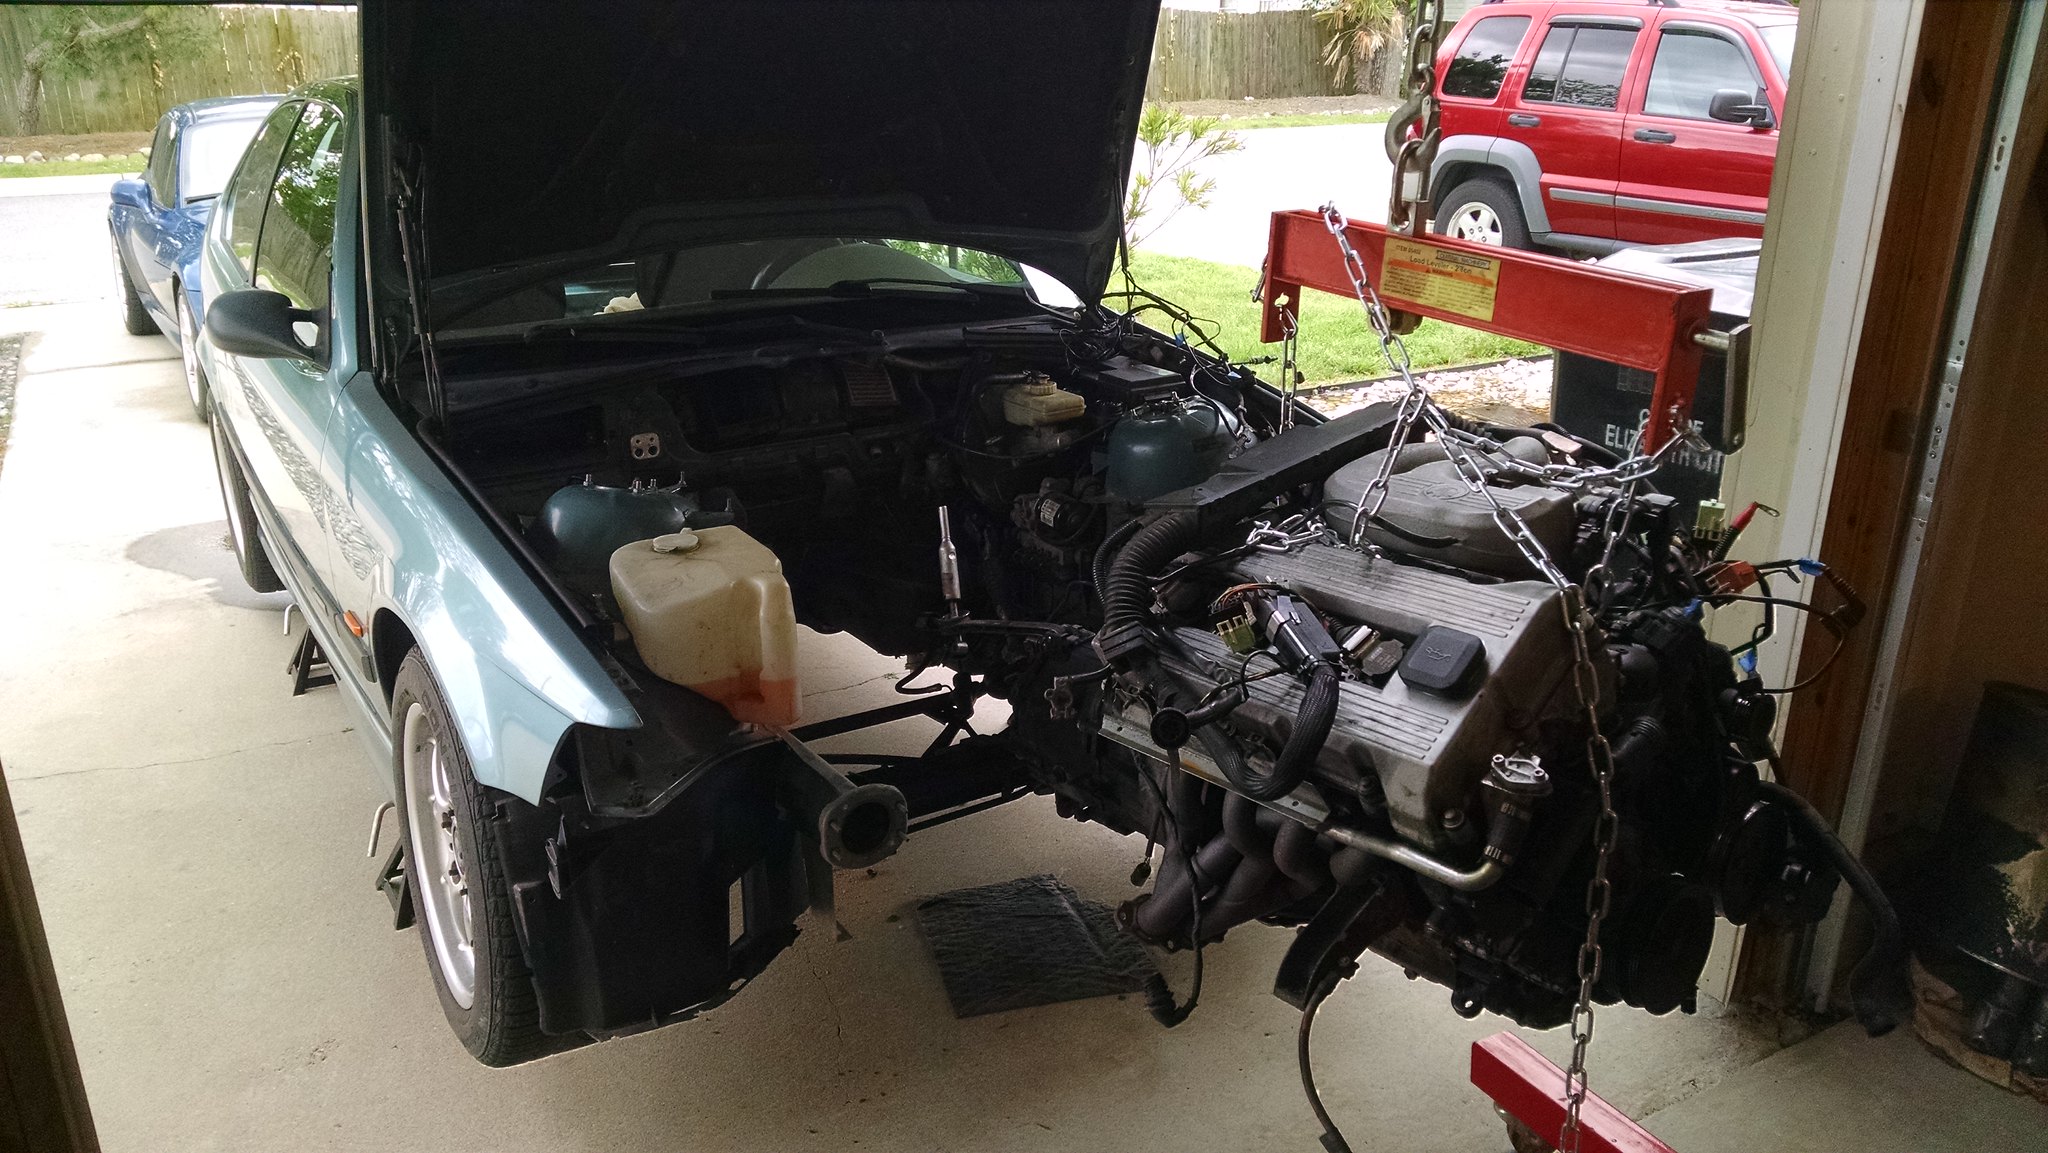 I need to get better at posting updates, lol. __________________ ~Dave~
98 328ti Morea Grun slicktop
11 128i space gray slicktop
13 JGC WK2 Deep Cherry
Search | RealOEM | | | | | |
| Currently Active Users Viewing This Thread: 1 (0 members and 1 guests) | | |
 Posting Rules Posting Rules | You may not post new threads You may not post replies You may not post attachments You may not edit your posts
HTML code is Off
| | |
|


 Linear Mode
