 » Site Navigation » Site Navigation | | | | » Recent Threads | | | |  |  |  | |  03-01-2013, 07:35 PM 03-01-2013, 07:35 PM | #121 | | Senior Member Join Date: Mar 2012 Location: West Bend, Wisconsin Posts: 1,055 |
I got an email from my German friend Kitty today. It included this picture:  That is all. __________________ 95 318ti & 96 318ti Quote: Originally Posted by eurohb  Im Jelly.. enough said. |  Follow me on instagram: earlmeyeriii |  |  | | 03-02-2013, 01:15 AM | #122 | | Senior Member Join Date: Jul 2007 Location: SW Florida Posts: 4,275 |
Awesome __________________ 
Sean
1995 Active | | | | | 03-07-2013, 12:34 PM | #123 | | Senior Member Join Date: Mar 2012 Location: West Bend, Wisconsin Posts: 1,055 | 
Thank you=) I was out Saturday and got all of the bushings removed. Their sleeves were the worst. I used an air hammer to cut them out of the subframe. I have to use the air hammer and a torch to cut the sleeve out of the diff cover. I didn't get much besides that done Saturday. I took too long to get those out. I did end up stripping the trailing arms completely down. I then picked up some brake cleaner and a rust/paint stripper wheel so that I can prep the arms, subframe, and block for paint=) Yesterday I worked on something that I have been putting off for weeks. Removing the lower half of the fusebox was where I stopped the relocation process. Yesterday I decided to do something about that. I started by removing all of the relays from the lid:  I was then about to remove all of the wires for the fuses, but noticed something. Each section of fuses is clipped into the box. They were pressed in there really good, but I managed to get them out.   I'm not sure if anyone has noticed this before, since I see people just stuffing the whole lid under the dash. That looks half assed to me. I will be making a mount for just the fuses and relays to sit on. The rest of the wires will be neatly bound up and set aside. A friend luckily stopped by and gave me a hand stuffing the wires into the footwell. I was tugging on them lightly before he arrived, but it wasn't working well at all. With his help, we had the wires all pulled in within about 10 minutes. Here is how it sits now:  And the mess I have to sort out:  Saturday will be filled with grinding, scuffing, sorting, and all sorts of adjectives. I'm hoping to get the wires organized, and the parts prepped for paint. I may possibly even get primer down=) We will see. Tah Tah for now __________________ 95 318ti & 96 318ti Quote: Originally Posted by eurohb Im Jelly.. enough said. | Follow me on instagram: earlmeyeriii | | | | | 03-11-2013, 02:04 PM | #124 | | Senior Member Join Date: Mar 2012 Location: West Bend, Wisconsin Posts: 1,055 |
I got out both days this weekend, but not for long at all=/ Saturday I was seperating my fusebox wiring. I put the fuses together in a bundle; relays together in another bundle; grounds into two seperate bundles; and I have a few other stray wires to sort out. I couldn't get any pictures due to the lighting. I need a real camera=( I then ran out of propane and left the shop. My feet were frozen and I decided to go out on a lake in the MK3 for a few hours. If my friend gets any video up soon, I will try to post it. After all of those shenanigans, I returned Sunday afternoon after a nice lunch/breakfast. I had to get home before my girlfriend, so I only had an hour to get anything done. I decided I would tackle at least one side of the block to prep for paint. I took pictures of both sides and then completed cleaning up the exhaust side.  Before:  After:   Wednesday I will be tackling the other side, as well as modifying my control arms/ cleaning them up for paint. I'll throw this picture in just for fun. I'm trying to figure out if I want to just make a plastic panel to cover the fuse box hole, or if I actually want to weld a panel over it.  Any thoughts? __________________ 95 318ti & 96 318ti Quote: Originally Posted by eurohb Im Jelly.. enough said. | Follow me on instagram: earlmeyeriii | | | | | 03-14-2013, 11:29 AM | #125 | | Senior Member Join Date: Mar 2012 Location: West Bend, Wisconsin Posts: 1,055 |
I got a little bit done yesterday. I started off by cleaning the other side of the block up with what was left of my drill mounted wire cup.  I need to get a wire wheel for the grinder and it should get the last bits of stubborn rust dust off. I then put a cutting wheel on the grinder and slipped working on the trailing arms=P    Whoops. Well since I "wrecked" one of them, I figured I would do the other.  I then got the idea, why not wreck the spring seats on the body? So I did.    More updates Saturday....or will it be sooner? =D __________________ 95 318ti & 96 318ti Quote: Originally Posted by eurohb Im Jelly.. enough said. | Follow me on instagram: earlmeyeriii | | | | | 03-18-2013, 11:31 AM | #126 | | Senior Member Join Date: Mar 2012 Location: West Bend, Wisconsin Posts: 1,055 |
I called in sick on Friday to go in and work on the car. I now need it to get warm out so I can paint these parts and reassemble it all. I started off by slipping with a drill and hitting the trailing arms yet again. Somehow a tap followed.   One of them is dead nuts in the center, the other is slightly off=( I don't believe it'll be much of an issue. I grabbed a new wire wheel and put it to good use.      Do you think the paint should hold pretty well with that little bit of rust dust left? I can never seem to get it with a wire wheel=/ I also decided to snap a few pictures of the rear brake lines. I am so glad that I decided to do the rear subframe now.     I'm hoping I can find a way to paint some of these items on Wednesday. I also have a few lists of parts that I need to order. The wheels are in transit, and I will be ordering lips shortly. I also decided on a color for the centers=) I most likely won't make my June deadline, but I have not given up. TTFN __________________ 95 318ti & 96 318ti Quote: Originally Posted by eurohb Im Jelly.. enough said. | Follow me on instagram: earlmeyeriii | | | | | 03-21-2013, 11:25 AM | #127 | | Senior Member Join Date: Mar 2012 Location: West Bend, Wisconsin Posts: 1,055 |
I went out to the shop yesterday, only to leave after an hour so that I didn't freeze to the floor. I did come home in time to receive a pleasant gift:  Only two came. The other two are somehow in Ghana, Africa 0_o    Then I got to work and split them=)  Hopefully the other two show up within the next week or two. I also was surprised to see the width of the lips. I initially read that they would be 1" lips. Upon measuring, I found out the lips are 1.5". This is excellent news. Now I'll be putting 3" lips up front; instead of 2.5", and 3.5" lips out back; instead of 3"=D More updates Saturday. __________________ 95 318ti & 96 318ti Quote: Originally Posted by eurohb Im Jelly.. enough said. | Follow me on instagram: earlmeyeriii | | | | | 03-21-2013, 12:07 PM | #128 | | Senior Member Join Date: Jul 2007 Location: SW Florida Posts: 4,275 |
Those wheels are nice! __________________
Sean
1995 Active | | | | | 03-25-2013, 11:36 AM | #129 | | Senior Member Join Date: Mar 2012 Location: West Bend, Wisconsin Posts: 1,055 |
I was shooting to paint all of my rear subframe parts Saturday....but had too many shenanigans and just ended up cleaning things when I actually did work. Parts will be painted this Saturday....Hopefully=) I did however finally finish my headlights. I wanted to mimic E30 Hella smoked headlights, but with an e36. I have never seen crosshairs in e36 lights so I figured I would give it a shot. Here are before and afters of the lights straight off the car to being finished. Before:  After:  Before:  After:  Before:   After:    It was hard capturing the crosshair. I need to get white bulbs instead of the stupid blue ones that they come with. I also got a fancy package Friday.  I now have all four disassembled and cleaned. The faces are being shipped today to get powdercoated=) Splish Splash Breytons takin' a bath=)  That is all for now=) __________________ 95 318ti & 96 318ti Quote: Originally Posted by eurohb Im Jelly.. enough said. | Follow me on instagram: earlmeyeriii
Last edited by Earl; 03-25-2013 at 01:10 PM. | | | | | 03-27-2013, 11:21 AM | #130 | | Senior Member Join Date: Mar 2012 Location: West Bend, Wisconsin Posts: 1,055 |
I did some small things yesterday. First, I ordered my tires. I opted for Hankook HR2's. I see that they have a pretty soft sidewall so they should stretch easily. I'm going for 205/40's in the front and 215/40's out back. I got them for $350 shipped to my door. I also found out that the lips are in stock and I am placing my order asap. These wheels will be together way faster than I had thought. I've been contemplating making a set of all red tails. I then remembered that I am getting a NOS set of amber tails. I figured since my current tails have some minor spider cracking, why not hit them with some model paint? So I did. I used Testors 1605 Candy Apple Red paint with Testors clear. They turned out really well. I just need to wetsand and buff them. Started off by masking them off:  I then layed a nice even coat of red. Somehow it only took me one coat to achieve the color that I needed, and I had no runs.  I removed the tape on this one to ensure that it matched well. I also wanted to compare a before and after.   It looks slightly off in the pictures due to it being a more matte finish at the moment, and I couldn't get a heads on shot. I then taped up the second light to be able to shoot color and clear right after one another. 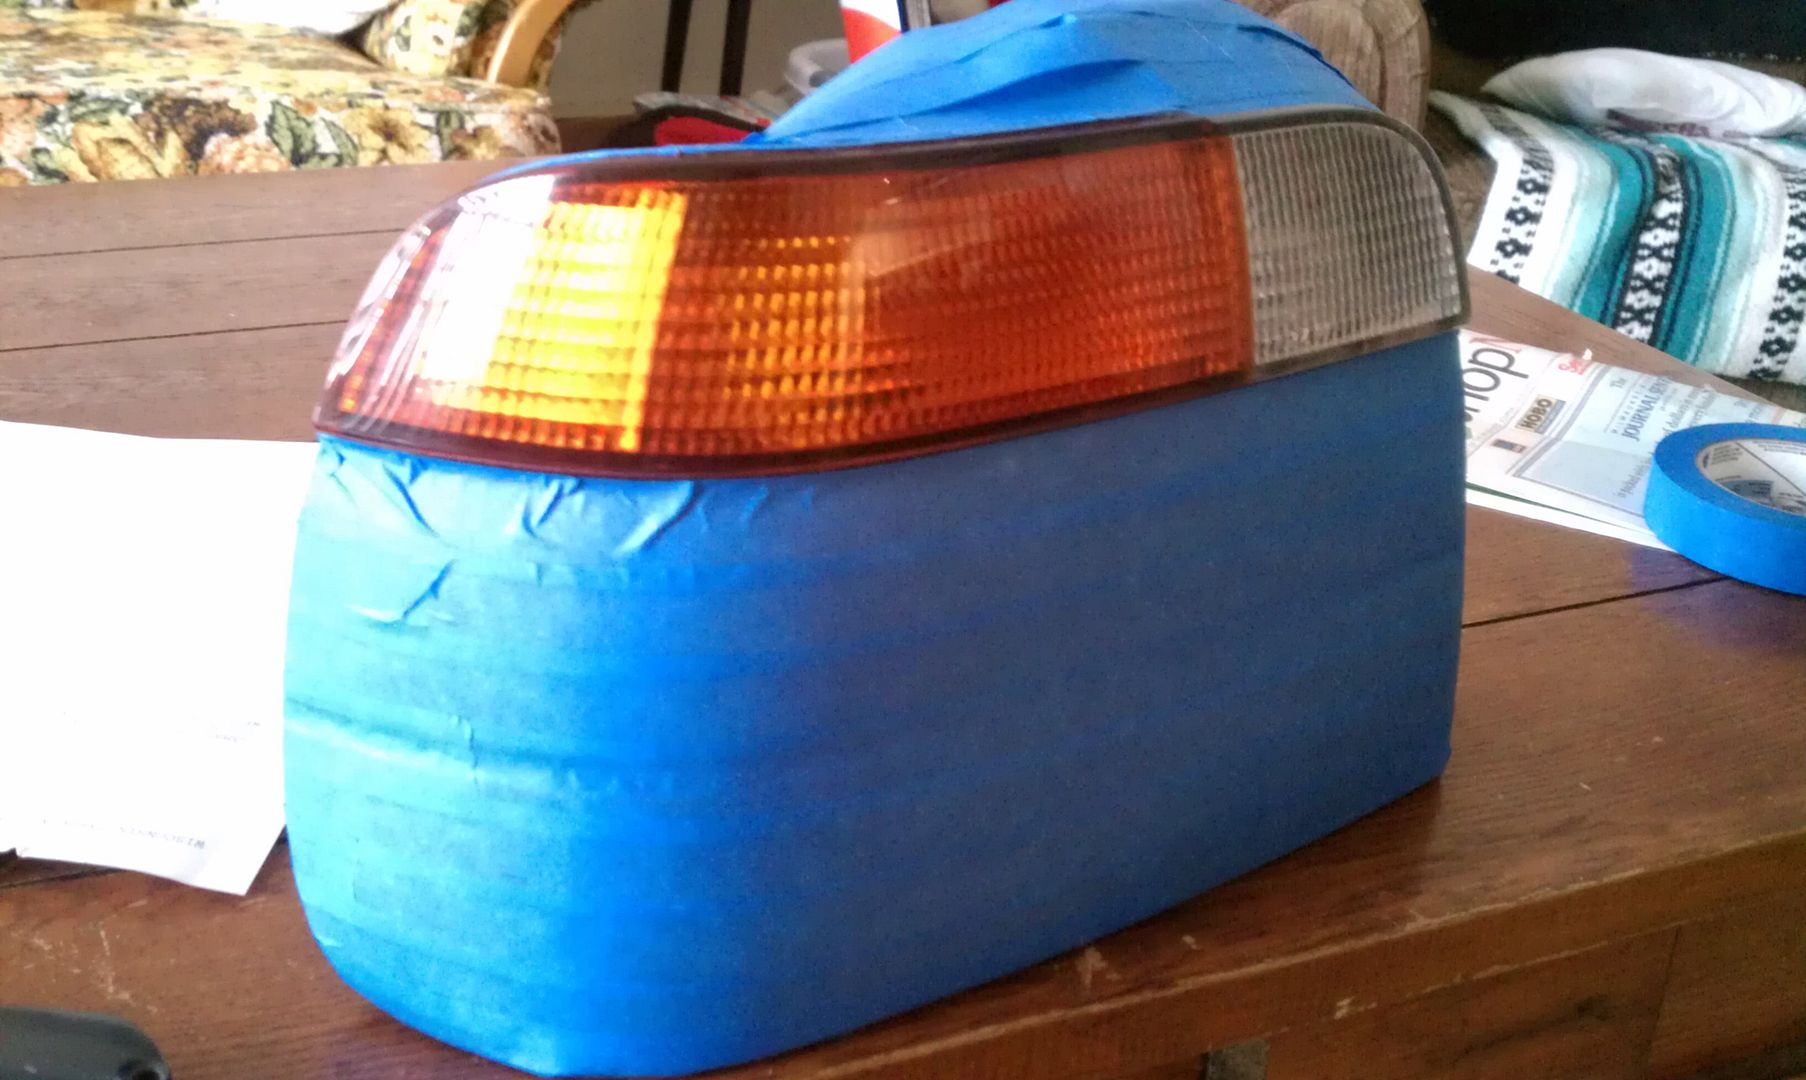 Then I just buried them in clear with a heavy coat. I wanted to put enough on to make a nice thick layer, but have no runs. It worked out really well.  I'm going to let them dry for a day or two, and then do the wet sanding and buffing. Hopefully I'll get something done at the shop tonight too. I can't think of much to do without a wire wheels for the bay, and any of my rear subframe or paint. haha I'll update again tomorrow. __________________ 95 318ti & 96 318ti Quote: Originally Posted by eurohb Im Jelly.. enough said. | Follow me on instagram: earlmeyeriii | | | | | 03-27-2013, 12:20 PM | #131 | | Senior Member Join Date: Jul 2007 Location: SW Florida Posts: 4,275 |
The tail light idea is awesome...might have to steal this one from you! Good job __________________
Sean
1995 Active | | | | | 03-27-2013, 12:30 PM | #132 | | Senior Member Join Date: Mar 2012 Location: West Bend, Wisconsin Posts: 1,055 |
Quote: Originally Posted by teetime4one The tail light idea is awesome...might have to steal this one from you! Good job | Thank you  It is actually a pretty common modification that people do, even out of the Ti realm. Its super simple though. I also enjoy how you are always the only one to comment on ny thread lately. Thanks for the support:P __________________ 95 318ti & 96 318ti Quote: Originally Posted by eurohb Im Jelly.. enough said. | Follow me on instagram: earlmeyeriii | | | | | 03-28-2013, 12:14 PM | #133 | | Senior Member Join Date: Mar 2012 Location: West Bend, Wisconsin Posts: 1,055 |
I didn't go out to the shop yesterday because I couldn't figure out what I would do. I instead went home and finished the headlights. I also got the tail lights almost finished. They just need to be wet sanded and buffed=) I didn't get any pictures of the other head light finished, but I did get a picture of the tail lights.  Updates will follow Saturday. __________________ 95 318ti & 96 318ti Quote: Originally Posted by eurohb Im Jelly.. enough said. | Follow me on instagram: earlmeyeriii | | | | | 03-28-2013, 12:23 PM | #134 | | Senior Member Join Date: Jul 2007 Location: SW Florida Posts: 4,275 |
I try to keep up...even with all notifications turned off. lol
I'm not familiar with too many other forums online. So, I rely on our community for most ideas that I can use on my car.
These tail lights are looking great! __________________
Sean
1995 Active | | | | | 03-28-2013, 12:38 PM | #135 | | Senior Member Join Date: Mar 2012 Location: West Bend, Wisconsin Posts: 1,055 |
Quote: Originally Posted by teetime4one I try to keep up...even with all notifications turned off. lol
I'm not familiar with too many other forums online. So, I rely on our community for most ideas that I can use on my car.
These tail lights are looking great! | Thank you sir. Side note: The faces arrive at the powder coaters today and I should also be ordering the lips. My tires also ship today. I cannot wait to MAKE them fit. 17x10 et8 in the rear will be a fun time. __________________ 95 318ti & 96 318ti Quote: Originally Posted by eurohb Im Jelly.. enough said. | Follow me on instagram: earlmeyeriii | | | | | |
| Currently Active Users Viewing This Thread: 1 (0 members and 1 guests) | | |
 Posting Rules Posting Rules | You may not post new threads You may not post replies You may not post attachments You may not edit your posts
HTML code is Off
| | |
|


 Linear Mode
