 » Site Navigation » Site Navigation | | | | » Recent Threads | looove 04-16-2024 01:18 PM 04-16-2024 01:18 PM 0 Replies, 1,014 Views | | | lolita porn 04-13-2024 11:45 PM 04-13-2024 11:45 PM 0 Replies, 390 Views | lolita porn 04-13-2024 11:43 PM 04-13-2024 11:44 PM 1 Replies, 288 Views | lolita porn 04-13-2024 11:40 PM 04-13-2024 11:41 PM 1 Replies, 297 Views | lolita porn 04-13-2024 11:38 PM 04-13-2024 11:39 PM 1 Replies, 310 Views | lolita porn 04-13-2024 11:36 PM 04-13-2024 11:37 PM 1 Replies, 300 Views | lolita porn 04-13-2024 11:35 PM 04-13-2024 11:35 PM 0 Replies, 273 Views | lolita porn 04-13-2024 11:34 PM 04-13-2024 11:34 PM 0 Replies, 293 Views | lolita porn 04-13-2024 11:33 PM 04-13-2024 11:33 PM 0 Replies, 260 Views | |  |  |  | |  09-04-2008, 08:01 AM 09-04-2008, 08:01 AM | #1 | | Senior Member Join Date: Feb 2005 Location: Richmond Hill, GA Posts: 1,231 |  style 5 polishing DIY style 5 polishing DIY
I am in the process of polishing my style 5 wheels after a long wait. I already finished the first wheel and I have to say that the process is a bit easier than I though it would be. here's how I started: TOOLS LIST (assuming tires are not mounted on rims) *10MM socket *ratchet *8 to 10 inch extension *hammer *long punch *Electric Drill SUPPLIES *Aircraft paint remover *Sponge/scrub pad combo *Sandpaper 120, 320, 400, 600, 800, 1000, 1500, 2000 *Terry cloths *Rubbing compound *Mother's polishing ball *Metal polishing compund (too many out there to list but if it helps I used mother's Mag and aluminum polish. 1. Remover all the nuts from the back of the wheel. Use a 12 point 10MM socket. 2. After removing all the nuts use a long punch (center punch is preferred) and a hammer and carefully knock the bolts out the barrels. You may leave the nuts in place but loosened if you think you may damage the thread on the bolts. 3. Place a towel on the floor under the wheel and stand in the center of the and jump on it. I weigh 190 and it came off the first try. 4. Using any form of Aircraft paint remover generously coat the clear coat. Allow it to sit for 10 to 15 minutes until you notice the clear coat blistering. 5. For the next step I used a damp sponge with a green scrub pad. Scrub the clear coat off. Keep in mind that you may have to repeat step 4 if you have any clear coat on the wheel left over. This will save you time sanding down the road. 6. Here's where the fun (and hand cramps) begin. If you have noticeable curbing you will have to use 120 grit sandpaper. Do not sand the whole wheel with 120 cause you will have to spend A LOT more time sanding. sand the curbed AREA until its smooth and even with the surrounding surface. 7. sand the whole wheel using 320. apply enough pressure to dull out the metal. Its important you sand always in the same direction so you don't have swirls going in different directions. this is important when using the more coarse sandpaper. Swirls wont be as noticeable when using 1000+ grit. 8. Move up to 400 grit and repeat the same process. 400, 600, 800, 1000, Do the same all the way up to 1500 or 2000 grit depending on how much shine you are trying to get. 9. Apply rubbing compound the the entire surface. using a damp cloth, buff the wheel using good pressure. this will clean off the residue created form all that sanding. It will also work as an additional step to smoothen the surface in preparation for polishing compound. 9. After buffing the wheel with rubbing compound use a metal polish compound to start polishing. I used Mother's mag and aluminum polish and mothers polishing ball. Using a clean cloth apply the polishing compound to entire surface. grab your drill and start buffing the wheel applying good pressure to bog the drill slightly until the compound turns black. . I recommend not using a cordless drill because you will have to swap batteries every 3-5 minutes. 10. Use a clean terry towel to buff applying minimal pressure. repeat step 9 is needed for a better shine. 11. sit back and admire your work........then start the next wheel. I used a drill to polish the bolts but I have to say that it may be too much of a commitment. After doing just 5 of them I decided not to even bother with them since they are in good condition anyway. I am also planning getting the centers painted gold. That's all there is to it. Not really all that hard but very time consuming I will update the pictures and tools list as I progress. Here's a few pics for now so you can see what it will look like. Hope this helps some of you. Before.... notice all the curbage. 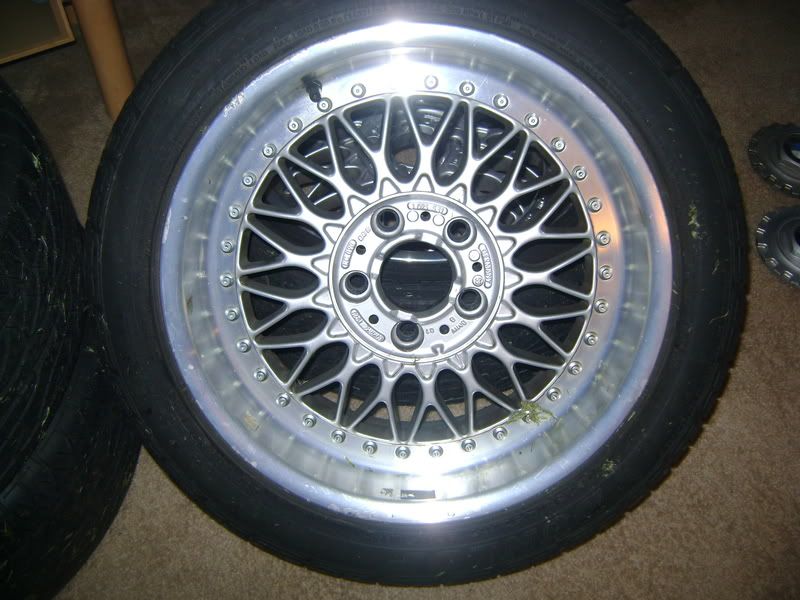 stripping the clear coat 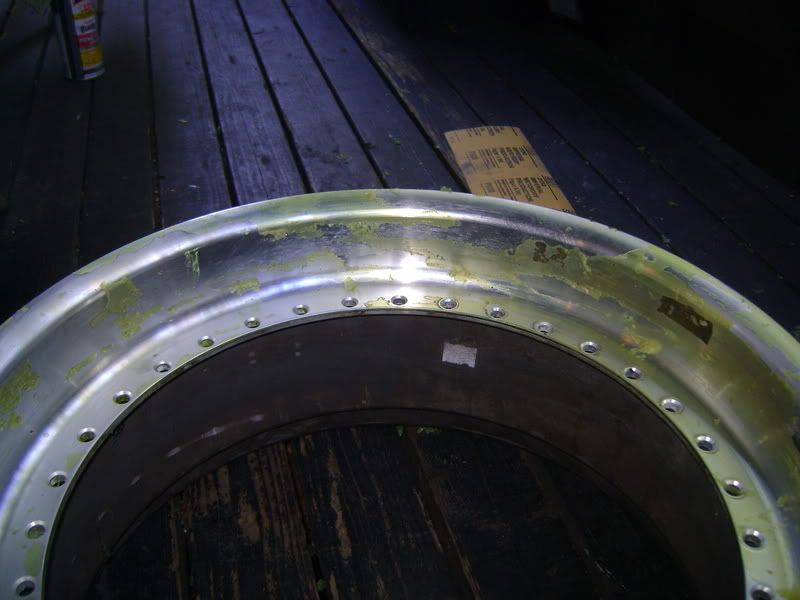 finished product 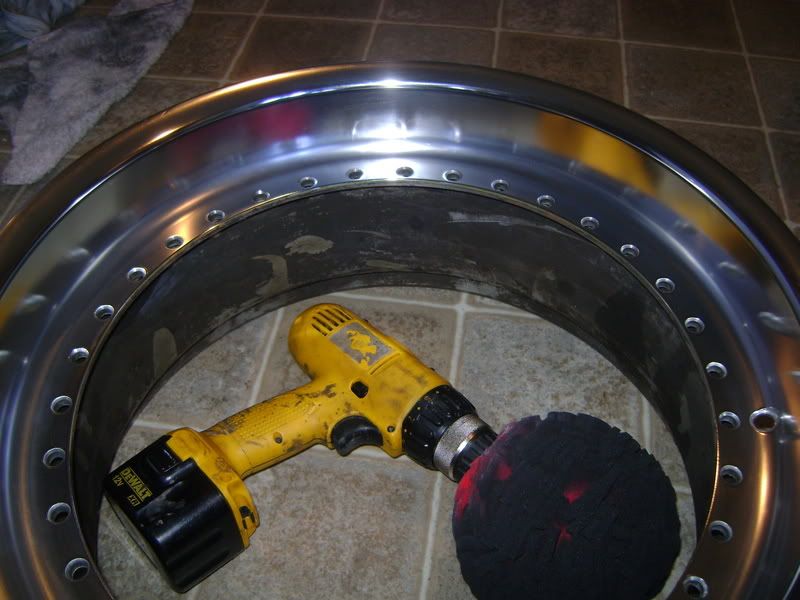 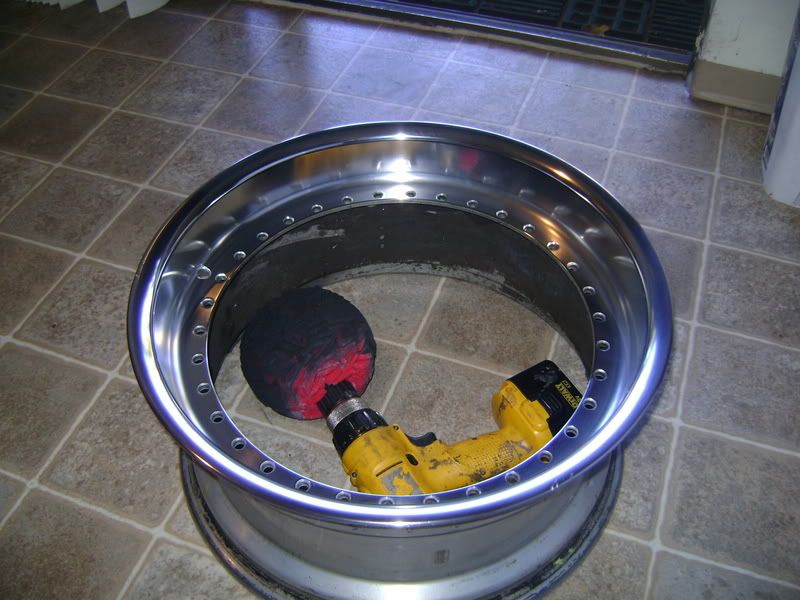 UPDATE 1 UPDATE 1 2 down....2 to go.  |  |  | | 09-04-2008, 08:05 AM | #2 | | Senior Member Join Date: Jul 2006 Location: Southern California - Orange county Posts: 978 |
looks good __________________ 1995 318ti Cosmos Black
Bilsteins w/ H&R Sport, Depos w/ angeleyes and HID 5K, 50% short throw kit, Custom fogged intake, AC schnitzer pedels w/ deadpedels, leather stickshift knob, vitesse tuning Ebreak boot w/ shift boot, X-Brace, 325/328 brake upgrade, Gray millpoint leather and cloth interior, custom computer multimedia system, and Style 5 BBS 17" rims, M3 Mirrors, CF Hood
 | | | | | 09-04-2008, 08:07 AM | #3 | | Senior Member Join Date: Feb 2005 Location: Richmond Hill, GA Posts: 1,231 |
Quote: Originally Posted by Bobbak  looks good | Thanks bro.  | | | | | 09-04-2008, 08:19 AM | #4 | | Senior Member Join Date: Jul 2006 Location: Southern California - Orange county Posts: 978 |
i got the same rims i just didnt take the bolts out of the rim i sanded and polished around it __________________ 1995 318ti Cosmos Black
Bilsteins w/ H&R Sport, Depos w/ angeleyes and HID 5K, 50% short throw kit, Custom fogged intake, AC schnitzer pedels w/ deadpedels, leather stickshift knob, vitesse tuning Ebreak boot w/ shift boot, X-Brace, 325/328 brake upgrade, Gray millpoint leather and cloth interior, custom computer multimedia system, and Style 5 BBS 17" rims, M3 Mirrors, CF Hood
| | | | | 09-04-2008, 08:24 AM | #5 | | Senior Member Join Date: Feb 2005 Location: Richmond Hill, GA Posts: 1,231 |
I decided to do all the way. especially since I'm having the centers painted anyway. What size tire are you running on yours? I have some 215/40/17 but I can even go with 225/40/17 since I will have no clearance issues. | | | | | 09-04-2008, 03:18 PM | #6 | | Senior Member Join Date: Sep 2007 Location: asdfasdf Posts: 10,002 |
nice, those are going to look great on your car, what color are you painting the centers? | | | | | 09-04-2008, 03:47 PM | #7 | | NOBODY F's with the Jesus Join Date: Oct 2006 Location: Ventura California Posts: 7,824 |
Quote: Originally Posted by tiFreak nice, those are going to look great on your car, what color are you painting the centers? | Quote: Originally Posted by angel318ti I am also planning getting the centers painted gold. | . __________________ 4 MORE YEARS BABY!!! | | | | | 09-04-2008, 04:52 PM | #8 | | Senior Member Join Date: Aug 2006 Location: maritimes Posts: 1,433 |
im running 235/40's on mine angel... they fit the wheel very nicely. can't wait to see the centers gold, I was considering doing that myself for a long time.... but I may sell them now, since they are becoming too popular  __________________ 11/97 Base  328Ti 328Ti
| | | | | 09-04-2008, 04:57 PM | #9 | | Senior Member Join Date: Feb 2005 Location: Richmond Hill, GA Posts: 1,231 |
Quote: Originally Posted by Philly im running 235/40's on mine angel... they fit the wheel very nicely. can't wait to see the centers gold, I was considering doing that myself for a long time.... but I may sell them now, since they are becoming too popular | Thanks, I decided to paint them gold cause I am also doing a gold pinstripe down the side when I get the car painted. the tires that are on them are 235/45/17 and they seem way too tall for the wheel. | | | | | 09-05-2008, 12:38 AM | #10 | | Senior Member Join Date: Sep 2007 Location: asdfasdf Posts: 10,002 |
Quote: Originally Posted by cooljess76 . | oh, the first post was so long I just skimmed it, missed that part Quote: Originally Posted by angel318ti I decided to do all the way. especially since I'm having the centers painted anyway. | this was the post I read | | | | | 09-05-2008, 05:27 AM | #11 | | Senior Member Join Date: Jul 2007 Location: norcal - 94590 Posts: 3,186 |
Quote: Originally Posted by angel318ti Thanks, I decided to paint them gold cause I am also doing a gold pinstripe down the side when I get the car painted. the tires that are on them are 235/45/17 and they seem way too tall for the wheel. | Agreed, the 45's will definitely look too tall on the Ti. I have 235/40/17's on both cars mounted on style 22's. __________________ James 95 active w/leather interior and sport interior conversion, Vaders, full M-Tech exterior conversion. Now m50 swapped* Eibach sway bars, D2 Coilovers, Depo's w/AE's, blacked-out sides and grills, LeatherZ console and door armrests, 1 series starter button mod, and custom finished Style 5's <--- in this color! Named "Roddy":  *M50 6 cyl. swap with fan delete, S50 cams and chip, AFE stage 2 intake, M3 clutch and 11.5 lb Fidanza flywheel, 3.15LSD, battery relocated to rear and complete custom exhaust. Sweet! *M50 6 cyl. swap with fan delete, S50 cams and chip, AFE stage 2 intake, M3 clutch and 11.5 lb Fidanza flywheel, 3.15LSD, battery relocated to rear and complete custom exhaust. Sweet!  97 318ti sport, Alaska Blue, Contours, coilovers, Dove Vaders and custom black/grey interior named "Max" 95 318ti Active in Cosmos, S50 swap in progress... named "Pit" SUPPORT 318ti.org! CLICK THE LINK ABOVE! Hosting a forum like this is not free. 318ti.org is one of the best BMW forums on the web because it is member supported, not vendor supported. The cost to become a Supporter is a nominal $10.00... A YEAR! DO IT! NOW! 97 318ti sport, Alaska Blue, Contours, coilovers, Dove Vaders and custom black/grey interior named "Max" 95 318ti Active in Cosmos, S50 swap in progress... named "Pit" SUPPORT 318ti.org! CLICK THE LINK ABOVE! Hosting a forum like this is not free. 318ti.org is one of the best BMW forums on the web because it is member supported, not vendor supported. The cost to become a Supporter is a nominal $10.00... A YEAR! DO IT! NOW! | | | | | 09-05-2008, 06:44 AM | #12 | | Senior Member Join Date: Feb 2005 Location: Richmond Hill, GA Posts: 1,231 |
Quote: Originally Posted by wolferj Agreed, the 45's will definitely look too tall on the Ti. I have 235/40/17's on both cars mounted on style 22's. | I have 255/45/17 on the current wheels and they look like derby tires. I think I will go with the 215/40/17 instead or I can lower it so it tucks and you cant tell the difference. | | | | | 09-05-2008, 05:01 PM | #13 | | Senior Member Join Date: Nov 2007 Location: Rocky Hill, CT Posts: 1,065 |
Quote: Originally Posted by angel318ti I have 255/45/17 on the current wheels and they look like derby tires. I think I will go with the 215/40/17 instead or I can lower it so it tucks and you cant tell the difference. | I run 215 45 17's on my TI. you can check out some pics if you go to the threads I started to see how they look __________________
1995 318TI base. 95 2.5L from 325IS. S50 cams+pistons, e36 M3 front brakes. H&R race springs F+R. Turner Motorsport front sway bars, M3 control arms. M Roadster rear sway bar. Racing Dynamics strut brace. e36 325i 5spd. 3.25lsd from e28 535is. M Roadster short shifter. Conforti chip. | | | | | 09-09-2008, 04:17 AM | #14 | | Senior Member Join Date: Feb 2005 Location: Richmond Hill, GA Posts: 1,231 |
finally got off my ass today and worked on the wheels a little. I put 2 of them back together. I've been working on a little of everything lately so I need to focus on one task at a time and I might get better results. I installed the M front, twisty sides and the M rear bumper and spoiler. Car is finally ready to go to the paint shop. here's are some pics of the finished wheels. 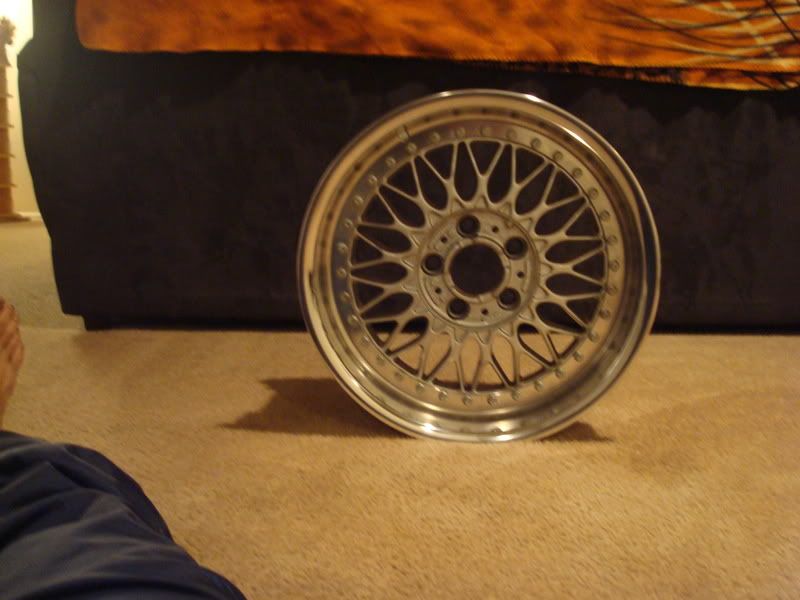 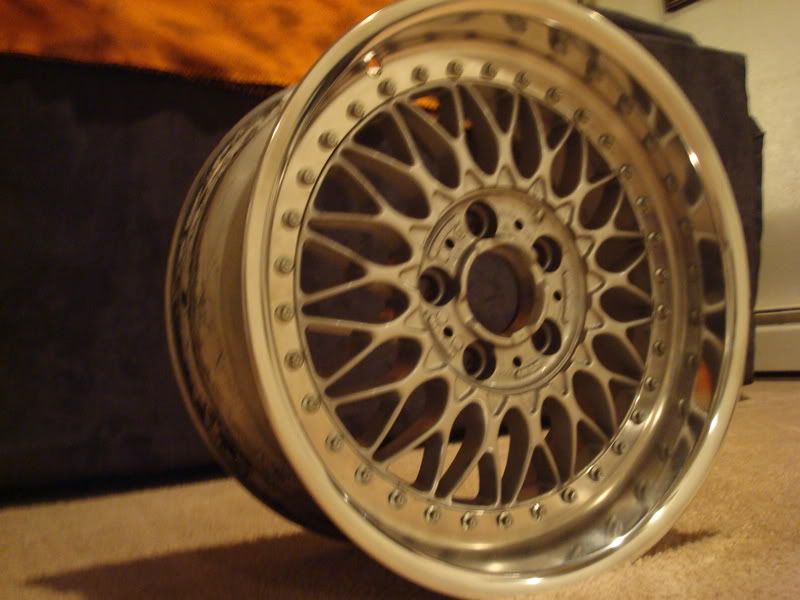 | | | | | 09-09-2008, 04:35 AM | #15 | | Senior Member Join Date: Jul 2008 Location: South Central, MN Posts: 1,065 |
Looks pretty good! Nice work! | | | | | |
| Currently Active Users Viewing This Thread: 1 (0 members and 1 guests) | | |
 Posting Rules Posting Rules | You may not post new threads You may not post replies You may not post attachments You may not edit your posts
HTML code is Off
| | |
|


 Linear Mode
