 » Site Navigation » Site Navigation | | | | » Recent Threads | | | lolita porn 04-13-2024 11:45 PM 04-13-2024 11:45 PM 0 Replies, 192 Views | lolita porn 04-13-2024 11:43 PM 04-13-2024 11:44 PM 1 Replies, 128 Views | lolita porn 04-13-2024 11:40 PM 04-13-2024 11:41 PM 1 Replies, 119 Views | lolita porn 04-13-2024 11:38 PM 04-13-2024 11:39 PM 1 Replies, 116 Views | lolita porn 04-13-2024 11:36 PM 04-13-2024 11:37 PM 1 Replies, 114 Views | lolita porn 04-13-2024 11:35 PM 04-13-2024 11:35 PM 0 Replies, 104 Views | lolita porn 04-13-2024 11:34 PM 04-13-2024 11:34 PM 0 Replies, 106 Views | lolita porn 04-13-2024 11:33 PM 04-13-2024 11:33 PM 0 Replies, 100 Views | lolita porn 04-13-2024 11:33 PM 04-13-2024 11:33 PM 0 Replies, 94 Views | |  |  |  |  05-13-2013, 08:44 PM 05-13-2013, 08:44 PM | #1 | | Junior Member Join Date: Sep 2012 Location: Jersey. Posts: 19 |  California Roof Delete - DIY Fun California Roof Delete - DIY Fun
After my attempt to create a manual handle to retract my california roof failed & my roof seal began leaking again, I decided I would rather have a big moon roof. . So, A few days ago I pulled out the california targa top & took it over to a local glass shop where I had a sheet of 1/4" acrylic glass cut to the same dimension as the tracking. The guy at the glass shop was a little bit off on the size and the shape, but luckily he over estimated quite a bit. So rather than going back to complain and get another piece cut, I decided to shape and fit the glass myself. After a quick stop at the hardware store for a Dremel Tool & a new palm sander, I was ready to go. I started out by removing the roof panel and tracking. 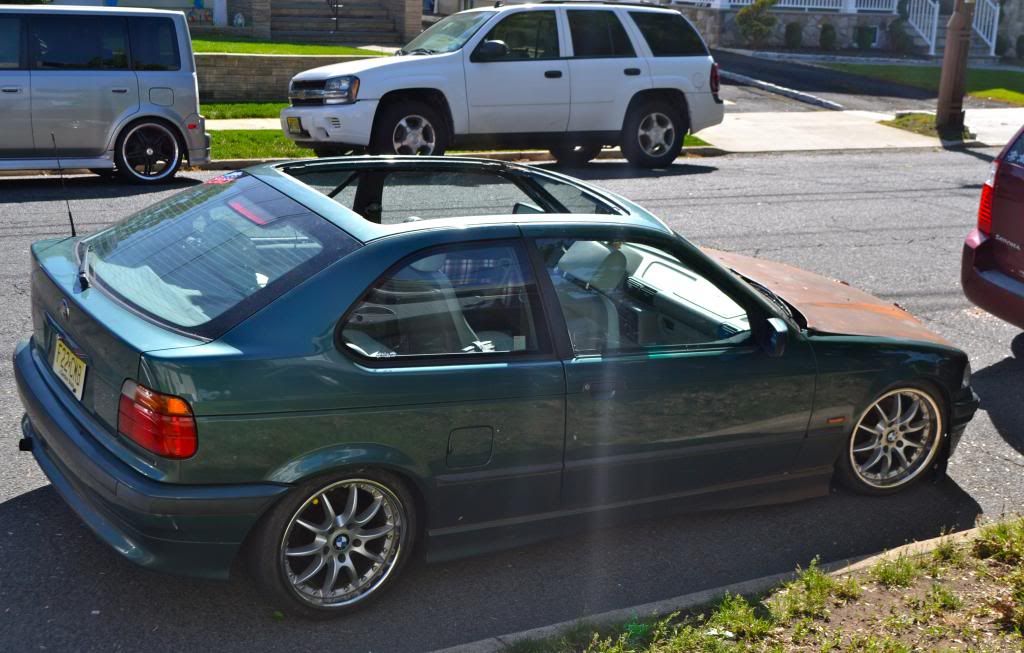 I then took the previously cut piece of acrylic sheet and placed it on top of the roof to get a better idea of what needed to be done and then traced the outer overlapping edge with a razor blade as a guide line for where to dremel away. (the duct tape stains are from my quick fix solution to the leaking problem lol) 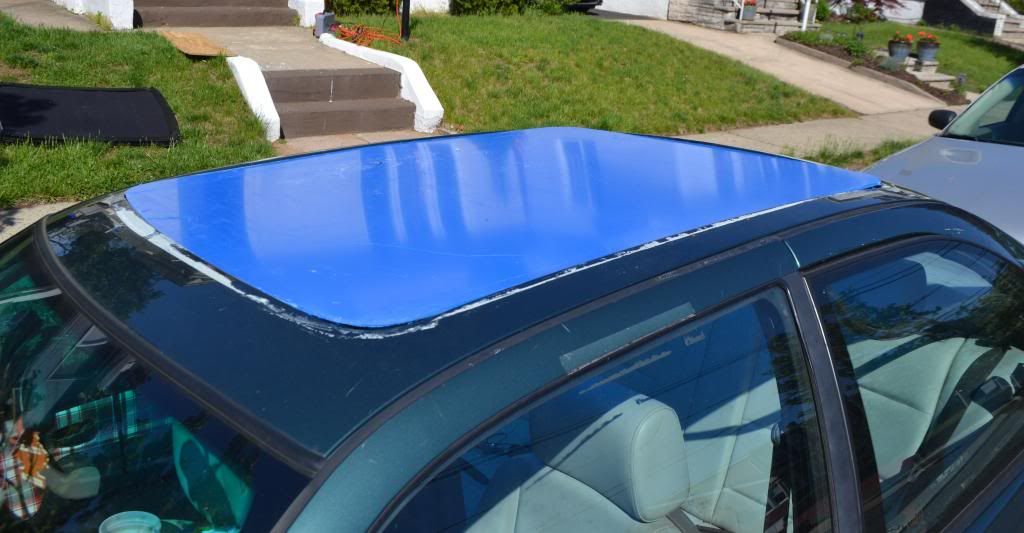 After a little bit of trimming, re-shaping and sanding, I was ready to remove the vinyl protectant layers. I was more than happy with my results on the cut and shape 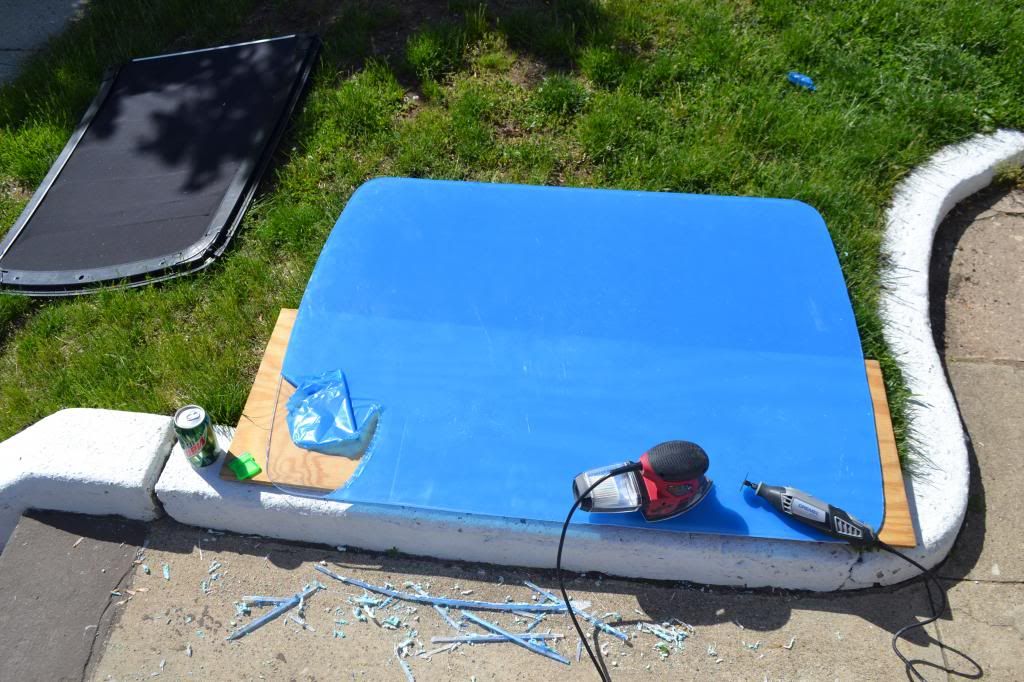 I then set the piece of glass in place and began to drill a few holes. I used only 4 bolts per side with cone shaped flat heads so they would sit as flush as possible in the glass & used the holes from the OEM targa top. I also placed 2 washers under the center of the glass as well as 2 in the rear in order to follow the concave of the roof panel. 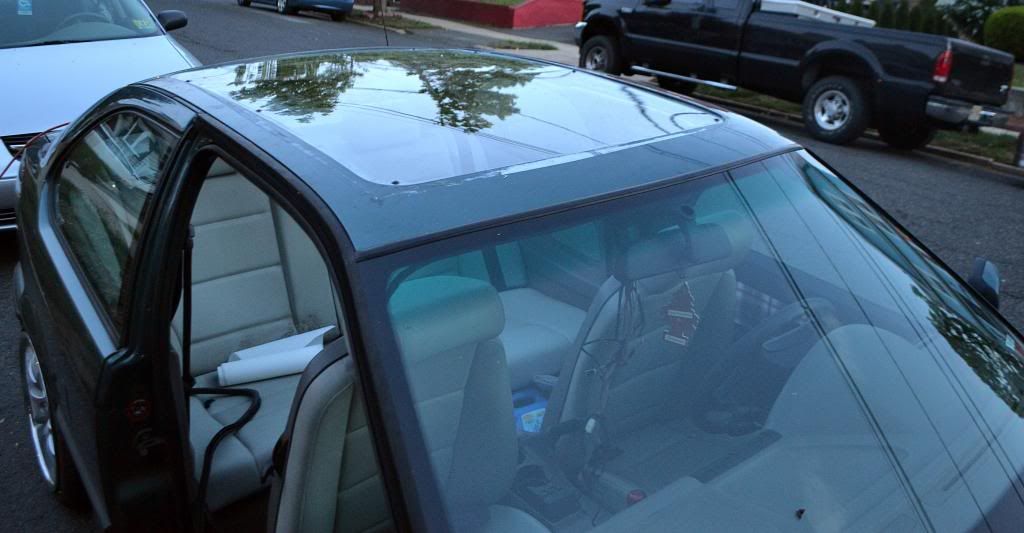 I then sealed the edges with some clear window sealant to prevent and leaking from occurring. 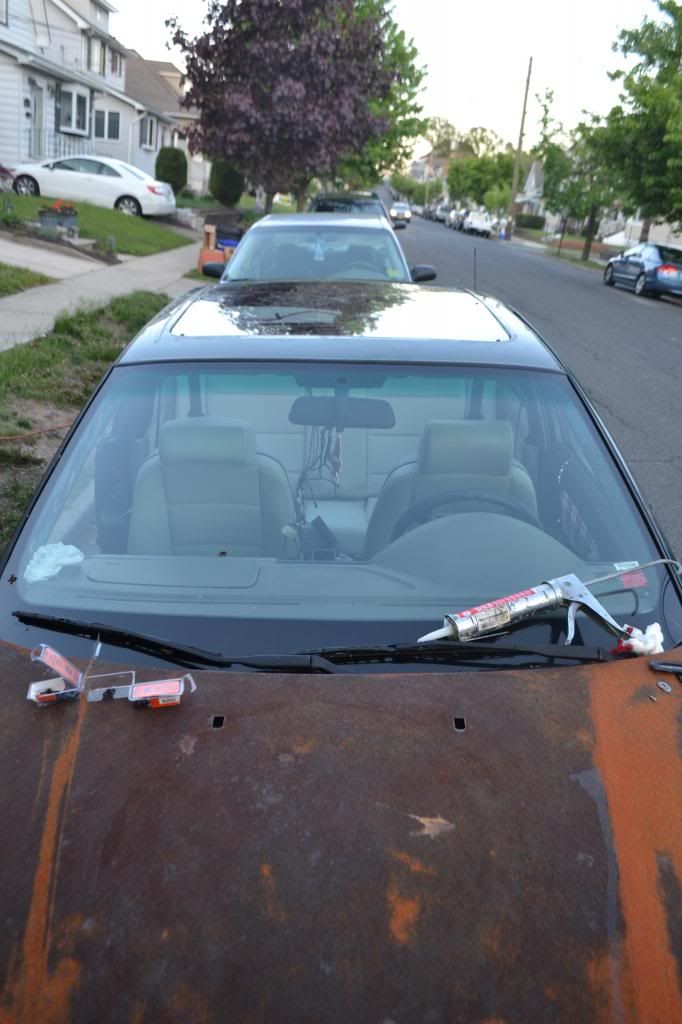 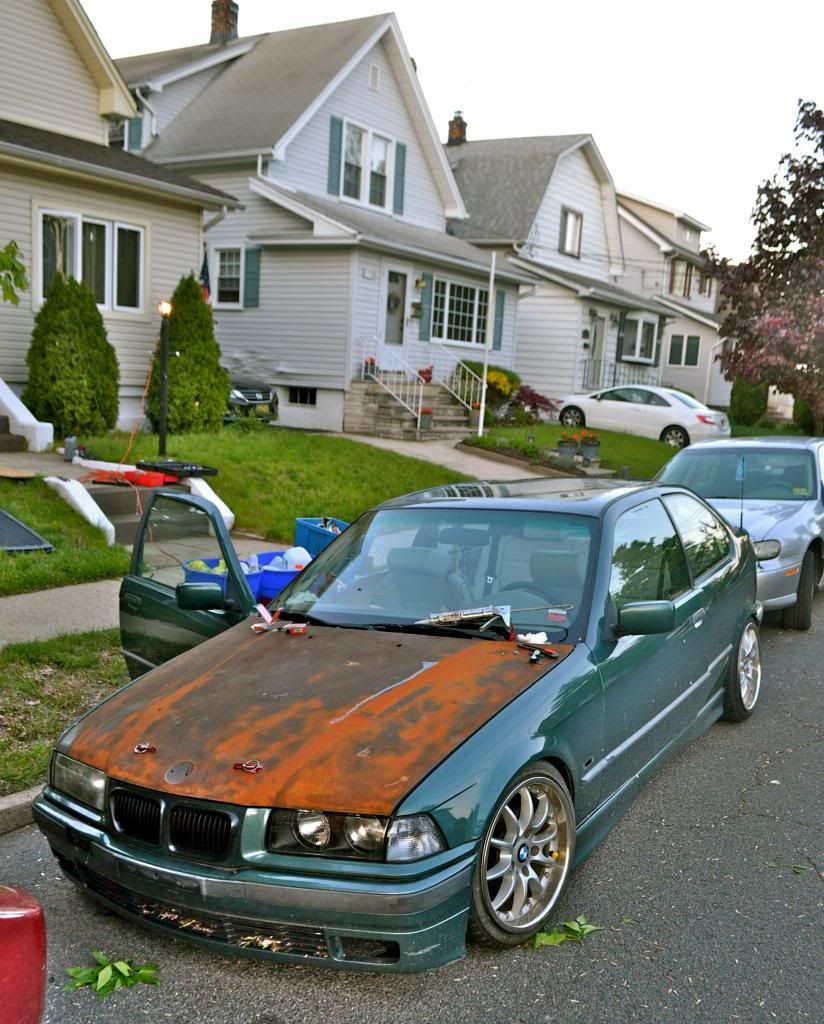 The roof is now set and I am very pleased with the results so far, though I am not 100% finished yet. I am now waiting on 2 sheets of vinyl to arrive. My next move is to limo tint the glass in order to fully hide the stud heads and will also possibly wrap the roof outside the area of the glass with black vinyl, but that part is still up in the air. During the process I kind of destroyed my freshly wrapped headliner, But without the leaking I can finally put my new interior panels, rug & seats in . I will post some pictures of the finished product once I finish, though it may have to wait an extra week or so since the car goes into the shop this week for its S52 swap. |  |  | | 05-13-2013, 09:06 PM | #2 | | Senior Member Join Date: Sep 2006 Location: Miami, Florida Posts: 483 |
BEAUTIFUL.... I love it.... __________________  | | | | | 05-14-2013, 01:33 AM | #3 | | Senior Member Join Date: Apr 2010 Location: Scranton/Wilkes-barre area PA Posts: 454 |
At first i saw "cali roof delete" and was really scared and sad. Now im very happy! looks awsome! could you have counter sunk the holes so the screws sat absolutely flush?
P.S. You should snap some pics of the screws to show how much they are protruding. __________________
***Derek***

^^Lola^^
Pioneer radio/ Pioneer 6-Disk CD Changer/ JBL 601.1 Grand Touring Amplifier/ Bilstein Sport shocks/ Bilstein e36sedan springs/ Green LED Courtesy Lights
Accident Counter: 3...  | | | | | 05-14-2013, 02:24 AM | #4 | | Senior Member Join Date: Mar 2005 Location: Portland Or Posts: 2,666 |
Based on doing quite a few Acrylic Race car windshields,,, You need to make sure the window can expand and contract with temps, that usually means surface screws not counter sunk, the holes need to be about .025 bigger than the bolt. It also takes a lot of screws to resist the air sucking the window out or in without cracking it at the edge,, looks cool ! You might consider a aluminum stay across the underside with some foam tape to support the acrylic and stop it from bouncing.
Dave __________________
Dave - PDX
1995 318ti - Active Black and Tan.
2005 330xi - Mtech 1 - 6spd - Orient Blue/Black | | | | | 05-15-2013, 03:25 AM | #5 | | Senior Member Join Date: Sep 2007 Location: asdfasdf Posts: 10,002 |
that looks really cool, tinting it will definitely be a good idea | | | | | 05-15-2013, 10:30 PM | #6 | | Junior Member Join Date: Sep 2012 Location: Jersey. Posts: 19 |
Quote: Originally Posted by 3.2TI  BEAUTIFUL.... I love it.... | Thanks man!! Quote: Originally Posted by rochey6957 At first i saw "cali roof delete" and was really scared and sad. Now im very happy! looks awsome! could you have counter sunk the holes so the screws sat absolutely flush?
P.S. You should snap some pics of the screws to show how much they are protruding. | Lol I'm glad you like it! I looked into a few different possibilities as to how I should mount the bolts. In the end I would up using black aluminum flat top cone shaped screws. I took a cone sander attachment and used the Dremel tool in order to give the holes a sunken cone shape so that the bolts would sit as flush as possible. So as of the moment, they're pretty much as flush as they can get without being sunken inside the glass. I'll also get some pics up when I get a chance  Quote: Originally Posted by pdxmotorhead Based on doing quite a few Acrylic Race car windshields,,, You need to make sure the window can expand and contract with temps, that usually means surface screws not counter sunk, the holes need to be about .025 bigger than the bolt. It also takes a lot of screws to resist the air sucking the window out or in without cracking it at the edge,, looks cool ! You might consider a aluminum stay across the underside with some foam tape to support the acrylic and stop it from bouncing.
Dave | Thanks man! The glass I chose is a "high poly Acrylic" according to the glass guy. From what I was told this stuff should hold up through tornado type winds without cracking. I did make sure the holes were drilled slightly larger than the bolts, and then filled them with the window sealant to avoid any leaking but it will still allow for enough wiggle room to avoid cracking around the holes. I originally planned to use a cross brace, though I'm now considering tossing the idea all together since the window doesn't seem to flex at all under the wind pressure. I'm not sure how thick acrylic race windows normally are, But the glass I used is about 2x thicker than my windshield. Quote: Originally Posted by Ti Freak that looks really cool, tinting it will definitely be a good idea | Thanks man, I'll be sure to post some shots up once the tint goes on! | | | | | 05-17-2013, 07:20 AM | #7 | | Senior Member Join Date: Mar 2005 Location: Portland Or Posts: 2,666 |
I was using 1/4 or 3/8 depending on the size of the windshield. Beware,, any gasoline or petroleum products will craze the plastic surface and em-brittle it , looks like cobwebs. You can always stretch a string from side to side and tape it about 1/8 inch below the glass so you can see if its buffeting, I did one a while back we used 1" x1/8 thick AL stock and put it on top of the widow and used windshield adhesive under it,,, used countersunk allen screws between the plastic and edge of the hole so the AL clamped the window in rather than a bunch of screws through the plastic, more like a OEM windshield. We did put 1 screw per corner to retain it in case something came loose..  Cool installation! __________________
Dave - PDX
1995 318ti - Active Black and Tan.
2005 330xi - Mtech 1 - 6spd - Orient Blue/Black | | | | | 05-18-2013, 01:36 AM | #8 | | Junior Member Join Date: Mar 2013 Location: Apex, N. C. Posts: 18 |
Hope you keep updating this. I really like the idea and I need to do something to my Cali roof. | | | | | 05-18-2013, 03:59 AM | #9 | | Junior Member Join Date: Sep 2012 Location: Jersey. Posts: 19 |
Quote: Originally Posted by pdxmotorhead I was using 1/4 or 3/8 depending on the size of the windshield. Beware,, any gasoline or petroleum products will craze the plastic surface and em-brittle it , looks like cobwebs. You can always stretch a string from side to side and tape it about 1/8 inch below the glass so you can see if its buffeting, I did one a while back we used 1" x1/8 thick AL stock and put it on top of the widow and used windshield adhesive under it,,, used countersunk allen screws between the plastic and edge of the hole so the AL clamped the window in rather than a bunch of screws through the plastic, more like a OEM windshield. We did put 1 screw per corner to retain it in case something came loose.. Cool installation! | Awesome, If anything happens to this one I'll be sure to try that out! I was going to try and use windshield adhesive without any of the bolts but I didn't want the risk of killing someone if this thing ever shot out for whatever reason lol Quote: Originally Posted by Ziradog Hope you keep updating this. I really like the idea and I need to do something to my Cali roof. | I'll keep the updates coming! I'll have this 100% complete by the end of next week as well! | | | | | 05-19-2013, 02:00 AM | #10 | | Member Join Date: Dec 2012 Location: new jersey Posts: 41 |
pleasantly suprised....digging the idea of the tint. now,...about that hood....  df | | | | | 05-21-2015, 06:33 AM | #11 | | Junior Member Join Date: Jan 2014 Location: CT Posts: 14 |
any more pics how did it finally turn out i have two cali top cars and thinking of doing this to one thast the motor is bad sense motor is so expensive, iwant to see pics from inside with tint | | | | |
| Currently Active Users Viewing This Thread: 1 (0 members and 1 guests) | | | | Thread Tools | | | | Display Modes |  Linear Mode Linear Mode |
 Posting Rules Posting Rules | You may not post new threads You may not post replies You may not post attachments You may not edit your posts
HTML code is Off
| | |
|


